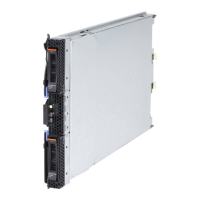
To install a microprocessor and heat sink, complete the following steps.
The following notes describe the type of microprocessor that the server supports
and other information that you must consider when you install a microprocessor:
v If you are installing a second microprocessor, make sure that microprocessor 2 is
identical to microprocessor 1. Information about the microprocessor installed in
your blade server can be viewed in the Setup utility (see “Using the Setup
utility” on page 56).
v For a list of microprocessors that the blade server supports, see
http://www.ibm.com/servers/eserver/serverproven/compat/us/
v Before you install a new microprocessor, download and install the most current
level of BIOS code (see “Firmware updates” on page 62).
v The microprocessors terminate themselves; therefore, no terminator card is
required if microprocessor socket 2 is empty on the blade server or on the MPE.
However, for proper airflow, socket 2 must contain a microprocessor heat-sink
filler, sometimes called a microprocessor baffle.
v The microprocessor speeds are automatically set for the blade server; therefore,
you do not have to set any microprocessor frequency-selection jumpers or
switches.
Attention:
1. Do not use any tools or sharp objects to lift the locking lever on the
microprocessor socket. Doing so might result in permanent damage to the
system board.
2. Do not touch the contacts in the microprocessor socket. Touching these contacts
might result in permanent damage to the system board.
1. Before you begin, read “Safety” on page v and “Installation guidelines” on
page 21.
2. Shut down the operating system, turn off the blade server, and remove the
blade server from the BladeCenter unit. See “Removing the blade server from
the BladeCenter unit” on page 23 for instructions.
3. Carefully lay the blade server on a flat, static-protective surface.
4. Open the blade server cover (see “Removing the blade server cover” on page
24 for instructions).
5. If you are installing a microprocessor in the blade server and a MPE unit or
expansion unit is attached to the blade server, remove the device (see
“Removing an optional expansion unit” on page 26).
6. Locate microprocessor socket 2 (see “Blade server connectors” on page 19).
7. Loosen the four captive screws that secure the heat-sink filler and then
remove the filler from the microprocessor socket.
8. Install the microprocessor and heat sink.
Microprocessor
release lever
Microprocessor
retainer
a. If a protective cover is installed on the microprocessor retainer, use your
fingers to remove the protective cover.
Chapter 3. Installing options 35

 Loading...


