d) Ensure that the drive carrier assembly is properly installed fully inside the drive bay so that it is
flush with the face of the enclosure.
e) Ensure that the LED indicators are at the bottom of the drive.
5. Run common system health check by using the SSR utility.
Use management GUI to check and conrm that no failed disk is reported.
Removing and replacing an NVMe drive - CLI
Refer to the service procedure to remove a faulty NVMe drive and replace it with a drive replacement part
in an IBM Elastic Storage System 3200 enclosure from command line interface.
The following steps are the high-level flow of the procedure:
1. Conrm the failed drive location from the fault drive LED.
2. Prepare the failed drive for replacement.
3. Remove the drive, which has amber LED ON.
4. Insert the FRU replacement drive into the slot.
5. Congure drive after replacement.
6. Run common system health check by using the SSR utility.
Note: If you encounter an error or an unexpected result, contact the next-level support.
This procedure requires access to CLI command as a root user. If IBM service personnel are running this
task, it requires coordination with the customer for steps that require root user access as part of the
procedure.
No tools are needed to complete this task. Do not remove or loosen any screws.
When you replace this part, you must follow recommended procedures for handling
electrostatic discharge (ESD) sensitive devices.
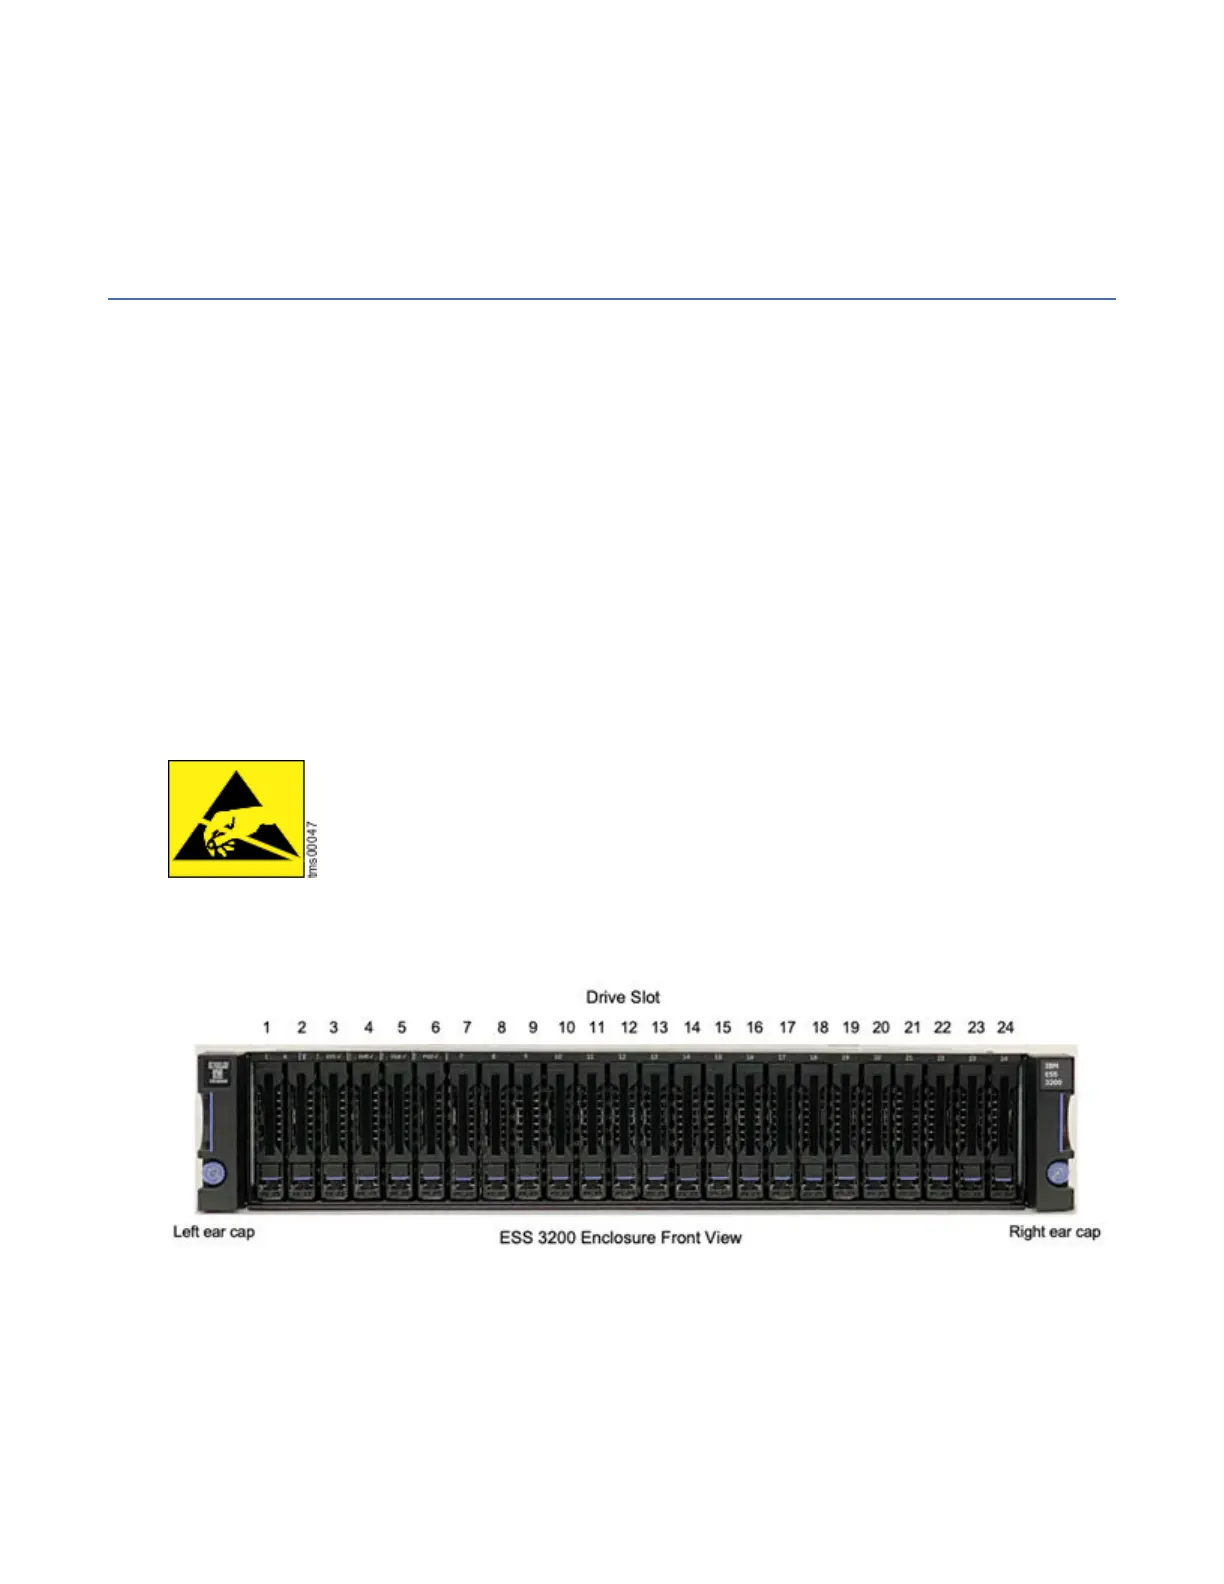
IBM Elastic Storage System 3200 enclosure supports up to 24 U.2 dual ported NVMe SSDs and the drive
slots are numbered from 1 through 24 as shown in the following gure.
Figure 8. Displaying enclosure front view
A drive carrier assembly is composed of the drive or drive blank and a drive carrier, and are used to
provide for controlled insertion into, and extraction from, the storage enclosure. Drive carrier assemblies
are installed from the front of the enclosure, which simplies service access. Closing the drive carrier
handle ensures complete seating of the connectors.
All 24 drive bays must be lled with drive carrier assemblies, each containing either a drive, or drive
blank, to ensure proper airflow and system cooling. The following gure provides a close-up view of a
drive carrier assembly housing an NVMe drive.
Chapter 1. Servicing (customer tasks)
5

 Loading...


