Figure 14. Releasing catch
b) Grab the frame beneath the touch point and gently push the drive carrier assembly into the drive
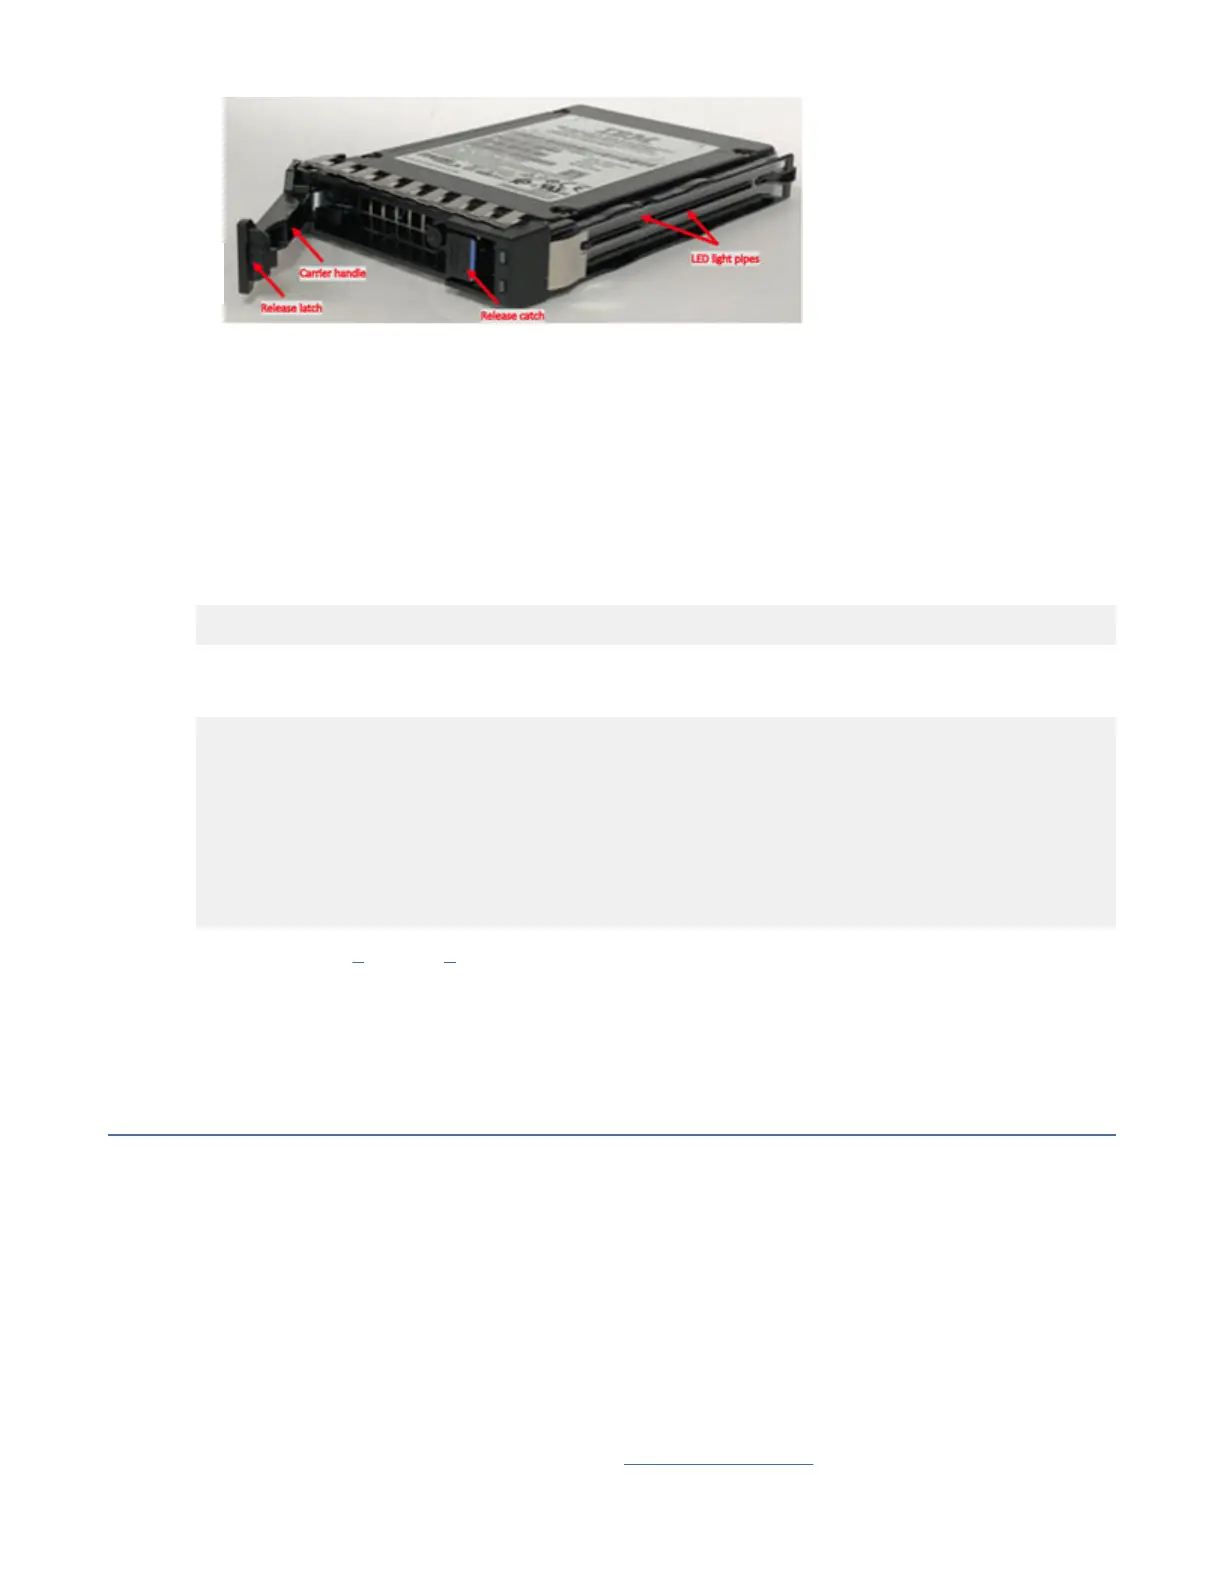
bay until the carrier handle engages.
c) Press the release handle downward until the release latch connects with the release catch and the
drive carrier assembly locks into place.
d) Ensure that the drive carrier assembly is properly installed fully inside the drive bay so that it is
flush with the face of the enclosure.
e) Ensure that the LED indicators are at the bottom of the drive.
5. After the drive is replaced, run the following command:
mmvdisk pdisk replace –-rg <rg name> --pdisk <pdisk name>
For example, nish replacing pdisk e2s11 with the new physical disk by running the following
command:
# mmvdisk pdisk replace --recovery-group BB01L --pdisk e2s11
mmvdisk:
mmvdisk: Preparing a new pdisk for use may take many minutes.
mmvdisk:
mmvdisk: The following pdisks will be formatted on node ess01io1:
mmvdisk: /dev/sdrk
mmvdisk:
mmvdisk: Location SX32901810-11 is Enclosure 2 Drive 11.
mmvdisk: Pdisk e2s11 of RG BB01L successfully replaced.
mmvdisk: Carrier resumed.
Repeat the steps 2 through 5 for each pdisk that needs to be replaced as marked in the output
of the mmvdisk pdisk list --recovery-group {all | RgName[,RgName]} --replace
command.
6. Run common system health check by using the SSR utility.
Use the mmvdisk command to check and conrm that no failed disk is reported.
Removing and replacing a drive ller
Refer to the service procedure to remove a drive slot ller in an IBM Elastic Storage System 3200
enclosure and replace it with a new one from stock.
The following steps are the high-level flow of the procedure:
1. Remove the drive ller.
2. Replace with the drive ller replacement part.
Note: If you encounter an error or an unexpected result, contact the next-level support.
Note: Drive slot llers are passive components that regulate airflow through the enclosure.
No tools are required to complete this task. Do not remove or loosen any screws.
IBM Elastic Storage System 3200 enclosure supports up to 24 U.2 dual ported NVMe SSDs and the drive
slots are numbered from 1 through 24 as shown in Figure 15 on page 10. All 24 drive bays must be lled
Chapter 1. Servicing (customer tasks)
9

 Loading...


