4. Install the eyebolts to the floor.
To install the frame, do the following:
Attention: It is the service representative’s responsibility to complete the following steps.
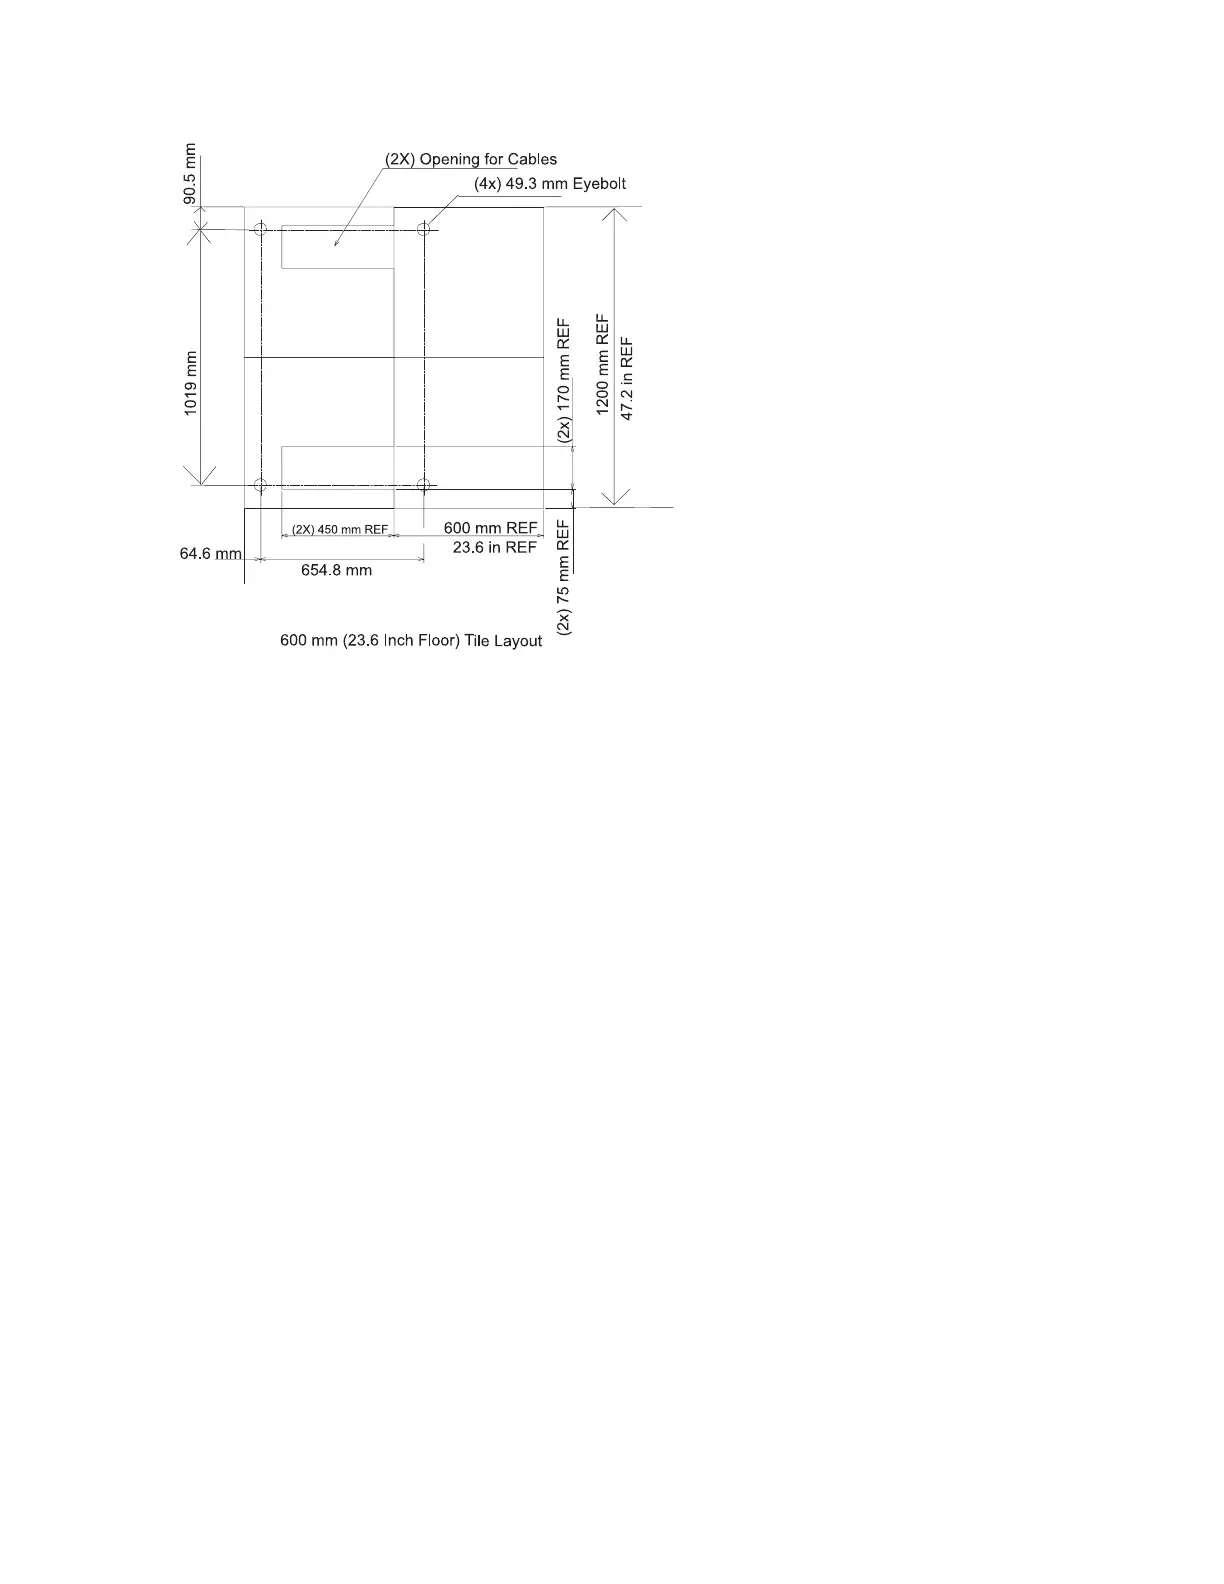
1. Before starting the installation, check all cable openings in the floor panel and location of the rubber
bushing holes so that they match the dimensions given in the illustrations on 113 and 113.
2. Power off the system and make sure all cables and connectors are disconnected and are not
dangling around the frame. The frame should be free to roll.
3. The floor eyebolts should be already secured to the concrete floor. Verify the height of the center of
the floor eyebolt to the concrete floor or the steel beam/channel adapter mounted to the concrete
floor. Ensure that the turnbuckles can accommodate the total height of the raised floor.
4. Remove the floor tiles around the area where the frame(s) will be installed.
Chapter 2. Physical Characteristics of Systems 113

 Loading...

