Note: Hold the RAID auxiliary cache card with one hand to ensure it stays in the connector while
you use the other hand to move the lever and remove the battery from the card.
3. Continue to slide the cache battery pack out of the mounting guides and remove it from the
controller.
Note: Ensure that the cache battery pack is disconnected for at least 60 seconds before you connect
the new battery. This duration is the minimum amount of time that is needed for the card to
recognize that the battery has been replaced.
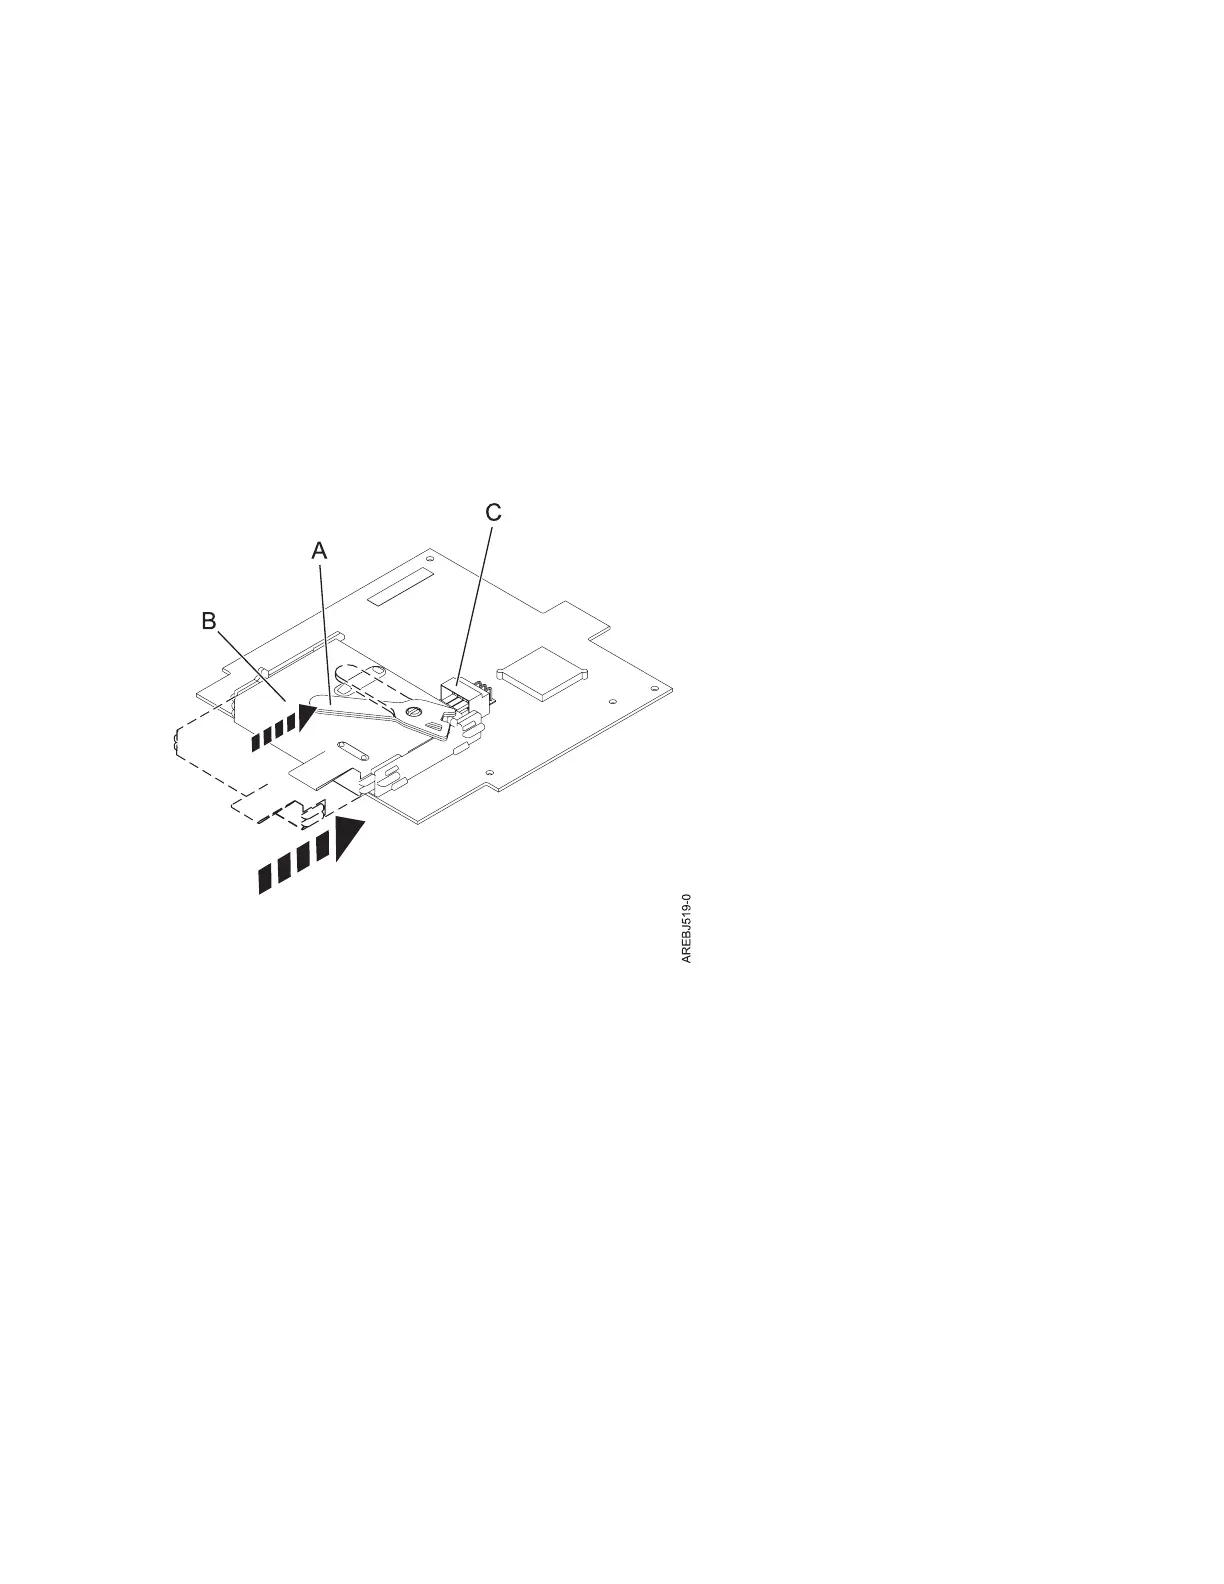
4. Using the following illustration to locate the battery components, move the lever to the unlatched
position (away from the connector).
5. Slide the new cache battery pack into the mounting guides on the controller until it is seated in the
battery connector.
6. After the battery is seated in the connector, move the lever to the latched position to fully seat the
battery into the connector.
7. Restart the write cache of the adapter by completing the following steps:
a. Navigate to the IBM SAS Disk Array Manager by using the steps in Using the Disk Array
Manager.
b. Select Diagnostics and Recovery > Controller Rechargeable Battery Maintenance > Start Adapter
Cache Option.
c. Select the controller with the battery you just replaced and then press Enter.
Replacing a 57CF cache battery pack
Learn how to replace the 57CF cache battery pack.
(A) Cache battery lever
(B) Cache battery pack
(C) Cache battery connector
Figure 29. Replacing the 57B7 cache battery
SAS RAID controllers for IBM i 41