EasyManua.ls Logo

Icom AT-141 - Service Manual

Icom AT-141
19 pages
Print Icon
To Next Page IconTo Next Page
Loading...
SECTION 1 SPECIFICATIONS
SECTION 2 INSIDE VIEWS
SECTION 3 CIRCUIT DESCRIPITON
3-1 RECEIVER CIRCUITS ............................................................................................................. B-3-1
3-2 TRNSMITTER CIRCUITS ........................................................................................................ B-3-1
3-3 POWER SUPPLY CIRCUITS ................................................................................................... B-3-1
3-4 OTHER CIRCUITS ................................................................................................................... B-3-2
SECTION 4 ADJUSTMENT PROCEDURES
SECTION 5 PARTS LIST
SECTION 6 MECHANICAL PARTS AND DISASSEMBLY
SECTION 7 SEMI-CONDUCTOR INFORMATION
SECTION 8 BOARD LAYOUT
SECTION 9 BLOCK DIAGRAM
SECTION 10 VOLTAGE DIAGRAM
SERVICE MANUAL
HF AUTOMATIC ANTENNA TUNER
B

Other manuals for Icom AT-141

Question and Answer IconNeed help?

Do you have a question about the Icom AT-141 and is the answer not in the manual?

Summary

Section 1 Specifications

Section 2 Inside Views

Section 3 Circuit Description

3-1 General

Overview of the AT-141's microprocessor and detector circuits.

3-2 Forward Power Detector Circuit

Explains the FWD power detector circuit function and connection.

3-3 SWR Detector Circuit

Explains the SWR detector circuit function and its role in matching.

3-4 Phase Detector Circuit

Details the phase detector's function in detecting reactance components.

3-5 Impedance Detector Circuit

Explains the impedance detector's role in minimizing risk during antenna matching.

3-6 Logic Circuit

Describes the CPU's control over the antenna matching network.

3-8 Antenna Current Detector Circuit

Explains the antenna current detector circuit and its signal path.

Section 4 Adjustment Procedures

4-1 Preparation

Lists required test equipment and outlines the connection setup for adjustments.

4-2 Tuner Adjustment Procedures

Details specific adjustments for the tuner, including conditions, measurements, and notes.

Section 5 Parts List

Section 6 Mechanical Parts and Disassembly

Mechanical Parts List

Lists chassis parts, tuner unit components, and accessories with order numbers.

Exploded View Diagram

Visual representation of mechanical parts assembly and disassembly.

Section 7 Semiconductor Information

Transistors and FETs

Diagrams and symbols for transistors and FETs used in the tuner.

Diodes

Diagrams and symbols for diodes used in the tuner.

Section 8 Board Layout

Section 9 Block Diagram

Section 10 Voltage Diagram

Overview

The Icom AT-141 is an HF automatic antenna tuner designed to match an antenna system to a transceiver. It is controlled by an 8-bit microprocessor and utilizes four types of detector circuits: a forward power detector, an SWR detector, a phase detector, and an impedance detector, to achieve optimal tuning.

Function Description:

The primary function of the AT-141 is to automatically tune an antenna system to the connected transceiver, ensuring an efficient transfer of RF power. It achieves this by adjusting coils and capacitors within its matching network based on feedback from the detector circuits. The forward power detector ensures that the input power from the transceiver is at an appropriate level for the attenuator. The SWR detector measures reflected signals from the antenna, allowing the CPU to adjust the matching network to minimize SWR. The phase detector identifies reactance components to achieve a pure resistance, while the impedance detector helps reduce transmit power to a low level during tuning, minimizing interference. The logic circuit, driven by a CPU (IC15), controls the entire matching process, initializing relays and starting the tuning program when RF power is applied. An antenna current detector circuit also monitors antenna current, converting it to a DC voltage for further processing.

Important Technical Specifications:

  • Memory Channels: 45
  • Frequency Coverage: 1.6–30 MHz (with a 7 m or longer antenna element)
  • Maximum Input Power: 150 W PEP, 100 W continuous
  • Input Impedance: 50 Ω
  • Minimum Operating Input Power: 5–15 W
  • Automatic Tuning Time: Approximately 2 to 3 seconds (maximum 15 seconds)
  • Tuning Accuracy (VSWR): Better than 2.0:1 (after tuning; except for multiples of 1/2 λ)
  • Power Supply Requirement: 13.6 V DC ± 15% (supplied from the transceiver)
  • Driving Current: Less than 2 A
  • Usable Temperature Range: -30°C to +60°C
  • Dimensions (projections not included): 230(W) × 80(H) × 340(D) mm
  • Case Construction: Weatherproof
  • Weight: Approximately 2.5 kg

Usage Features:

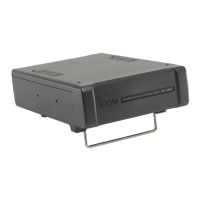
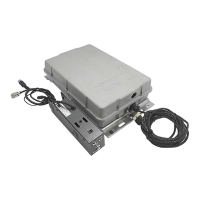
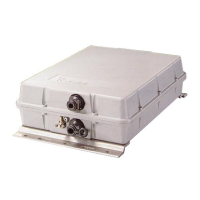
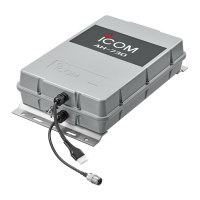
The AT-141 is designed for automatic operation, simplifying antenna tuning for the user. It connects to the transceiver via a control cable and receives its power supply directly from the transceiver. The automatic tuning process is initiated when RF power is applied from the transceiver, with the tuner quickly adjusting its internal components to achieve a low VSWR. The weather-resistant construction allows for outdoor installation, making it suitable for various operating environments.

Maintenance Features:

The manual provides detailed adjustment procedures for the tuner, including:

  • Preparation: Disconnecting and connecting specific pins (P6, J6, J13) and wires (between CP15 and ground) to set up for adjustment.
  • Forward Power Detector Circuit Adjustment: Transmitting with a specific frequency (1.6000 MHz) and output power (10 W carrier only) and measuring voltage at CP81 (1.4–2.4 V).
  • SWR Detector Circuit Adjustment: Transmitting and measuring voltage at CP84 (0–0.1 V).
  • Phase Detector Circuit Adjustment: Transmitting and connecting an oscilloscope to CP81 to set R194 for a 5 V reading just before it drops to 0 V.
  • Impedance Detector Circuit Adjustment: Transmitting and connecting an oscilloscope to CP83 to set C7 for a 5 V reading just before it drops to 0 V.
  • Post-Adjustment: Removing jumper wires and reconnecting pins to their original positions. The manual also includes a comprehensive parts list, mechanical parts and disassembly instructions, semiconductor information, board layout diagrams, and a voltage diagram, all of which are crucial for troubleshooting and repair. The internal view highlights key components such as the CPU, LEDs, detector circuits (forward power, SWR, phase), attenuator, and voltage regulator, aiding in component identification during maintenance.

Icom AT-141 Specifications

General IconGeneral
BrandIcom
ModelAT-141
CategoryTuner
LanguageEnglish

Related product manuals