EasyManuals Logo

Icom IC-705 Installation

Icom IC-705
8 pages
To Next Page IconTo Next Page
To Previous Page IconTo Previous Page
Page #2 background imageLoading...
Page #2 background image
Assembly Instructions
Please read and review all of the instructions before starting the assembly of your frame.
1. Assemble the side rails onto the frame, using 4 M4 x 10mm socket head screws. The inside
edge of the side rails should line up with the inside edge of the frame. Tighten these screws
securely.
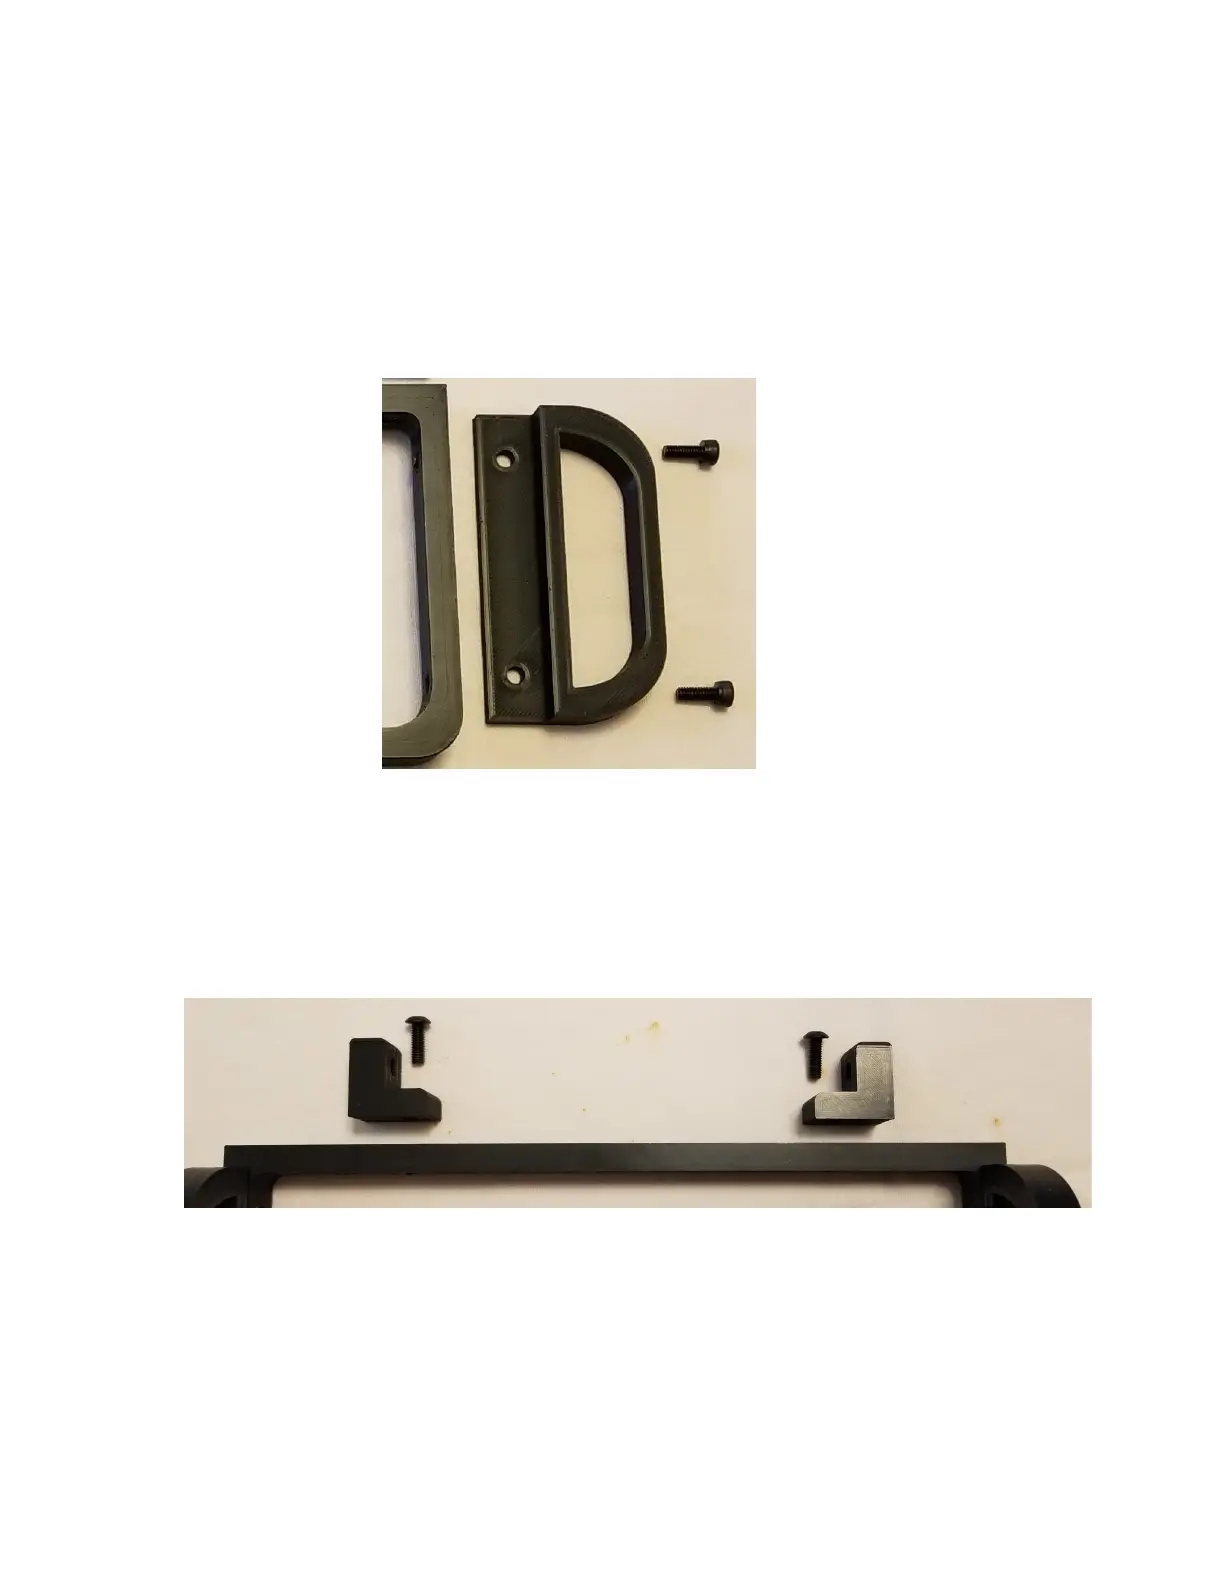
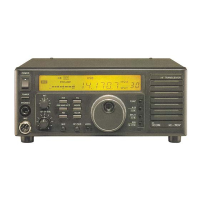
2. Attach the handle brackets to the top of the frame using the two M4 x 12mm button head
screws. If you look at the L-shaped brackets closely you will notice that one leg of the L is
thicker than the other. The thick leg should be vertical. Note that one side of the bracket is
smoother than the other – the smooth side should face the operator. Line the brackets up with
the frame and tighten the screws securely.

Other manuals for Icom IC-705

Questions and Answers:

Question and Answer IconNeed help?

Do you have a question about the Icom IC-705 and is the answer not in the manual?

Icom IC-705 Specifications

General IconGeneral
BluetoothYes
WLANYes
SD Card SlotYes
Antenna ConnectorBNC
Frequency Range0.030–199.999 MHz
ModesSSB, CW, AM, FM
Receiver TypeSuperheterodyne
GPSBuilt-in
BatteryLithium-ion
WeightApprox. 1.1 kg
TypePortable
Power Supply13.8 V DC
Waterproof StandardIP54
Operating Temperature Range-10°C to +60°C
Display4.3 inch color TFT touch screen LCD

Related product manuals