


J
Joseph CarterSep 16, 2025
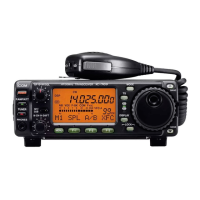
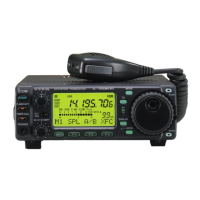
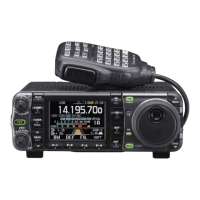
Why is transmitting impossible on my Icom IC-7000 Transceiver?
- MMichael CardenasSep 16, 2025
If transmitting is impossible on your Icom Transceiver, ensure the operating frequency is set to a ham band.
Why is transmitting impossible on my Icom IC-7000 Transceiver?
If transmitting is impossible on your Icom Transceiver, ensure the operating frequency is set to a ham band.
Why doesn't programmed scan start on my Icom IC-7000?
If the programmed scan on your Icom Transceiver does not start, it is possible that the same frequencies have been programmed in scan edge memory channels. Program different frequencies into scan edge memory channels.
Why won't the memory scan start on my Icom IC-7000 Transceiver?
If the memory scan on your Icom Transceiver does not start, ensure that you have programmed 2 or more memory channels.
Why doesn't memory select scan start on my Icom Transceiver?
If the memory select scan on your Icom Transceiver does not start, designate 2 or more memory channels as select channels for the scan.
What to do if Icom IC-7000 Transceiver programmed scan does not stop?
If a programmed scan on your Icom Transceiver does not stop, ensure the squelch is set to the threshold position. Also, verify that different frequencies are programmed into the scan edge memory channels.
Why won't my Icom IC-7000 Transceiver memory select scan start?
If the memory select scan on your Icom Transceiver does not start, designate two or more memory channels as select channels for the scan.
Why is there no sound coming from my Icom IC-7000 Transceiver speaker?
If no sound is coming from the speaker of your Icom Transceiver, there might be several reasons: * The volume level may be set too low. Rotate [AF] clockwise to increase the listening level. * The squelch might be closed. Rotate [SQL] counterclockwise to open the squelch. * The transceiver could be in transmitting condition. Release [PTT] on the microphone or check the SEND line of an external unit, if connected. * An external speaker or headphones could be connected. Check the external speaker or headphone plug connection.
How to fix Icom Transceiver if power does not come on?
If your Icom Transceiver doesn't power on when you press the [PWR] key, consider the following: * The DC power cable may be improperly connected. Reconnect the power cable correctly. * A fuse might be blown. Check for the cause, then replace the fuse with a spare one. (Fuses are installed in two places: in the DC power cable and in the FRONT unit. Check the battery voltage.) * If using a 12V battery, it may be exhausted. Check the battery voltage.
What to do if strong signals distort Icom IC-7000 Transceiver receive audio?
If strong signals are distorting the receive audio on your Icom Transceiver, try turning OFF the noise blanker function by pushing [NB/ADJ]. Also, turn OFF the preamp by pushing [P.AMP/ATT].
How to fix low output power on Icom Transceiver?
If your Icom Transceiver's output power is too low, try the following: 1. Adjust the output power in quick Set mode to a higher setting. 2. Increase the microphone gain to a suitable level using quick Set mode. 3. Ensure the antenna is properly connected. 4. Inspect the antenna feed line for any cuts or shorts and correct them. 5. Manually tune the antenna by pushing [TUNER/CALL].
Highlights dangers related to power supply, liquids, and RF signal levels.
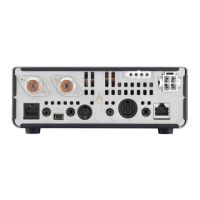
Details the HF/50 MHz RF filters and signal path from antenna to main unit.
Explains the VHF/UHF RF circuits, filtering, and amplification stages.
Describes the function of the preamplifier circuit for wide band reception.
Explains how the first mixer converts RF signals to the first IF frequency.
Details the filtering and amplification of the first IF signal.
Describes the mixing and filtering of signals for the second IF frequency.
Explains the third mixer's function and the third IF signal processing.
Details demodulator circuits for WFM and the DSP circuit functions.
Describes the AF amplifier stage that drives the speaker.
Explains Automatic Gain Control and Squelch circuit operations.
Explains the mixer and IF stages for the transmitter signal path.
Details the RF circuit's amplification and filtering for signal transmission.
Describes the drive and power amplifier circuits for output power.
Explains Automatic Level Control and Automatic Power Control circuits.
Explains the generation of the 1st LO signal by the DDS unit.
Describes the generation of 2nd and 3rd LO signals by the DDS unit.
Step-by-step instructions on how to enter the adjustment mode.
Describes how to navigate and operate within the adjustment mode.
Detailed steps for performing DDS adjustments.
Detailed steps for performing display adjustments.
Procedure for adjusting transmitter drive and final idling current.
Procedure for adjusting the SWR detector settings.
Procedure for adjusting the transmitter peak output.
Steps for adjusting total transmitter gain across different bands.
Procedure for adjusting HF band output power levels.
Procedure for adjusting the HF Automatic Power Control.
Procedure for adjusting AM mode output power.
Procedure for adjusting 50 MHz band output power levels.
Procedure for adjusting 144 MHz band output power levels.
Procedure for adjusting the VHF Automatic Power Control.
Procedure for adjusting 430 MHz band output power levels.
Procedures for ALC and minimum drive level adjustments.
Steps for adjusting SWR measurement settings.
Procedures for ID APC and Residual AM adjustments.
Procedure for adjusting the receiver's peak response in HF/50 MHz bands.
Procedure for setting the total receiver gain in HF/50 MHz bands.
Procedure for adjusting receiver sensitivity in VHF/UHF bands.
Procedure for setting total receiver gain in VHF/UHF bands.
Procedure for adjusting WFM demodulator distortion.
High-level block diagram showing the functional units and signal flow.
Detailed circuit schematics for the display, VR, and connect units.
Detailed circuit schematics for the display unit (part 2).
Detailed circuit schematics for the main unit (part 1).
| Input voltage | 13.8 V |
|---|---|
| Microphone included | Yes |
| Product type | Portable CB radio |
| Product color | Black |
| Housing material | - |
| Frequency range | 0.5 - 455000 MHz |
| Channels quantity | 503 channels |
| Depth | 180 mm |
|---|---|
| Width | 167 mm |
| Height | 58 mm |