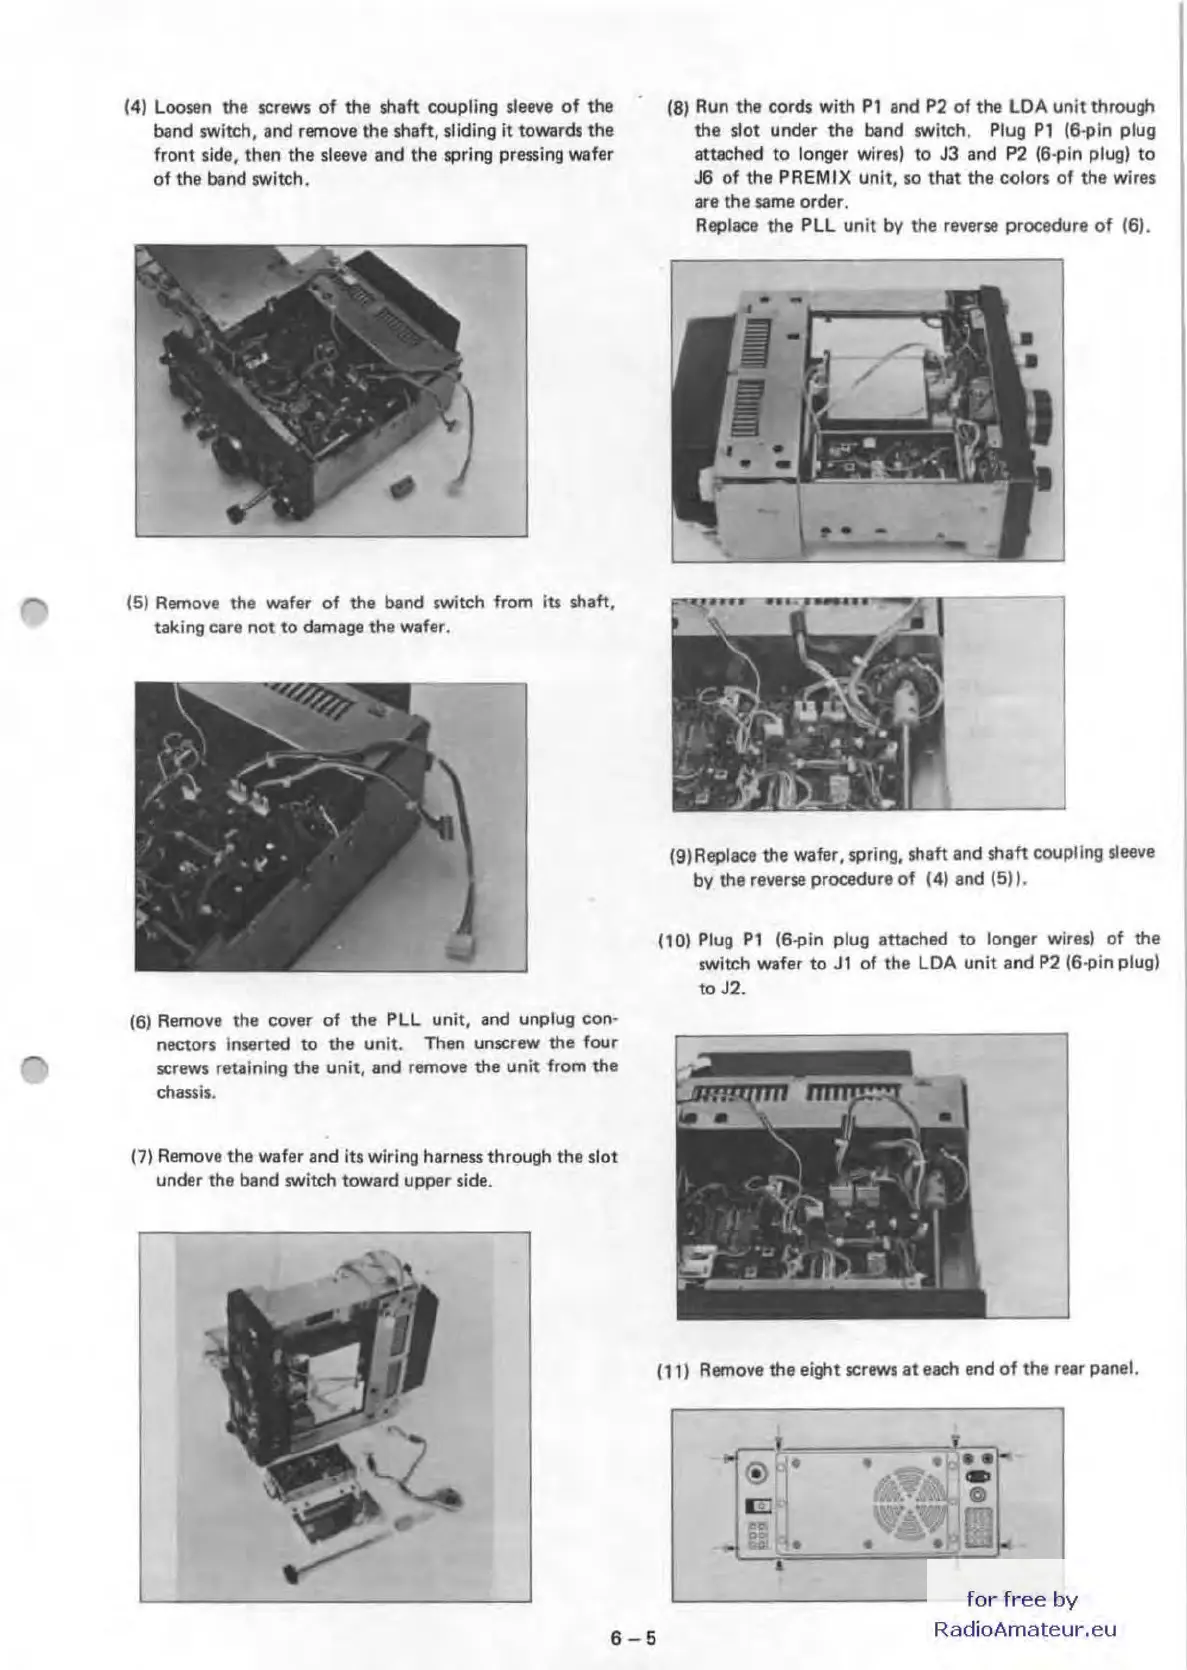
(4) Loosen the screws of the
~aft
coupling sleeve of the
band switch, and remove the
shaft, sliding it towards the
front
side, then the sleeve and the spring pressing wafer
of the band switch.
(5)
Rem
ove the wafer of the band switch from Its shaft,
taking care not
to
damage the wafer.
(6) Remove the cover of the PLL
unit, and unplug con·
nectors inserted
to
the unit. Then unscrew the four
screws retaining the unit, and remove the unit from the
chassis.
171
Remove the wafer and its wiring harness through the slot
under the band switch toward upper side.
6
-5
(8)
Run the cords with
Pl
and
P2
of the
LOA
unit through
the slot under the band switch. Plug
Pl
(6opln
plug
attached to longer wires) to
J3 and
P2
(S-pin plug)
to
J6 of the
PREM
IX unit,
so
that the colors of the wires
are the
same order.
Replace the
PlL
unit
by
the reverse procedure of (6).
(9)Replace the wafer, spring,
&haft
and shaft coupling sleeve
by
the reverse procedure of (4) and (5) ,
(10)
Plug
Pl
(6opln
plug attached to longer wires) of the
switch wafer
to
Jl
of the
LOA
unit and P2160pin plug)
to J2,
(11)
Remoye the eight screws at each end of the rear panel.
,
for
free
by
RadioAmateur.eu
 Loading...