4-2
ENTERING THE ADJUSTMENT MODE ■
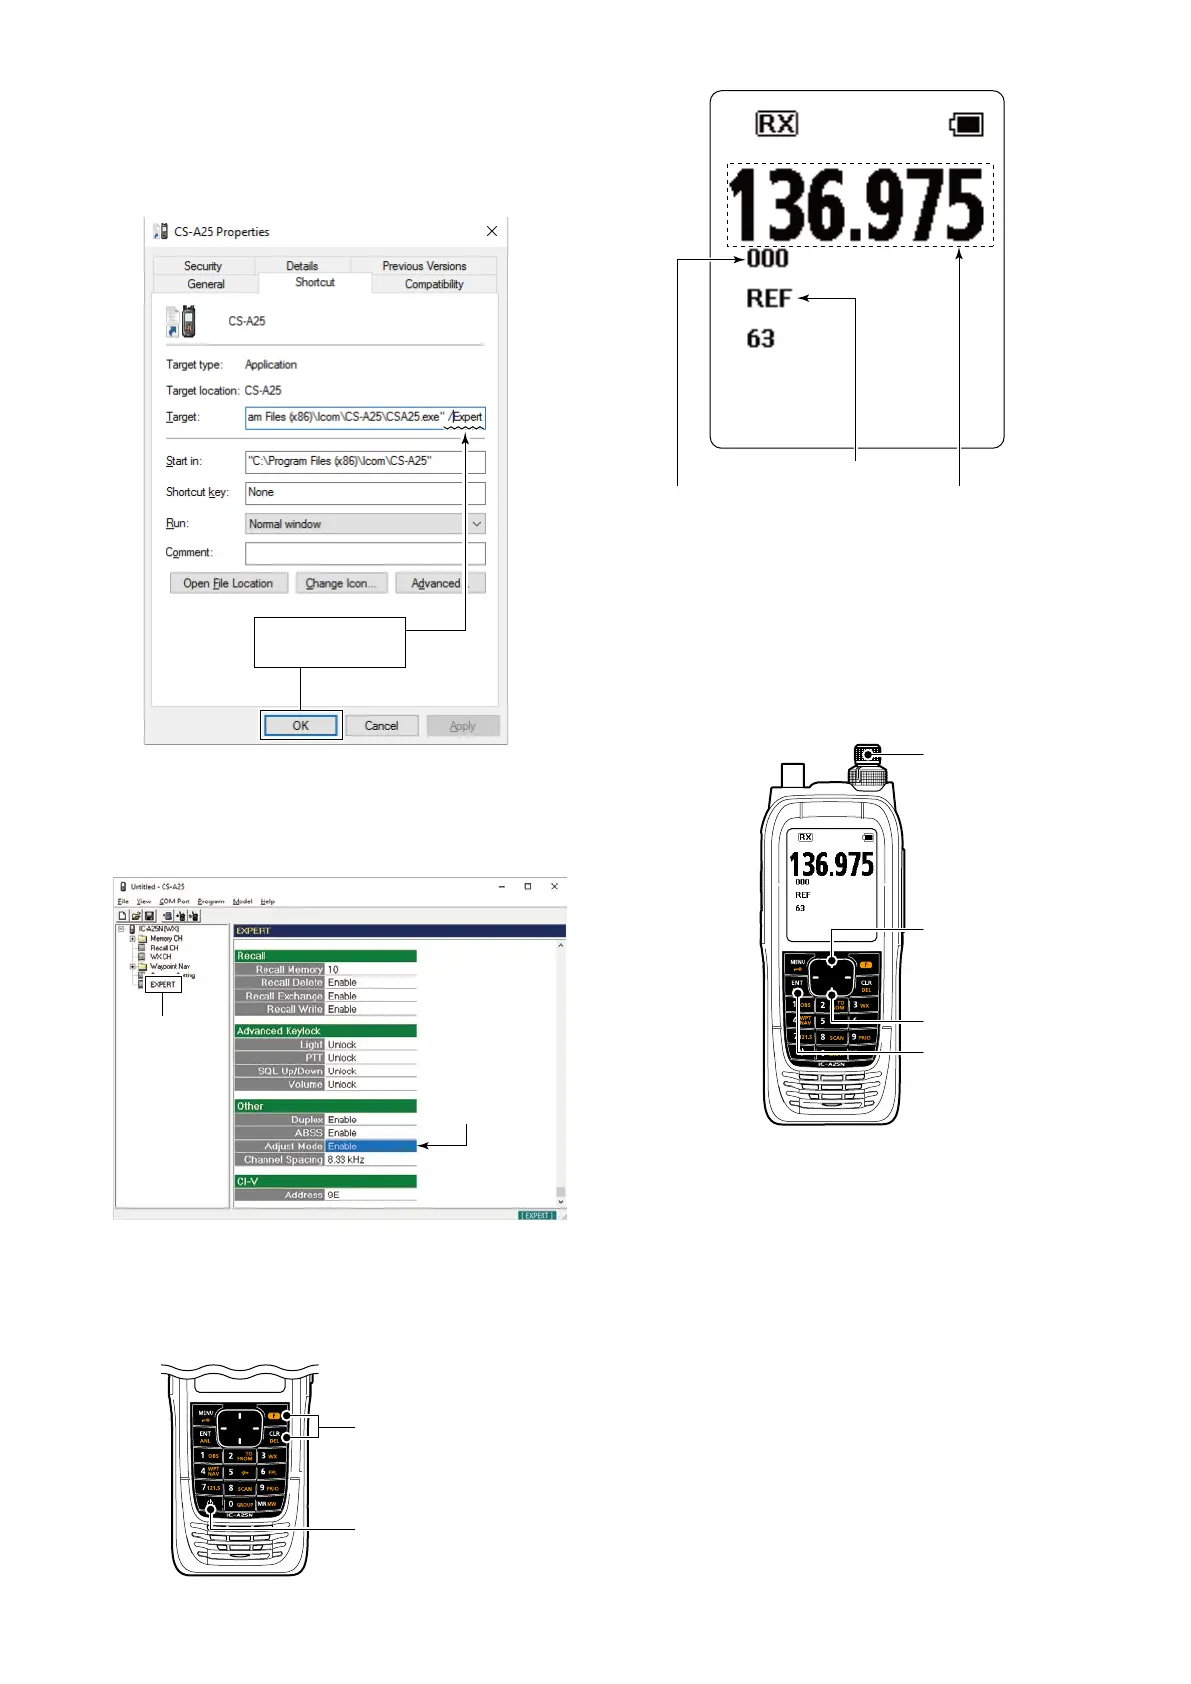
Right click the CS-A25's icon on the desktop and select 1.
the "Properties."
• The CS-A25 properties window appears.
Append " /Expert" to the end of the contents of the Target 2.
field, and then click [OK].
• A space is necessary before slash.
Append “ /Expert,”
then click [OK].
Boot up the programming software, CS-A25.3.
Connect the transceiver and the PC using with the OPC-4.
478UC, and then turn the power ON.
Read the transceiver data into the PC.5.
Set "Adjustment Mode" in the "Expert" to "Enable."6.
Write the data to the transceiver.7.
Turn the power OFF, and then disconnect the OPC-8.
478UC from the transceiver.
While holding down [9. F] and [CLR], turn ON the power.
• Enters to the adjustment mode.
While holding down
Turn the power ON
ADJUSTMENT MODE SCREEN ■
Adjustment frequency
Adjustment item name
KEY ASSIGNMENTS FOR THE ADJUSTMENT ■
MODE
Push [• Y] to select the next adjustment item, push [Z] to
select the previous adjustment item.
Rotate [DIAL] to set or modify the adjustment value.•
Push [ENT] to store the adjusted value, and select the •
next adjustment item.
 Loading...