11
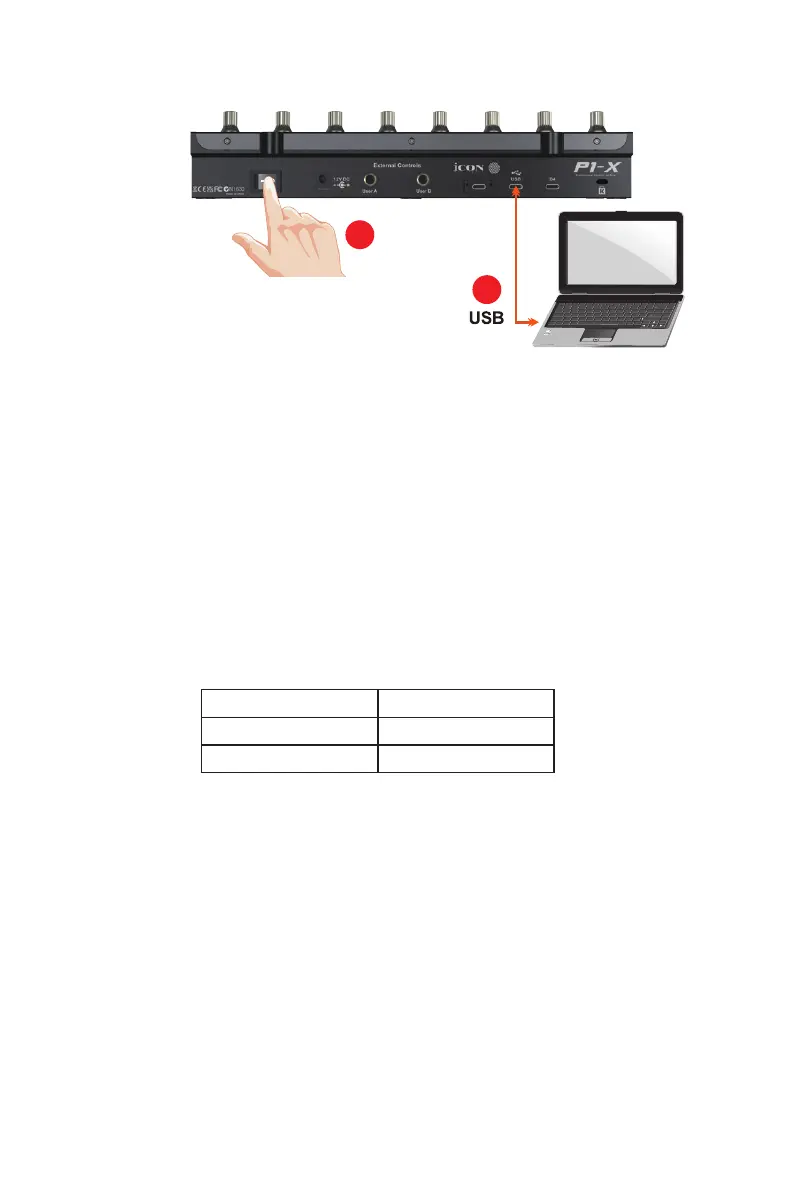
1. Connect the P1-X to your Mac/PC via the USB C port
Choose a USB port on your Mac/PC and insert the USB C cable. Connect the
cable’s other end to the P1-X. Switch on! Your Mac/PC should automatically
“detect” the new hardware.
2. Congure the 3x DAWs you wish to connect to
You will have already allocated 3x DAWs in the P1-M iMAP and assigned them
to the 3x DAW buttons on the P1-M, (see the iMAP section of the P1-M manual).
These are the DAWs that are used as examples in the P1-M manual;
Getting Started with the P1-X
DAW #1 Bitwig
DAW #2 Cubase
DAW #3 Logic
For clarity purposes, we'll continue to use these examples in the following pages to
demonstrate how you will congure the DAWs to the P1-X .
Firstly, let's get one thing very clear;
You do NOT need to allocate DAWs to the P1-X so that it recognizes which is
DAW#1 is, DAW #2 is and so on. You've already set that up on the P1-M. This will be
communicated to the P1-X.
Now, you only have to ensure that the DAW programs know the P1-X and the P1-M
are trying to communicate to them.
Read on to nd out how.
Esc
F1
F2
F3
F4
F5
F6
F7
F8
F9
F10
F11
F12
Prtsc
sysrq
pause
Break
Lns
Del
Home
Pgup
PgDN
End
$
~
`
!
1
··
2
3
4
5
6
7
78
9
0
)
)
*
—
-
+
=
#
¥
%
*
#
#
Q
W
E
R
T
Y
U
I
O
P
{
}
|
A
S
D
F
G
H
J
K
L
:
;
Z
X
C
V
B
N
M
<
>
?
Tab
CapsLook
Shift
Ctrl
Alt AltGr
Ctrl
Backspace
[
]
|
Enter
Shift
intel
2
1