Control Panel
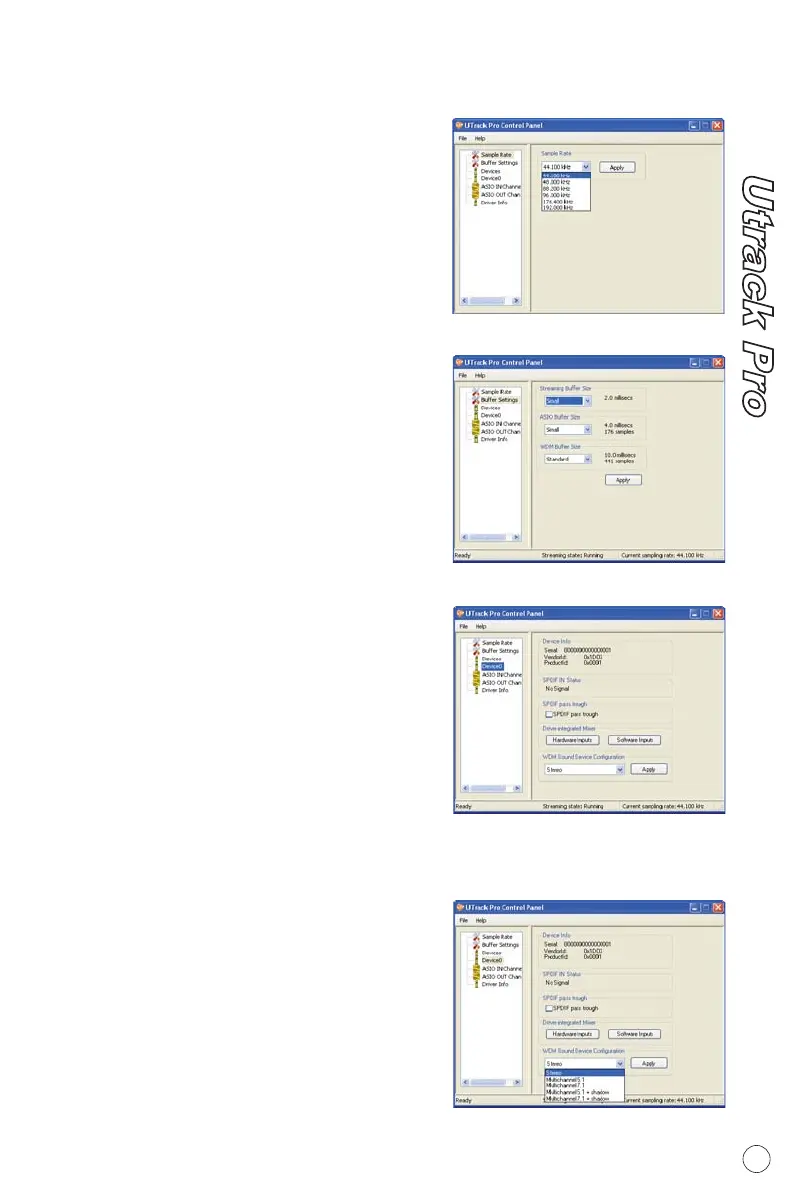
Select your desired sampling rate from
44.1KHz to 192KHz at the pull down
window as shown on Diagram 1. Click
"Apply" after selection been made to
set the value.
Sample rate settings
Diagram 1
Diagram 2
You may select the buffer size for
"Streaming", "ASIO" and "WDM".
Click "Apply" after you have made the
selections.
Buffer Size settings
Diagram 3
Showing the serial no. & Product ID of
your Utrrack Pro. If it doesn't, it means
your Utrack Pro is not propely installed.
Please go therough the Driver
Installation process again (Page 5).
Device settings
r
Click this button to launch the
"Hardware Inputs Mixer" (Page 9)
Hardware Inputs Mixe
r
Click this button to launch the
"Software Inputs Mixer" (Page 10)
Software Inputs Mixe
Diagram 4
Showing the S/PDIF device signal
staus.
S/PDIF Status and Pass Through
"Tick" the box if you wanted S/PDIF
signal pass through
S/PDIF Pass Through
As Utrack Pro is a 4x4 I/O interface, you
should select "Stereo" for this setting.
WDM Sound Device Configuration
8