41
440 01 2021 01
Manifold Gas Pressure Adjustments
(Hi & Lo Fire)
NOTE: Make adjustment to manifold pressure with burners oper-
ating.
!
FIRE OR EXPLOSION HAZARD.
Failure to turn OFF gas at shut off before
connecting manometer could result in death,
personal injury and/or property damage.
Turn OFF gas at shut off before connecting
manometer.
WARNING
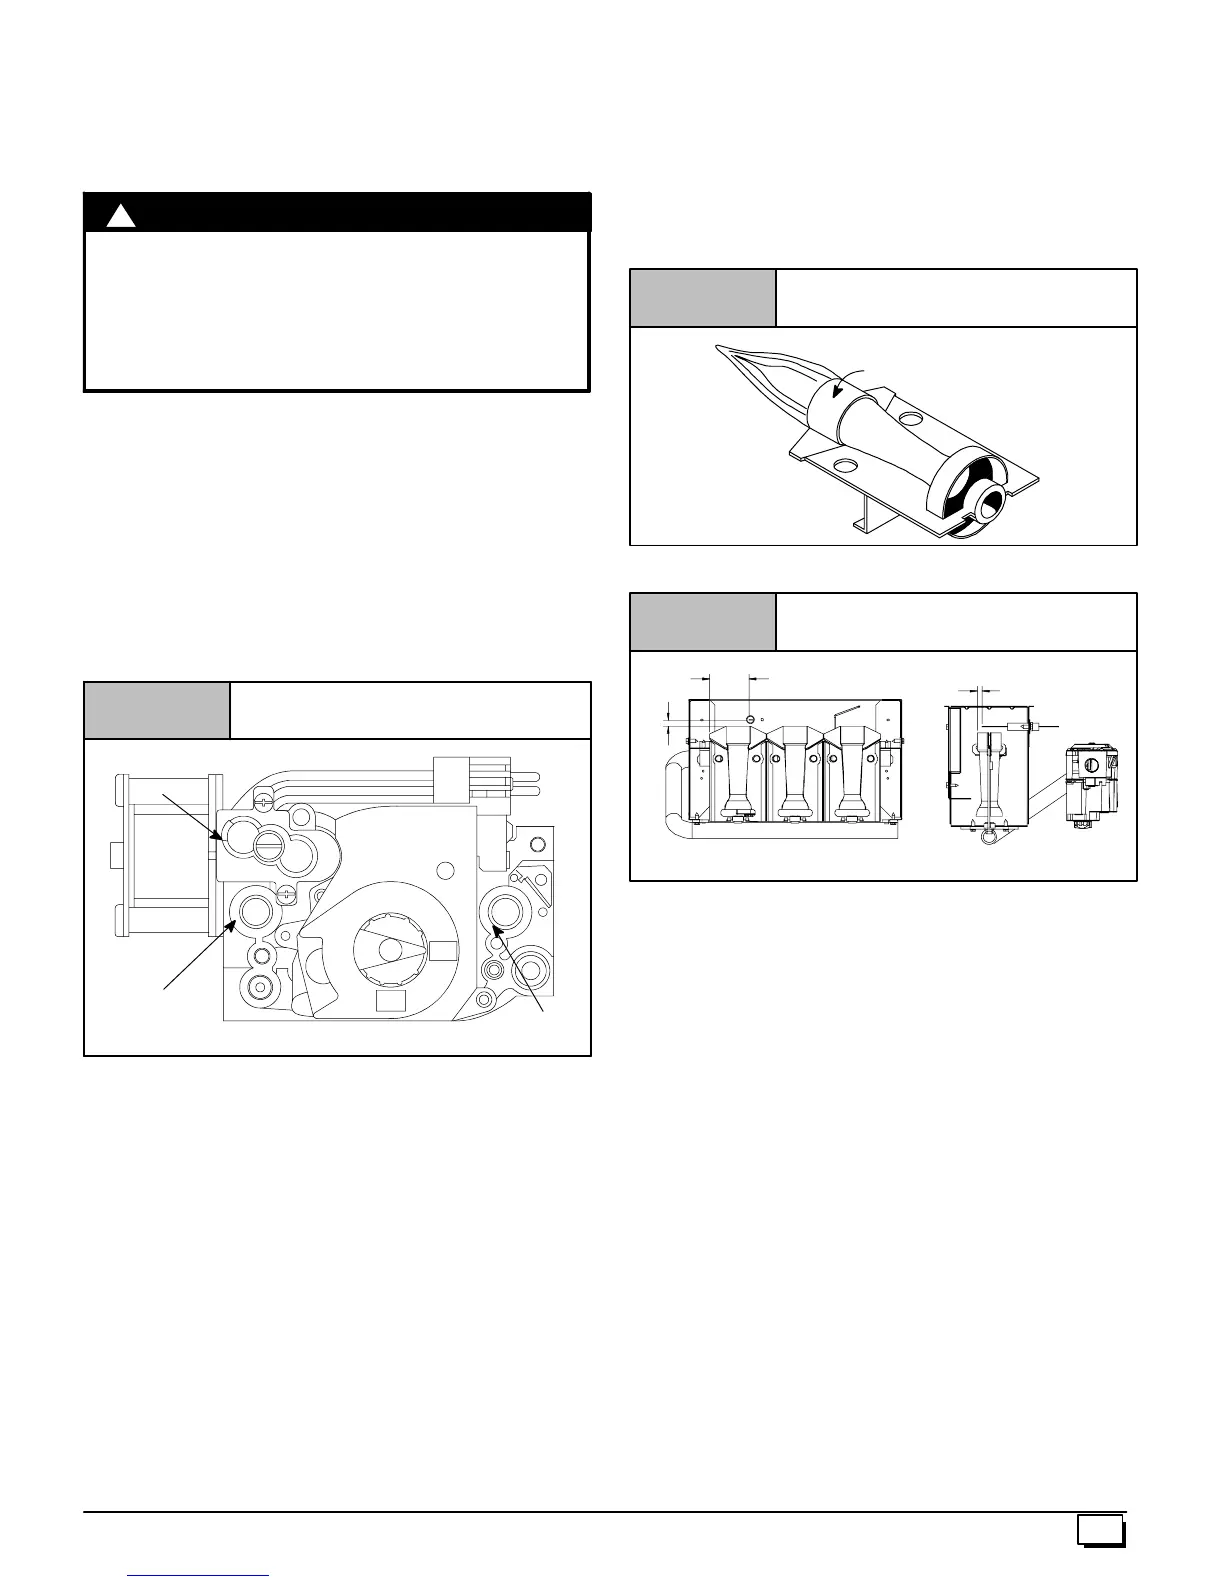
1. With gas OFF, connect manometer to manifold pressure tap
on the outlet of gas control v alve. See Figure 49.Useama-
nometer with a 0² to 12² water column range.
2. Turn gas ON. Operate the furnace on high fire by using a
jumper wire on the R to W1 & W2 thermostat connections on
the fan board.
3. Remove manifold pressure adjustment screw cover on fur -
nace gas control valve. Turn adjusting screw counterclock-
wise to decrease the manifold pressure and clockwise to
increase pressure. See Figure 49.
NOTE: Adjustment screw cover MUSTbe replaced on gas control
valve before reading manifold pressure and operating furnace.
Typical Gas Control Valve Honeywell
Figure 49
ON
OFF
HI
LO
25--24--98a
HONEYWELL
INLET
Pressure
Tap --
1
/
8
OUTLET
Pressure
Tap --
1
/
8
Regulator
Adjustment
Under Cap
4. Set manifold pressure to value s hown in Table 6 or Table 7 .
5. Operate the furnace on low fire by using a jumper wire on
the R to W1 thermostat connections on the fan board.
Note:The third (3rd) DIP switch should be in the on position
to set the low fire manifold pressure. (See wiring diagram.)
6. Repeat steps 3 and 4 for low fire operation.
7. When the manifold pressures are properly set, replace the
adjustment screw covers on the gas control valve.
8. Remove the jumper wires from the thermostat connections
on the fan board. Remove manometer connection from
manifold pressure tap, and replace plug in manifold.
9. Return third (3rd) DIP switch to previous setting.
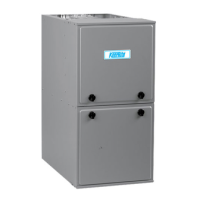
Main Burner Flame Check
Allow the furnace to run approximately 10 minutes then inspect the
main burner and pilot flames. See Figure 50.
Check for the following (Figure 50):
· Stable and blue flames. Dust may cause orange tips or
wisps of y ellow, but flames MUSTNOThave solid, yellow
tips.
· Flames extending directly from burner into heat ex-
changer.
· Flames do NOT touch sides of heat exchanger
.
If any problems with main burner flames are noted, it may be nec-
essary to adjust gas pressures, or check for drafts.
Main Burner
Burner Face
10--10--78
Figure 50
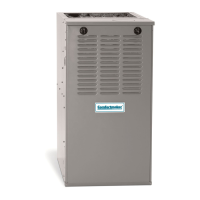
NOTE: For Ignitor location see Figure 51.
Ignitor Location
Figure 51
5
/
16
1
/
4
2
1/
16
NOTE: Flame sensor has a different orientation in all 050 models.
Temperature Rise Check
The blower speed MUSTbe set to give the correct air temperature
rise through the furnace as marked on the rating plate for both high
fire and low fire operation. Temperature rise is the difference be-
tween supply and return air temperatures.
To check temperature rise,use the following procedure:
1. Place thermometers in supply and return air registers as
close to furnace as possible, avoiding direct radiant heat
from heat exchangers.
2. Operate furnace on high fire for 10 minutes with all the regis-
ters and duct dampers open by using a jumper wire on R to
W1 and W2 thermostat connections on the fan board.
Note:The third (3rd) DIP switch should be in the on position.
(See furnace wiring digram)
3. Take readings and compare with range specified on rating
plate.
4. If the temperature rise is not in the correct range, the blower
speed must be changed. A higher blower speed will lower
the temperature rise. A lower blower speed will increase the
temperature rise.
5. Repeat steps 2 thru 4 with the furnace operating on low fire
for 10 minutes by using a jumper wire on the R to W1 ther-
mostat connections on the furnace control board.
6. Remove the jumper wire after the adjustments are com-
plete. Return third (3rd) dip switch to previous setting.