Do you have a question about the iDataLink maestro mus1 and is the answer not in the manual?
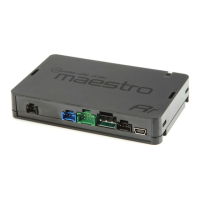
| Product Type | Vehicle Interface Module |
|---|---|
| Data Bus | CAN bus |
| Compatibility | Compatible with select vehicles |
| Functionality | Retains factory features while providing aftermarket radio integration |
| Retained Features | Steering wheel controls, factory amplifier, and more |
| Integration | Integrates aftermarket radio with factory system |
| Installation | Professional installation recommended |
| Programmability | Programmable settings via software |
| Warranty | 1 Year |
Follow the six essential steps for initial setup, Weblink integration, and module programming.
Comprehensive instructions covering dash kit preparation, wiring, connections, and final assembly.
Wiring diagrams, wire charts, and solutions for common installation and operational issues.
Explore the customizable button bar and its 15 programmable function options.
Details on the 1-year limited warranty and a list of included components.
Instructions on how to find and print the correct installation guide for your specific vehicle.
Procedure to fix uneven backlight distribution on the 'CLIMATE' button.