Zhuhai Bell Technology Co., Ltd
3、安装挤出机、打印头、耗材架 Install extruder, print head and Filament holder
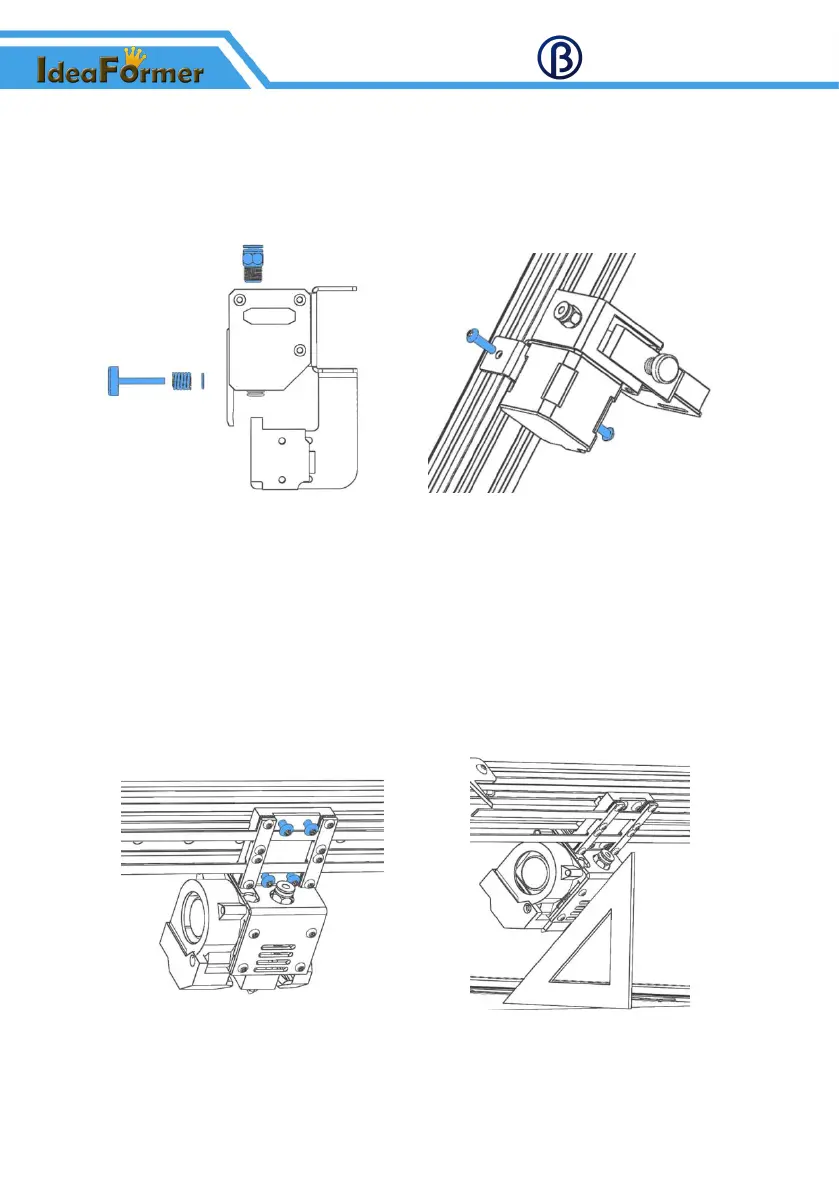
(1)挤出机安装 Install the extruder
先把挤出机配件安装在挤出机上,然后用 M4*20 圆头内六角把挤出机固定在铝型材上。
First install the extruder accessories on the extruder, and then fix the extruder on the
aluminum profile with M4*20 hexagon socket round head screw.
挤出机配件安装 Install extruder accessories 螺丝固定 Screw fixation
所需材料:挤出机 挤出机配件 M4*20 圆头内六角×2
Need materials: Extruder, Extruder accessories, Hexagon socket round head screw M4*20×2
(2)打印头安装 Install the print head
把打印头从下方插进安装位置,用 M4*8 圆头内六角螺丝固定。安装完后大致测量打印头与传送
带平台夹角是否为 45°,可以通过轻微的掰动打印头进行调节
Insert the print head into the installation position from below,and fix it with hexagon socket
round head screw M4*8. After installation, measure whether the angle between the print head
and the conveyor belt platform is 45°, you can move the print head slightly to adjust it.
螺丝固定 Screw fixation 角度调节 Adjust the angle
所需材料:打印头、M4*8 圆头内六角×4、三角板
Need materials: Print head, Hexagon socket round head screw M4*8×4, Triangular plate