INSTALLATION
Solar Thermal - Installation and Servicing
SOLAR CONTROLLER
44
IDEAL SOLAR CONTROLLER - OPENING AND CLOSING THE CONTROLLER
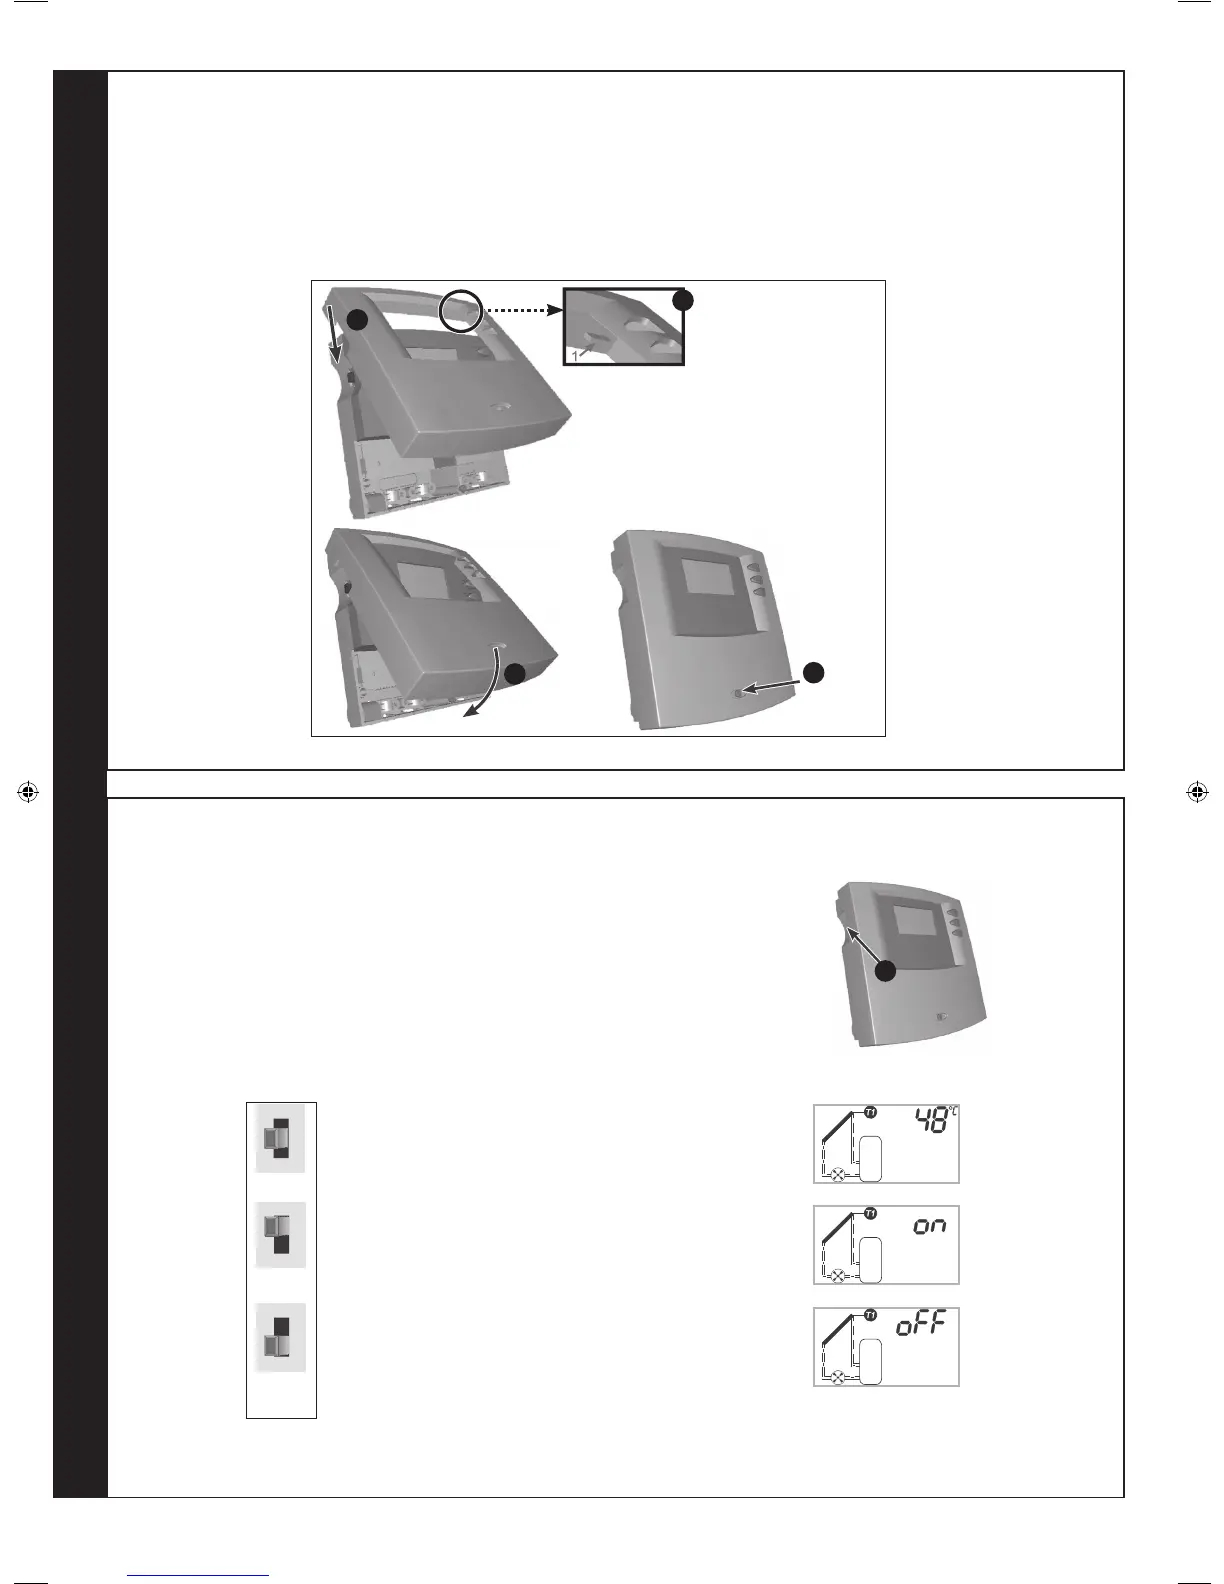
1. The front cover is secured by two holding bars on the top
edge of the controller and a screw on the housing.
2. Close the controller by angularly setting the front cover on
the controllers housing. The holding bars must be on the
corresponding hinge notches.
1. After the controller’s front cover has been closed, the power supply can be
turned on (refer to page 5, Electricity Supply)
2. To test if the solar circuit’s pump has been installed correctly (independent of
the controller’s functions), it is helpful to briey turn it on and off by hand. For
this purpose, there is a mode switch on the left side of the housing.
Note.
Every change of the switching position is followed by a 3 sec. lasting display of the
current control mode. (‘on’ / ‘Automatic’/ ‘off’).
45
IDEAL SOLAR CONTROLLER - COMMISSIONING
3. Now, the front cover can be folded down and the push
buttons can be threaded through.
4. A fastening screw is used to securely close the housing.
Switch in central position means automatic mode.
The backlight display is yellow.
Turn the switch to the upper position to start the pump.
The word ‘on’ flashes in the display as a reminder.
The backlight display is red.
Turn the switch to the lower position to switch off the pump.
The word ‘off’ flashes in the display as a reminder.
The backlight display is red.
sol8579
WARNING. If the system is ready for operation (system is lled, solar circuit is not blocked), the controller can be set to
automatic mode after commissioning.
207786-2.indd 48 16/02/2012 11:26:25
 Loading...