INSTALLATION
Solar Thermal - Installation and Servicing
51
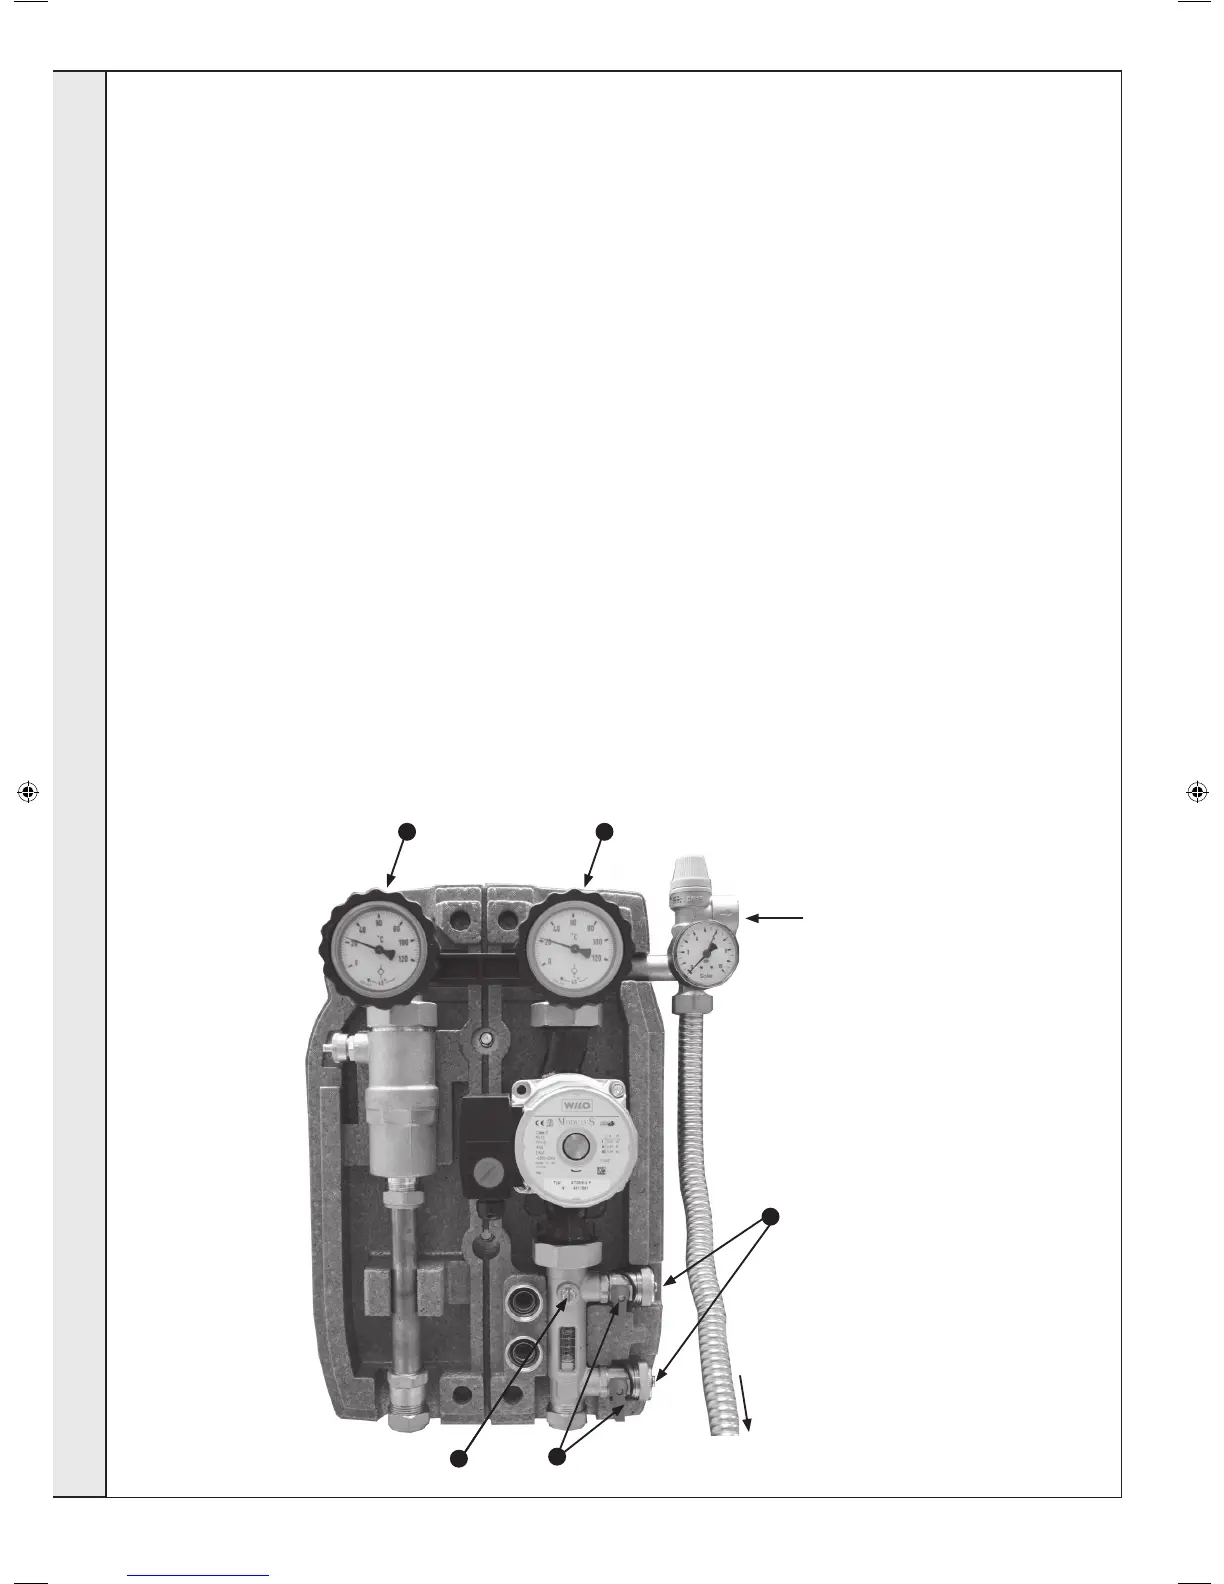
COMMISSIONING OF THE SOLAR PUMP STATION
WARNING. Do not commission the Ideal Solar System in direct
sunlight, it is recommended that system is commissioned early
morning or evening; failing this the collectors may be covered
with a tarpaulin to prevent excessive temperature. The system
should not be commissioned when there is a risk of frost.
The Ideal Solar System is supplied with heat transfer uid and
is pre-mixed and ready to use. The heat transfer uid ensures
reliable operation, high vapour reliability and protects against
freezing.
IMPORTANT. ONLY IDEAL HEAT TRANSFER FLUID MUST
BE USED WITH THE IDEAL SOLAR SYSTEMS.
Safety - Heat Transfer Fluid
- Use undiluted only.
- Keep out of reach of children.
- Avoid contact with skin and eyes.
- If swallowed, seek medical advice immediately and show
the label adhered to the container.
The heat transfer uid is non-corrosive and bio degradable.
Flushing the Solar System Preparations
The Ideal Solar System must be ushed with heat transfer uid
to remove any debris before commissioning.
Use a suitable lling pump, capable of producing 2 bar with
lter, such as an electric solar pump, manual hand pump or an
attachment to a power tool.
1. connect ushing pipes to the ll and drain valves on the
side of the ow limiter by replacing the caps with the hose
connectors.
2. Open the ll and drain valves.
3. Using a screwdriver esnure the adjustment screw below
the pump is in the veritcal position.
4. Turn the left gauge thermometer dial anti clockwise by 45°
to manually open the non return valve.
5. Turn the right gauge thermometer dial anti clockwise by
90° to manually close the non return valve.
The system is now ready to be ushed to remove any debris.
6. Once the solar system has been ushed, open the right
gauge thermometer dial by turning clockwise by 90º
ensuring the centre point is at the top vertical position.
7. Close the lling and drain valve on the ow limiter and
pressurise the solar system until 1.5 - 2.0 bar system
pressure is reached.
8. Open the left gauge thermometer dial by turning clockwise
by 45°, ensuring the centre point is at the top vertical
position.
Ensure that all valves are in the open position on the solar
system.
Check all joints for any leaks.
To Solar Container
INSTALLATION
To Expansion Vessel
1
54
3
2
207786-2.indd 54 16/02/2012 11:26:30
 Loading...