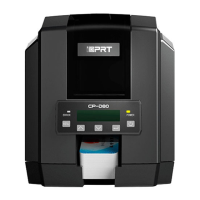
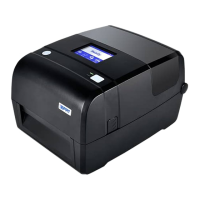
The CP-D80 is a card printer designed for various printing needs, offering both single-sided and duplex color printing capabilities. It supports a range of operating systems and provides features for easy installation, usage, and maintenance.
Function Description:
The CP-D80 is primarily used for printing on cards. It can handle both single-sided and duplex (double-sided) printing in color or monochrome. The printer is equipped with a ribbon loading system, a duplex print module (optional), and various ports for connectivity, including USB and Ethernet. It features an LCD display for operation and error indication, a navigation key, and a latch button for opening the ribbon cover. The printer also includes a card limit controller and a card output slot.
Important Technical Specifications:
- Dimensions: The printer has a width of 397.25 mm, a height of 285.7 mm, and a depth of 200 mm.
- Maximum Resolution: 300 dpi.
- Supported Operating Systems:
- Microsoft Windows 10 (32 bit/64 bit)
- Microsoft Windows 8 (32 bit/64 bit)
- Microsoft Windows 7 SP1 (32 bit/64 bit)
- Microsoft Windows Vista SP2 (32 bit/64 bit)
- Microsoft Windows XP Professional SP3 (32 bit)
- Microsoft Windows Server 2012 (64 bit)
- Microsoft Windows Server 2008 R2
- Microsoft Windows Server 2008 SP2 (32 bit/64 bit)
- Microsoft Windows Server 2003 R2 SP2 (32 bit/64 bit)
- Connectivity: USB, Serial Port (extension communications only), Ethernet.
- Power: Requires an AC adapter and power cord. Power cord varies by region.
- Card Size: Supports custom card sizes, for example, 54.2mm * 85.6mm.
- Print Modes: Color Mode, Single Color Mode, Do Not Print.
Usage Features:
- Media Loading:
- Ribbon Loading: To load the ribbon, the printer's latch button is pressed to open the ribbon cover. The ribbon latch lever is then lifted to release the ribbon bracket group, which is manually removed. The ribbon is aligned with the ribbon spindle, and the front edge is stuck to the ribbon rewind spindle. The ribbon rewind spindle is rotated anticlockwise as shown in the figure. After the ribbon is installed, the ribbon bracket group is assembled back into the printer, and the ribbon latch lever is pressed down to lock the ribbon bracket group.
- Duplex Print Module Loading (Optional): The side cover is pressed down to remove it. The FPC (Flexible Printed Circuit) is inserted into the cable connector, and the positioning slot is inserted into the positioning pin. It is important to unplug the AC adapter before installation. After inserting the module, it is pushed from the bottom to the top.
- Power Connection: Connect the AC adapter to a power receptacle, then connect the power cord to the AC adapter, and finally connect the other end of the power cord to the outlet. It is crucial to use the original power adapter to avoid damage and to unplug the printer power cord if it is not in use for a long time.
- Operation Panel:
- LCD Display: Shows "ERROR," "MENU," and "POWER" indicators.
- Power Button: Used to turn the printer on/off and to shut down the printer by pressing and holding for 1 to 2 seconds. It also stops printing tasks.
- Up/Down/OK Button: Arrow buttons are used to navigate through the printer menu system, and the ENTER button is used to make a selection.
- Menu Button: In the ready state, pressing the menu button enters the menu interface. At any level of the menu interface, pressing it returns to the previous level.
- Main Menu: The LCD panel displays the menu system, showing information about the printer. When the printer is in the ready state, the LCD displays the model of the printer. The main menu includes Maintenance (Cleaning Card, Test Card, Exit), Status (Serial Number, Versions, Ethernet, Cards, Magnetic Stripe Card, Exit), and Setting (Ethernet, LCD Backlight, Buzzer, Language, Printing Mode, Magnetic Stripe Card, Exit).
- Indicator Description:
- Yellow (Always light on): Normally, it is always yellow and bright.
- Red (Always light on): Printer error.
- Printing Test:
- The printer has a built-in test card function. When the printer is ready, the status light is yellow. Press the "MENU" button to display "menu" on the LCD. Press ENTER to enter the menu system, then ENTER again to enter "maintenance." When "Testing card" appears, press and hold ENTER until "start" is displayed. Press and hold ENTER again to print the testing card. The printer returns to "ready" after printing.
- Windows Driver Usage:
- Installation: Double-click the Windows Driver, select the language, accept the license agreement, choose the printer model (CP-D80), and click "Finish." A USB port will be automatically generated when connecting the printer to the computer if the driver is already installed.
- Printer Icon: The printer icon can be found in "Start" -> "Devices and Printers."
- Printing Preferences: Right-click the printer icon and select "Printing preferences." Users can set up the page according to different needs, including custom paper names and offsets.
- Advanced Settings:
- Duplex Color Printing: Set the front option to "Color Mode" and the back option to "Color Mode."
- Single-Sided Color Printing: Set the front option to "Color Mode" and the back option to "Single Color Mode" or "Do Not Print."
- Single-Sided Monochrome Printing: Set the front option to "Single Color Mode" and the back option to "Do Not Print."
- Magnetic Stripe or Chip Area: If the magnetic stripe or chip area on the card is not printed, it will be shown in the figure.
- Printer Properties: Right-click the printer icon and choose "Printer properties." In the "General" tab, click "Print Test Page" to verify connectivity. In the "Ports" tab, select the desired port type (Local Port, Standard TCP/IP Port, etc.). For TCP/IP, enter the printer's IP address and port name.
- Removing the Driver: Turn off the printer or unplug the USB cable. Double-click the Windows Driver, choose "Uninstall printer driver," and click "Next." Select "Delete all printer drivers and its components" and click "Next" to complete the uninstallation.
Maintenance Features:
- Print Head Cleaning:
- When to clean: When replacing the print head, if unprinted lines appear on the card, or if the print head is accidentally touched (oil from hands can damage it).
- How to clean: Turn off the printer. Unlock and open the printer laminator access door if necessary. Lift the ribbon latch lever to release the ribbon bracket group and remove the inner box of ribbon. Take out a cleaning swab and gently move it back and forth along the edge of the print head until it is clean. Replace the ribbon box, avoiding hitting the print head. Close the printer cover and turn on the printer.
- Warnings: Avoid touching the print head with fingers. Do not use sharp objects near the print edge of the ribbon box. Only use the cleaning swab for cleaning; other materials may cause damage. Use cleaning swabs only once and discard them after use.
- Track Cleaning:
- Close the ribbon latch lever.
- Place the cleaning card in the slot.
- Start the cleaning card from the "menu."
- Troubleshooting: The manual provides a detailed "Troubleshooting" table with common problems, their descriptions, and solutions. Examples include:
- Close and lock doors: Print head is not closed. Solution: Close the cover.
- Request not supported: Task request not supported. Solution: Press and hold the MENU button.
- Job could not complete: Receive the data timeout. Solution: Press and hold the MENU button.
- Card not in position: The card is stuck in the process. Solution: Press and hold the MENU button.
- Printer error: The printer be found in error. Solution: Press and hold the MENU button.
- Magstripe data error: Data verification error of magnetic stripe card. Solution: Press and hold the MENU button.
- Magstripe data not found: The magnetic stripe card could be found. Solution: Press and hold the MENU button.
- Magstripe read data error: Error reading magnetic stripe card. Solution: Press and hold the MENU button.
- Magstripe read no data: The data of magnetic stripe card can not be read. Solution: Press and hold the MENU button.
- Print ribbon problem: Ribbon breakage or ribbon wrong specification. Solution: Check the ribbon, press and hold the MENU button.
- Print ribbon out or missing: Print ribbon out or missing. Solution: Replace a new ribbon, press and hold the MENU button.
- Card hopper empty: Card hopper empty. Solution: Place the card.
- Close cover to continue: Continue after closing the cover. Solution: Close the cover.
- Cover opened during job: Cover opened during job. Solution: Close the cover.
- Magstripe not available: Magstripe not available. Solution: Press and hold the MENU button.
- Reader not available: No contactless smart card module detected. Solution: Press and hold the MENU button.
- Print ribbon not supported: Authentication error in refresh length of ribbon RFID authentication. Solution: Replace a new ribbon, press and hold the MENU button.
- User paused the printer: User paused the printer. Solution: Press and hold the MENU button.
- Print ribbon not identified: Authentication error in ribbon. Solution: Replace a new ribbon, press and hold the MENU button.
- Magstripe format problem: Data format error in magnetic stripe. Solution: Press and hold the MENU button.
- Print ribbon will run out: The ribbon will run out. Solution: Press and hold the MENU button.
- Print ribbon winding: The ribbon sticks to the card or the platen. Solution: Check the ribbon box, press and hold the MENU button.
- Card not picked: Card not picked. Solution: Check the card hopper, press and hold the MENU button.
- Card coming out failed: When the printing is finished or abnormal, the card does not exit to the exit slot. Solution: Check the track, press and hold the MENU button.
- TPH over temperature: The temperature of the print head exceeds the rated temperature during printing. Solution: When the temperature drops to a certain value, it will close automatically.
- Power voltage error: Abnormal printer voltage. Solution: Automatic shutdown after voltage recovery.
- Print mode mismatch: The data mode issued by PC does not match the current mode of printer. Solution: Press and hold the MENU button.
- Dual-sided module not found: There are no accessories to support duplex printing. Solution: Press and hold the MENU button.