Quick Installation Guide
Jun. 2011 Copyright © IDTECK Co., Ltd.
4. INSTALLATION
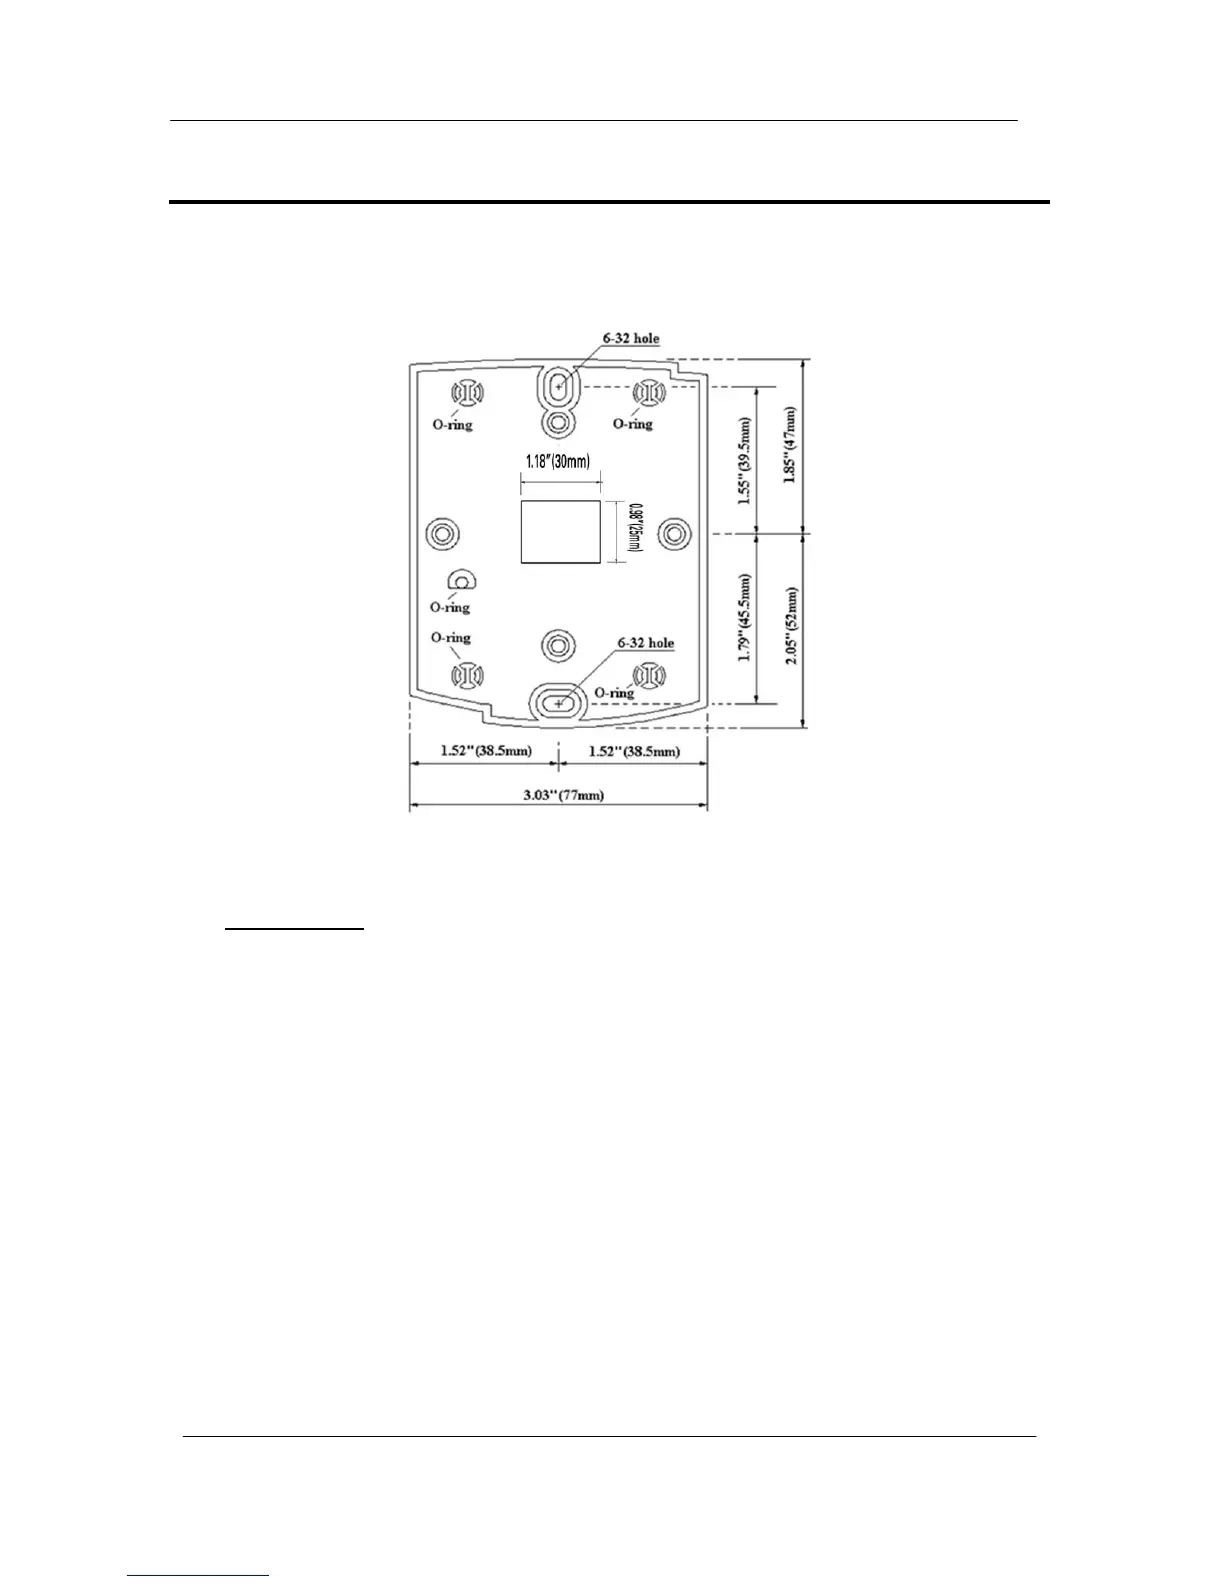
1. Tear off page on the back this manual and use the provided template to drill two 6-32 holes and one
1/2" hole on the proper location of the wall to mount the Wall Mount bracket as shown below.
(If the gang box is already installed on the wall then skip this step.)
2. Using 2 screws, install wall mount to the wall.
※CAUTIONS
Before mounting the STAR 100R unit to the Wall Mount bracket, operational testing of the unit
should be completed, as the locking pins will lock the unit to the Wall Mount. Removing the unit
from the Wall Mount bracket after they have been installed together may cause damages to the
bracket and render its effectiveness.
2. Insert 5 O-rings to the wall mount as indicated, then route the cable of the main unit through the
center hole and push the main unit to wall mount to lock the main unit and make sure that the main
unit is locked with wall mount.