9
CLEANING AND MAINTENANCE
Always switch off the unit and unplug from the mains socket before cleaning or performing any
maintenance. When not in use for long periods it is also advisable to remove the plug from the power
socket.
Wipe the outside of the unit with a soft damp cloth. You may use a mild detergent if necessary. Dry with
a cloth. Do not use any harsh abrasives or solvents. Never immerse this appliance in water or any other
liquid.
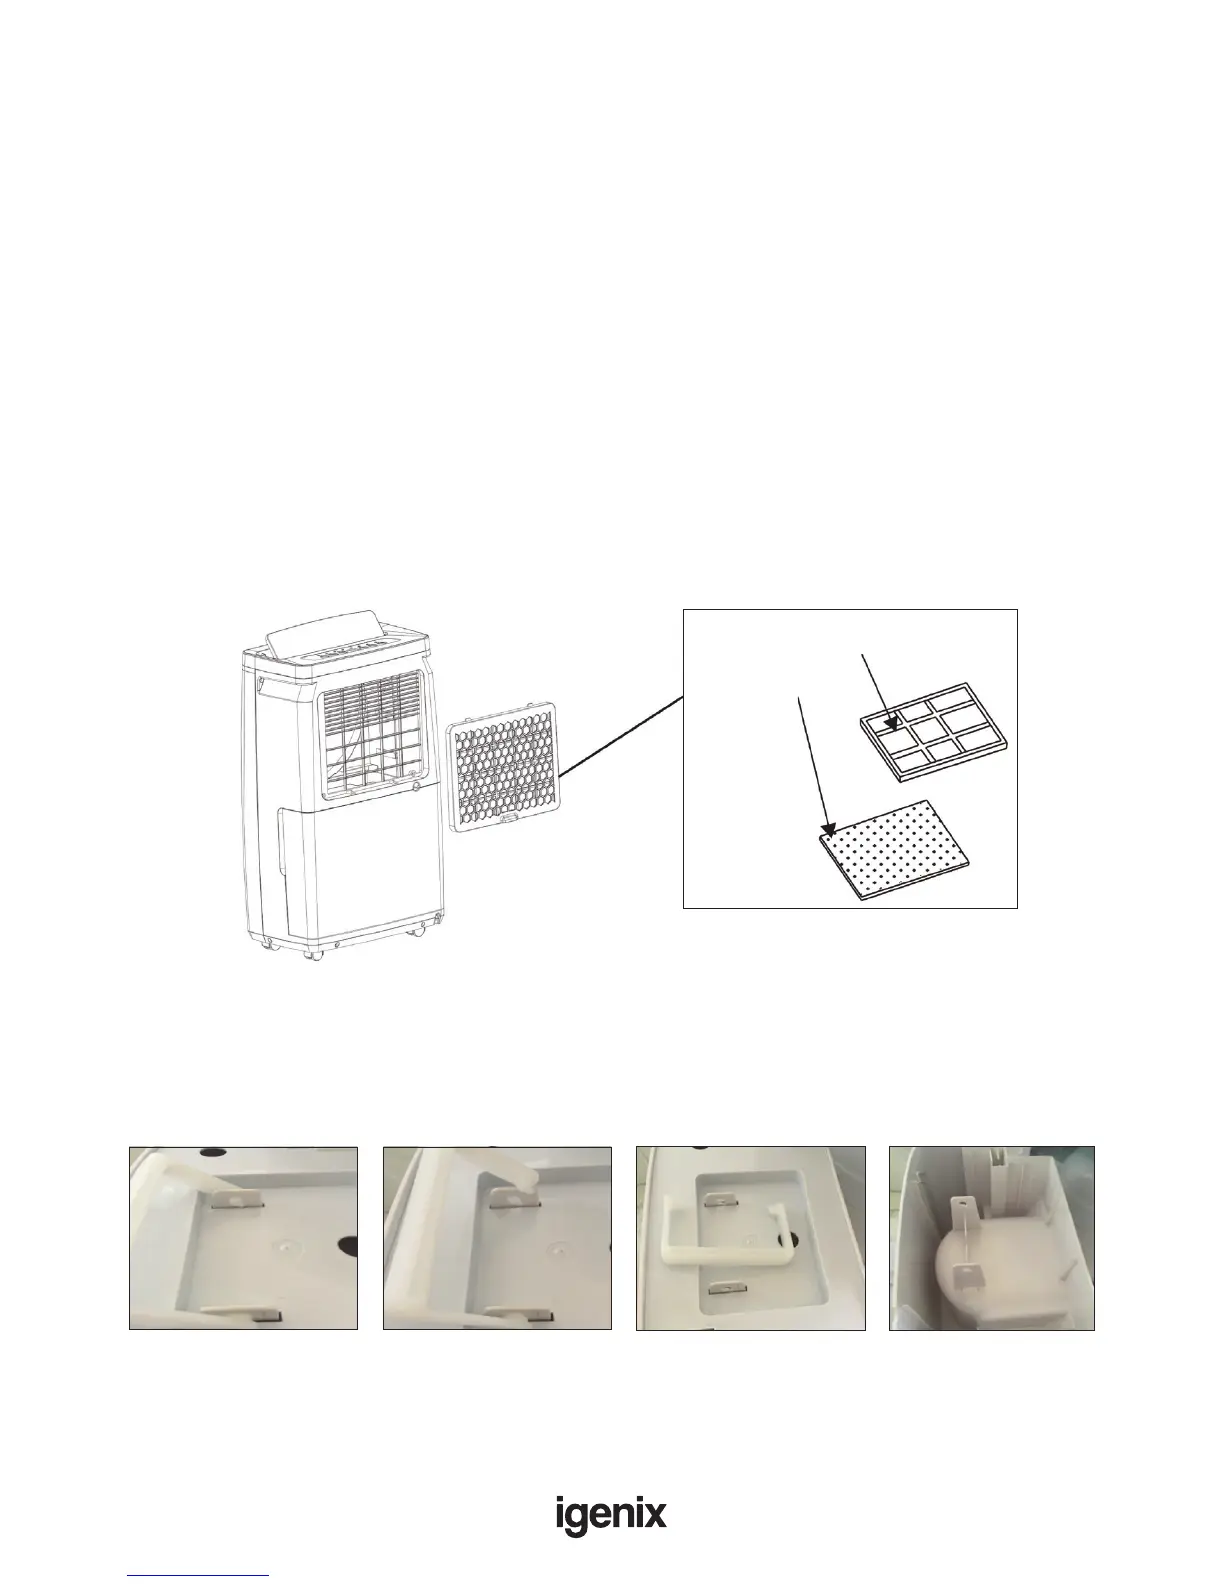
The air lter should also be cleaned regularly. To remove the lter:
• Place nger in the recess area at the base of the Air Outlet Filter and gently pull towards you
and then down, the lter will now be released from the unit.
• To dislodge any dust from the lter; you can either tap lter lightly over a dustbin or use a
vacuum cleaner to remove all dirt.
• If the lter contains excessive debris which is hard to dislodge, you can remove the carbon lter from
the lter bracket and wash the lter in warm soapy water (using a neutral detergent), rinse well with
clean water and then leave until dry. Once lter is dry, reinsert into the lter bracket.
• Replace lter back on to the unit and clip into place.
The water tank should be cleaned every few weeks to prevent growth of mould, mildew and bacteria.
Partially ll the tank with clean water and add a little mild detergent. Swish it around and then empty the
tank and rinse.
To thoroughly clean and dry the tank you can remove the handle and lid to gain access to the inside of
the tank.
Follow these instructions:
Active
Carbon Filter
Active Carbon Filter Holder
Move handle to
this position
Detach the handle Remove handle and
water tank cover
You can now access
inside of water tank
Note: After cleaning, drying and reassembling the water tank, it must be reinserted securely into
dehumidier in order to restart operation.