IE
22
General warnings.
All Immergas products are protected with suitable
transport packaging.
e material must be stored in dry premises and
protected against weathering.
is instruction manual provides technical infor-
mation for installing the Immergas kit. As for the
other issues related to kit installation (e.g. safety
in the work site, environment protection, injury
prevention), it is necessary to comply with the
provisions specied in the regulations in force and
principles of good practice.
Improper installation or assembly of the Immergas
appliance and/or components, accessories, kit and
devices can cause unexpected problems to people,
animals and objects. Read the instructions pro-
vided with the product carefully to ensure a proper
installation of same.
Installation and maintenance must be performed
in compliance with the regulations in force, ac-
cording to the manufacturer's instructions and by
authorised professionally qualied sta, intending
sta with specic technical skills in the plant sector,
as envisioned by the Law.
Safety guidelines:
e safety guidelines must be strictly observed.
Installation, first start up, maintenance and
repair work must be carried out exclusively by
qualied sta.
• All ball valves inside the solar unit (ow and
return ball valves as well as the adjustment
valve) and the manifold circuit (ex. lling and
rinsing device) must be re-opened once lling
and rinsing are complete!
• All ball valves must stay open during opera-
tion!
• e connection between the storage tank and
the solar unit must be precautionally protected
with a membrane expansion vessel!
Installation instructions.
One and two-column units are pre-assembled.
e clamping ttings must be ordered separately.
e assembly position for one and two-column
units must always be lower than the solar mani-
folds, to avoid vapour from the expansion vessel
from reaching it in case of stagnation.
If the expansion vessel is at the same height or
higher than the unit, it will require insulation.
Every time the system is drained, it must be
rinsed out with clean water.
One or two-column hydraulic units are not suit-
able for direct contact with pool water, or in any
case with untreated lling water. Only pre-mixed
glycol must be used, as envisioned by Immergas,
under penalty of cancellation of the warranty.
e unit with deaerator is equipped with a vent
to degas the heat transfer uid.
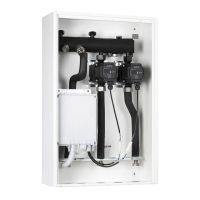
Assembly instructions (Fig. 2).
- Remove the upper insulation (1) and control
unit (2) by pulling them towards you.
- Remove the mixing unit (13) from the lower
insulation (3) by undoing the screw (12) and
removing the bracket (11).
- en separate the mixing unit (13) from the
lower insulation (3).
- Fasten the support bracket (10) as required
using the relative screws as described below
(the two fastening holes of he pump unit are
on the same vertical with a centre-to-centre
pf approximately 264 mm:
- For wall mounting, use the screw (4) and
relative plug (5).
- For mounting on Inoxstor use the screw
M6 x 25 (7) inserting the washer (8).
- For mounting on Domestic Sol use the
screw (20) inserting the washer (5).
- Now place the lower insulation (3) on the
bracket (10) and fasten the lower part, select-
ing the screws according to the installation:
- For wall mounting screw (4) for plug (5)
and washer (5).
- For mounting on Inoxstor screw M6 x 35
(9) and washer (8).
- For mounting on Domestic Sol screw (19)
and washer (5).
- Put the pump unit (13) in its housing in the
insulation (3) and fasten it with the bracket
(11) and screw (12).
- Mount the safety unit (14) inserting the gasket
(15). Attach the safety valve drain to the drip
pan and the pipes connecting the safety unit
(14) to the expansion vessel.
- Hydraulically connect the pump unit, choos-
ing from the options provided in the kit and
inserting the gasket (15):
- Direct connection G 3/4”.
- Connection using adaptor G 1” (16).
- Connection using bar hold Ø 18 to be
welded (18).
Use copper pipes that are not specic for solar
applications, "annealed" copper, you must
use reinforcing bushings to prevent the pipes
from deforming when clamping the ttings,
jeopardising the hydraulic seal.
- Bring the pump cable downwards and con-
nect it to the control unit according to the
installation instructions provided by the
manufacturer of the solar installation.
- Preventively test the watertight seal of the
solar circuit (with air), then lter out debris/
lling the system with pre-mixed glycol as
required by Immergas, using an automatic
pump suitable for this purpose. Adapt the ow
to the number of manifolds or to the surface
of the manifold using dierent pump speeds.
If requested, make any ne adjustments with
the ball valve of the ow-meter.
- Assemble the front layer of insulation (1 and
2). Insulate the ow and return tubing all the
way to the layer of insulation.
1
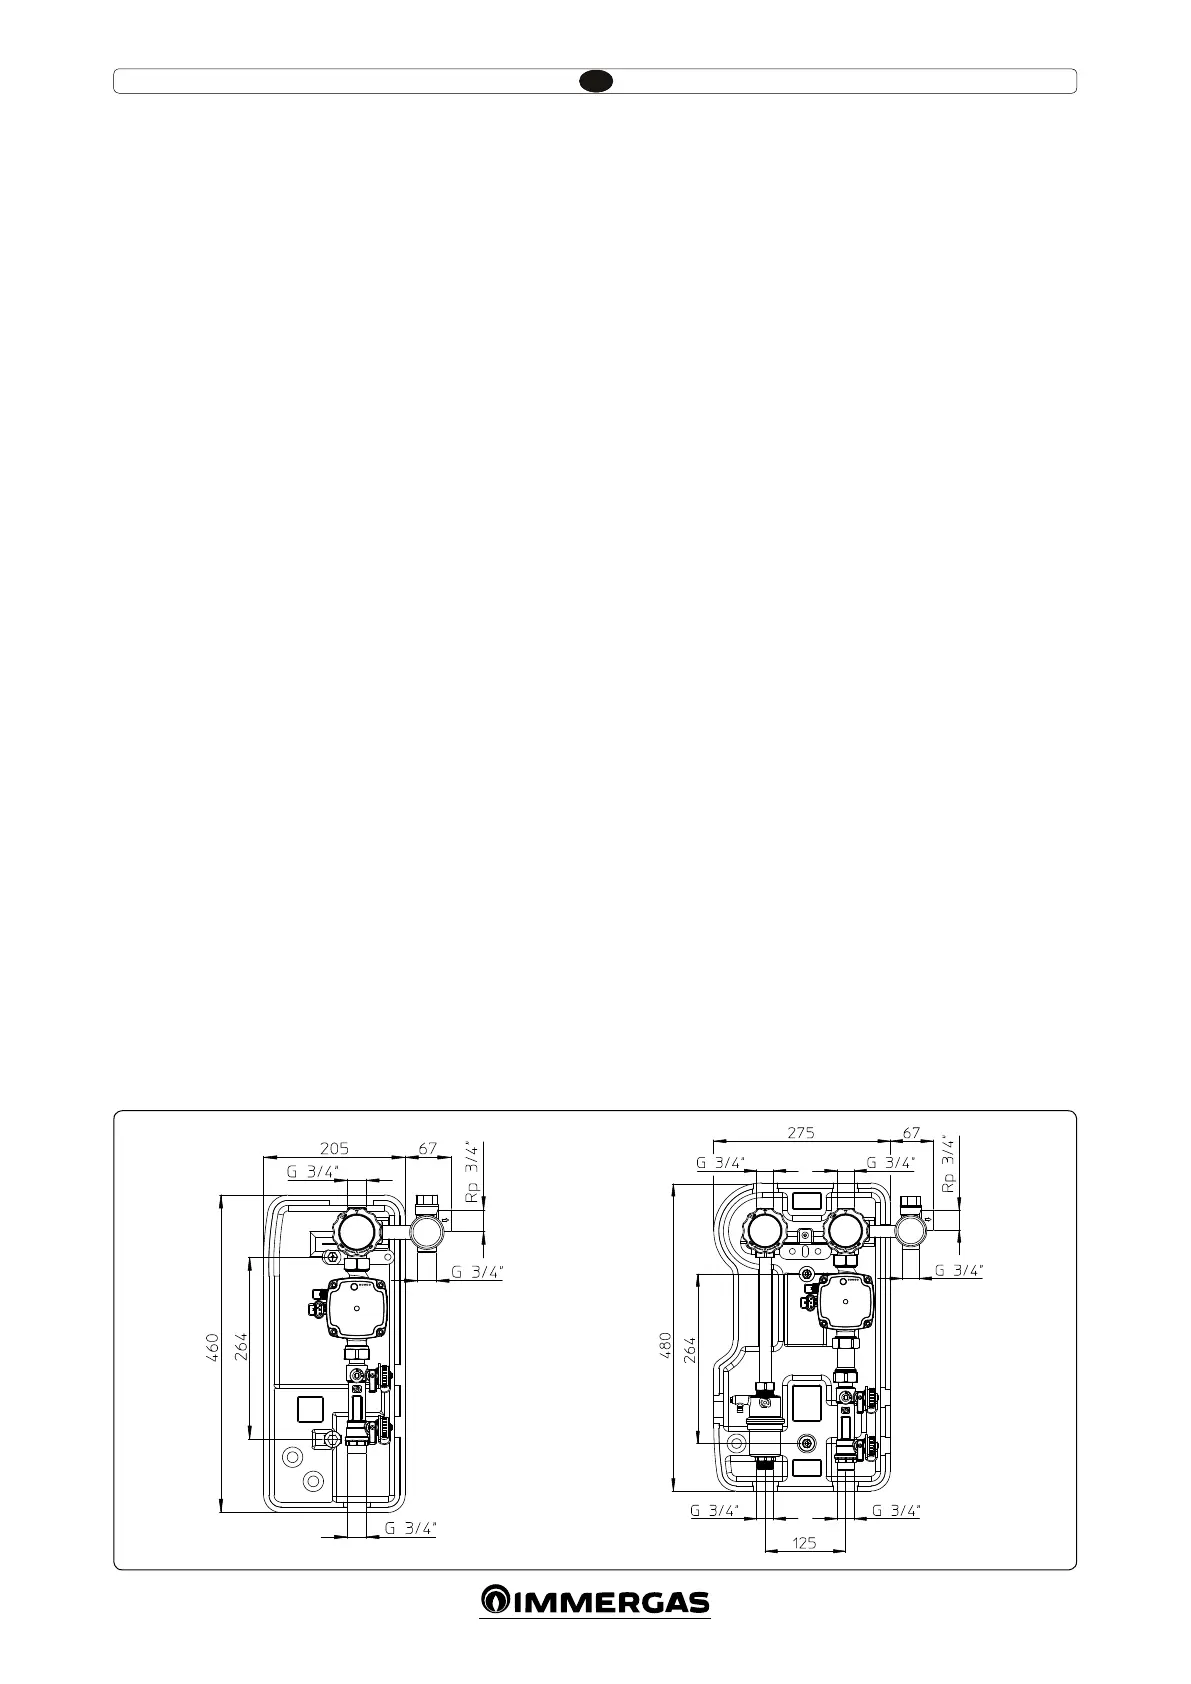
Main dimensions.
 Loading...