15
STMiN3E ed 09/11 MINI NIKE 3 E
Technical Documentation
Technical Documentation
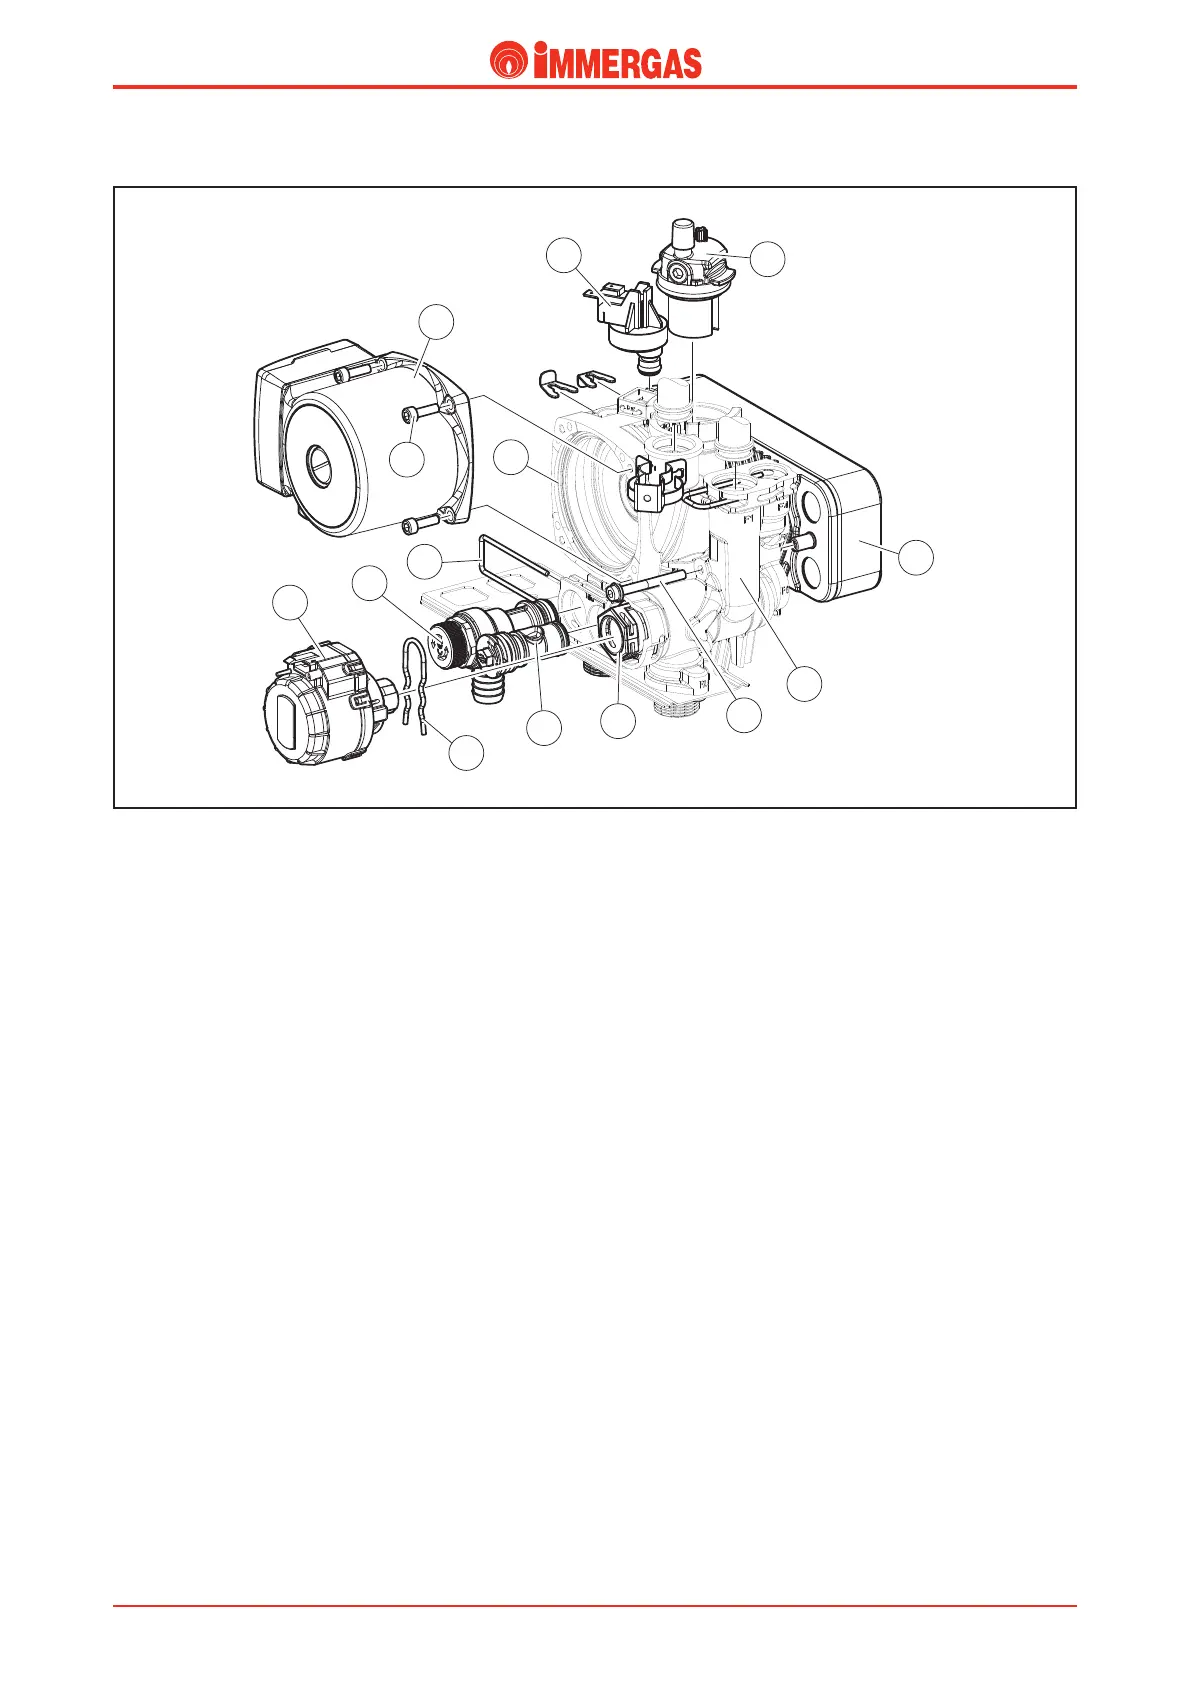
Multipurpose Hydraulic Group ICHS
Before replacing the various components found on the ICHS
unit, the water present inside the primary circuit must be
drained by unscrewing the system draining tting.
Before draining, ensure that the system lling valve is closed.
ree-way valve cartridge replacement
To replace the 3-way cartridge (1) slide the locking clip out (2)
and extract the small electric motor (3) and then using a CH
28 key turn the cartridge counter-clockwise so that it detaches
from the composite body (8).
N.B.: when you are re-attaching the cartridge you must be very
careful not to damage the relative O-ring seal.
Pump motor replacement
To replace the pump body, remove the 4 screws (14) that attach
the motor (13) to the composite body (12).
Replacement of the automatic air vent valve.
To remove the air vent valve from the pump body, turn the air
vent valve counter-clockwise by a quarter turn, being careful
not to damage the relative O-ring seal.
N.B.: when re-mounting the air vent valve, pay particular
attention to inserting the relative O-ring correctly.
By-pass cartridge replacement
To replace the by-pass cartridge (5) you need to pull out the
relative locking clip (6), and then pull the cartridge out from
the front.
N.B.: when re-mounting the by-pass cartridge body be careful
not to damage the gasket.
6
14
1
9
8
10
5
4
3
2
12
13
11
7
3 bar safety valve replacement
To replace the 3 bar safety valve (4) you need to pull out the
relative locking clip (6), and then pull the cartridge out from
the front.
N.B.: when re-mounting the 3 bar valve, pay particular
attention to inserting the relative O-ring correctly.
System pressure switch replacement
To replace the system pressure switch (11), slide the relevant
locking clips out.
N.B.: when re-mounting the system pressure switch, pay
particular attention to inserting the relative O-ring correctly.
Taking out the plate heat exchanger
To take out the plate heat exchanger you need to remove the
two screws (7) that keep the plate heat exchanger fastened (9)
to the hydraulic group (8).
N.B.: when you put the plate heat exchanger back in place
you need to pay close attention to inserting it correctly and
checking the state of the gaskets.