12 13
12. MOUNTING THE MICRO
Mounting on a Helmet
The RICO MICRO Series can be mounted to a helmet using the
helmet adapter rail (included) and additional MUM-14 style interface
hardware (not included), or with the optional PICTAIL system. See
Selecting a Working Mode on page16 for more information on
helmet mode.
NOTE: Torque all hardware to a maximum of 15 inch-pounds (in/lbs)
unless noted otherwise. Please note, torque is inch-pounds, NOT
foot-pounds. If you do not have a torque wrench, apply until snug.
Do not over-tighten. No threadlocker is required for proper use; but
if you do decide to use a threadlocker, use only a small amount of
low-strength LOCTITE 222.
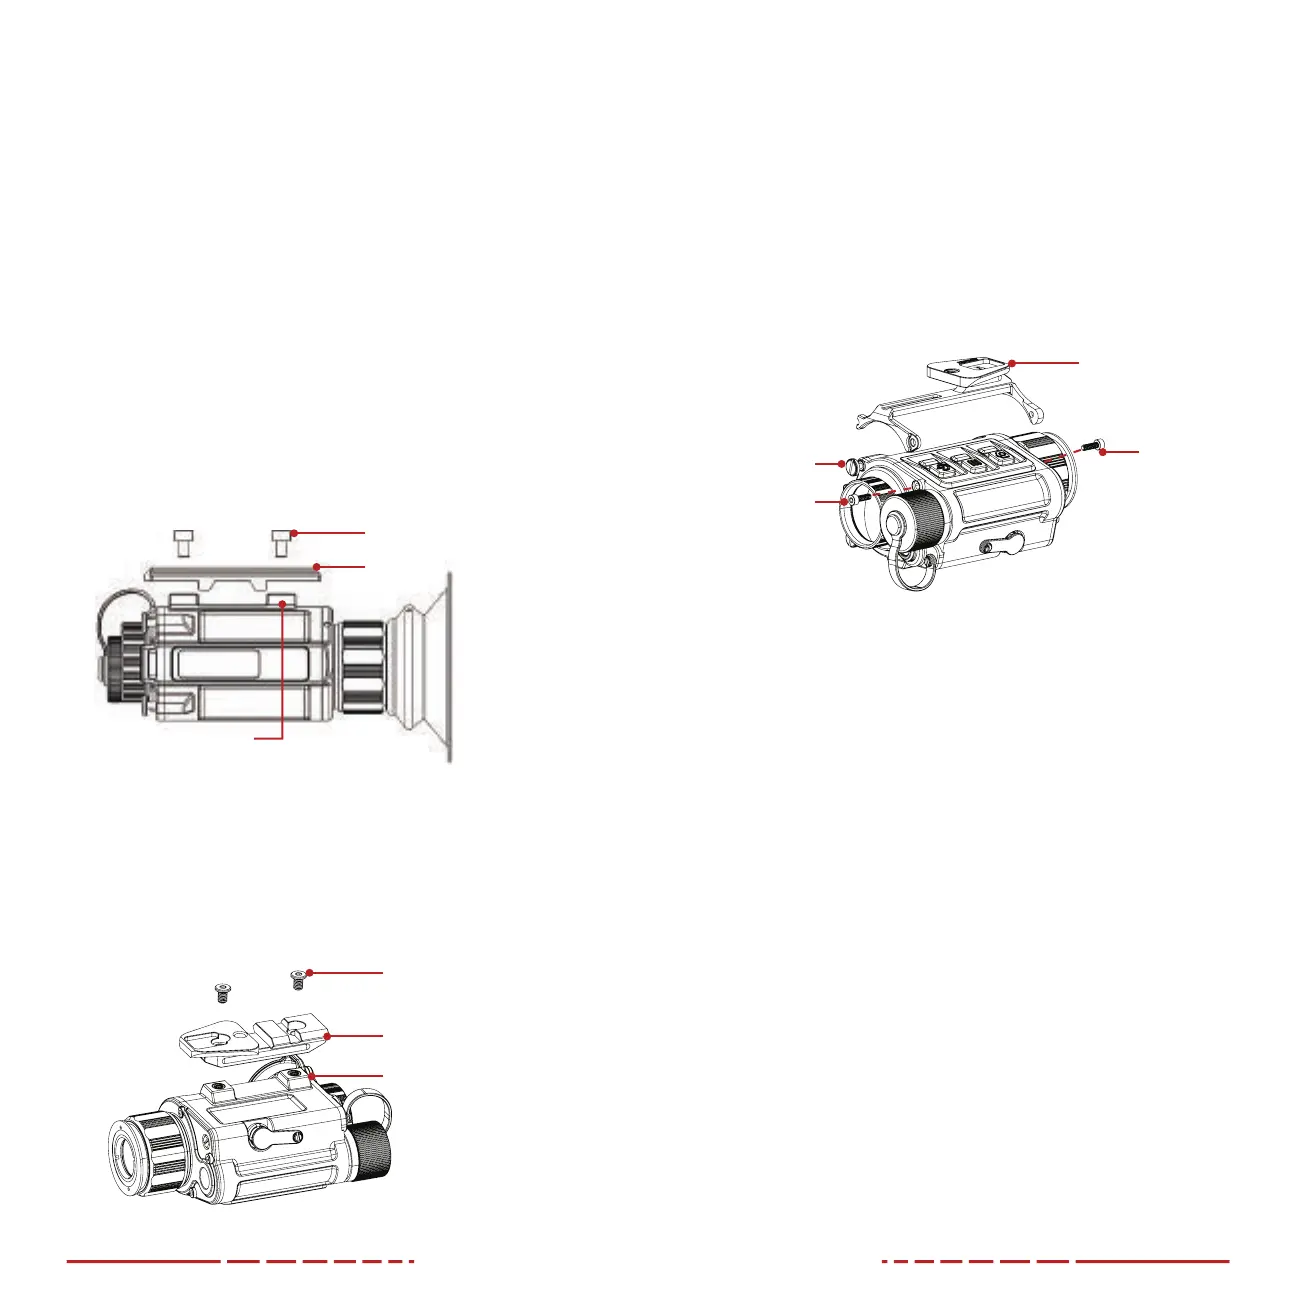
MOUNTING WITH THE OEM HELMET ADAPTER
1. Install the OEM helmet adapter rail onto the mount interface (9)
using the two included M4×6mm socket head screws.
Helmet Adapter Rail
Mount Interface (9)
M4 Socket Head Screws
2. Finish mounting to your helmet with compatible MUM-14 style
interface hardware.
MOUNTING WITH THE OPTIONAL PICTAIL SHOE
1. Install the PICTAIL shoe (IRAY-AC52) onto the mount interface(9)
with the narrow end of the dovetail facing toward the eyepiece
as shown below.
PICTAIL Shoe
Low-Profile
M4 Screws
Mount Interface (9)
2. Thread in the low-profile M4 screws included with the PICTAIL
shoe to 15 in/lbs.
3. Finish mounting to your helmet with compatible dovetail-style
helmet interface hardware.
MOUNTING WITH THE OPTIONAL OMS OBVERSE
MICRO HELMET SHOE
1. Place the OMS Obverse MICRO Helmet Shoe (IRAY-AC53) on
the MICRO with the narrow end of the dovetail facing towards
the eyepiece as shown below. Notice the two front and one rear
in-body screws that correspond to the openings in the OMS
Shoe (see below).
OMS Obverse MICRO
Helmet Shoe
Flat Head
Shoulder Screw
Socket Head
Screw (Front)
Socket Head
Screw (Rear)
2. Remove the socket head screws using a 2mm hex key but leave
the flathead shoulder screw installed.
3. Apply the OMS and re-install the socket head screws through the
screw holes in the OMS Shoe.
4. Tighten until snug, taking care to not damage the threads in the
body of MICRO.
5. Finish mounting to your helmet with compatible dovetail-style
helmet interface hardware.
Mounting on a Weapon
The MICRO may be used with (clip-on mode) or without (standalone
mode) a rifle scope. See Selecting a Working Mode on page16.
CAUTION: Before attempting to install your RICO MICRO on a
weapon, please guarantee that your firearm is unloaded, and the
muzzle is pointed in a safe direction.
NOTE: Torque all hardware to a maximum of 15 inch-pounds (in/lbs)
unless noted otherwise. Please note, torque is inch-pounds, NOT
foot-pounds. If you do not have a torque wrench, apply until snug.
Do not over-tighten. No threadlocker is required for proper use; but
if you do decide to use a threadlocker, use only use a small amount
of low-strength LOCTITE 222.
 Loading...