Do you have a question about the InfiRay iRay RH25 and is the answer not in the manual?
Power on the thermal imager and orient it correctly to avoid Helmet mode.
Ensure the device is in Handheld Mode, switching from Clip-On Mode if necessary via menu options.
Navigate menus and press all device buttons simultaneously to enable Standalone/Reticle Mode.
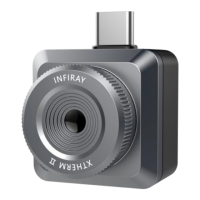
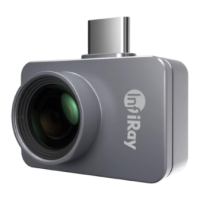
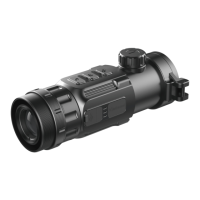
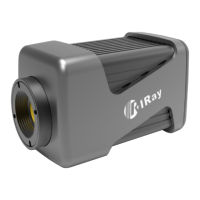
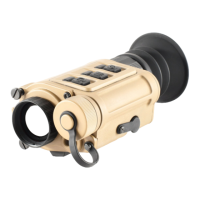
The iRay RH25 / PFalcon 640+ Thermal Imager is a sophisticated optical device designed for enhanced visibility and aiming, particularly in low-light or challenging environmental conditions. Its primary function is to provide thermal imaging capabilities, allowing users to detect heat signatures rather than visible light, which is invaluable for various applications such as hunting, surveillance, and tactical operations. A key feature of this device is its ability to operate in a "Standalone/Reticle Mode," transforming it into a self-contained aiming device complete with a reticle for precision targeting. This mode is distinct from a "Helmet Mode" and a "Clip-On Mode," offering versatility in how the imager is deployed and used.
To ensure optimal performance and correct functionality, users must understand and follow specific operational procedures. The device's interface is designed with a set of intuitive buttons located on its top surface: Power, Photo, and Menu. These buttons serve multiple purposes, acting as navigation controls within the device's menu system and as triggers for specific functions. For instance, in the Main Menu, the Power and Photo buttons function as left and right navigation keys, while the Menu button is used to select options or open sub-menus.
The process of enabling the Standalone/Reticle Mode highlights the device's user-centric design, even if the manual's initial explanation might require clarification. The first crucial step involves ensuring the device is correctly oriented, with the buttons facing upwards, which confirms it's not in Helmet Mode. This initial check is fundamental to accessing the desired operational modes. Following this, users must verify that the device is in "Handheld Mode," indicated by a small hand symbol in the top left corner of the screen. This mode is the prerequisite for transitioning into the Standalone/Reticle Mode. If the device is found to be in "Clip-On Mode," identified by a "Clip-on" symbol, a series of steps are required to switch back to Handheld Mode.
Switching from Clip-On Mode to Handheld Mode involves navigating through the device's menu system. Users press the Menu button to open the Main Menu, then use the Power and Photo buttons to scroll until the "Working Mode icon" is highlighted. Pressing the Menu button again opens the Working Mode Settings. Within these settings, the Power and Photo buttons are repurposed as up and down controls, allowing the user to select "Handheld Mode." Confirmation of this selection is achieved by pressing and holding the Menu button until the Working Mode Settings collapse, and then holding it again to close the Main Menu. A successful transition is visually confirmed by the appearance of the Handheld Mode symbol on the screen. This multi-step process, while detailed, ensures that users can precisely control the device's operational state.
Once in Handheld Mode, the final steps to activate Standalone/Reticle Mode are straightforward. The user presses the Menu button to re-enter the Main Menu. The critical action then involves simultaneously pressing and holding all three buttons—Power, Photo, and Menu—for a duration of 10 seconds. This specific combination and timing act as a dedicated command to toggle the Standalone/Reticle Mode. Upon successful activation, a unique "Standalone/Reticle Mode" symbol will become visible in the top right corner of the screen, confirming that the device is now configured for standalone aiming with a reticle. This method of activation, requiring a simultaneous press of multiple buttons, is a common design choice in advanced optical devices to prevent accidental mode changes and ensure intentional user input.
The iRay RH25 / PFalcon 640+ Thermal Imager is designed for robust field use, and its operational modes cater to diverse user needs. While the manual focuses heavily on the activation of specific modes, it implicitly suggests a device built for durability and reliability. The clear visual indicators for different modes (hand symbol, clip-on symbol, reticle symbol) are crucial for user feedback, allowing operators to quickly ascertain the device's current status without extensive menu navigation once familiar with the symbols. The emphasis on precise button presses and holding durations underscores the device's sophisticated internal logic and the need for users to follow instructions carefully to unlock its full potential. The ability to switch between modes, particularly from a clip-on configuration to a standalone aiming device, highlights its adaptability across various platforms and operational scenarios, making it a versatile tool for professionals and enthusiasts alike.
| Frame Rate | 50 Hz |
|---|---|
| Field of View | 10.5°x8° |
| Display | 1280x960 LCOS |
| Battery Type | Li-ion battery |
| Battery Life | 6h |
| Weight | <500g |
| Ingress Protection (IP) Rating | IP67 |
| Sensor Type | Uncooled Vox |
| Magnification | 2.0-8.0x |
| Digital Zoom | x1 - x4 |
| Operating Time | Up to 6 hours |
| Spectral Range | 8~14μm |
| Focus | Manual |
| Video Output | Yes |
| Wi-Fi | Yes |
| Operating Temperature | -20°C to +50°C |
| Storage Temperature | -40°C to +70°C |