30
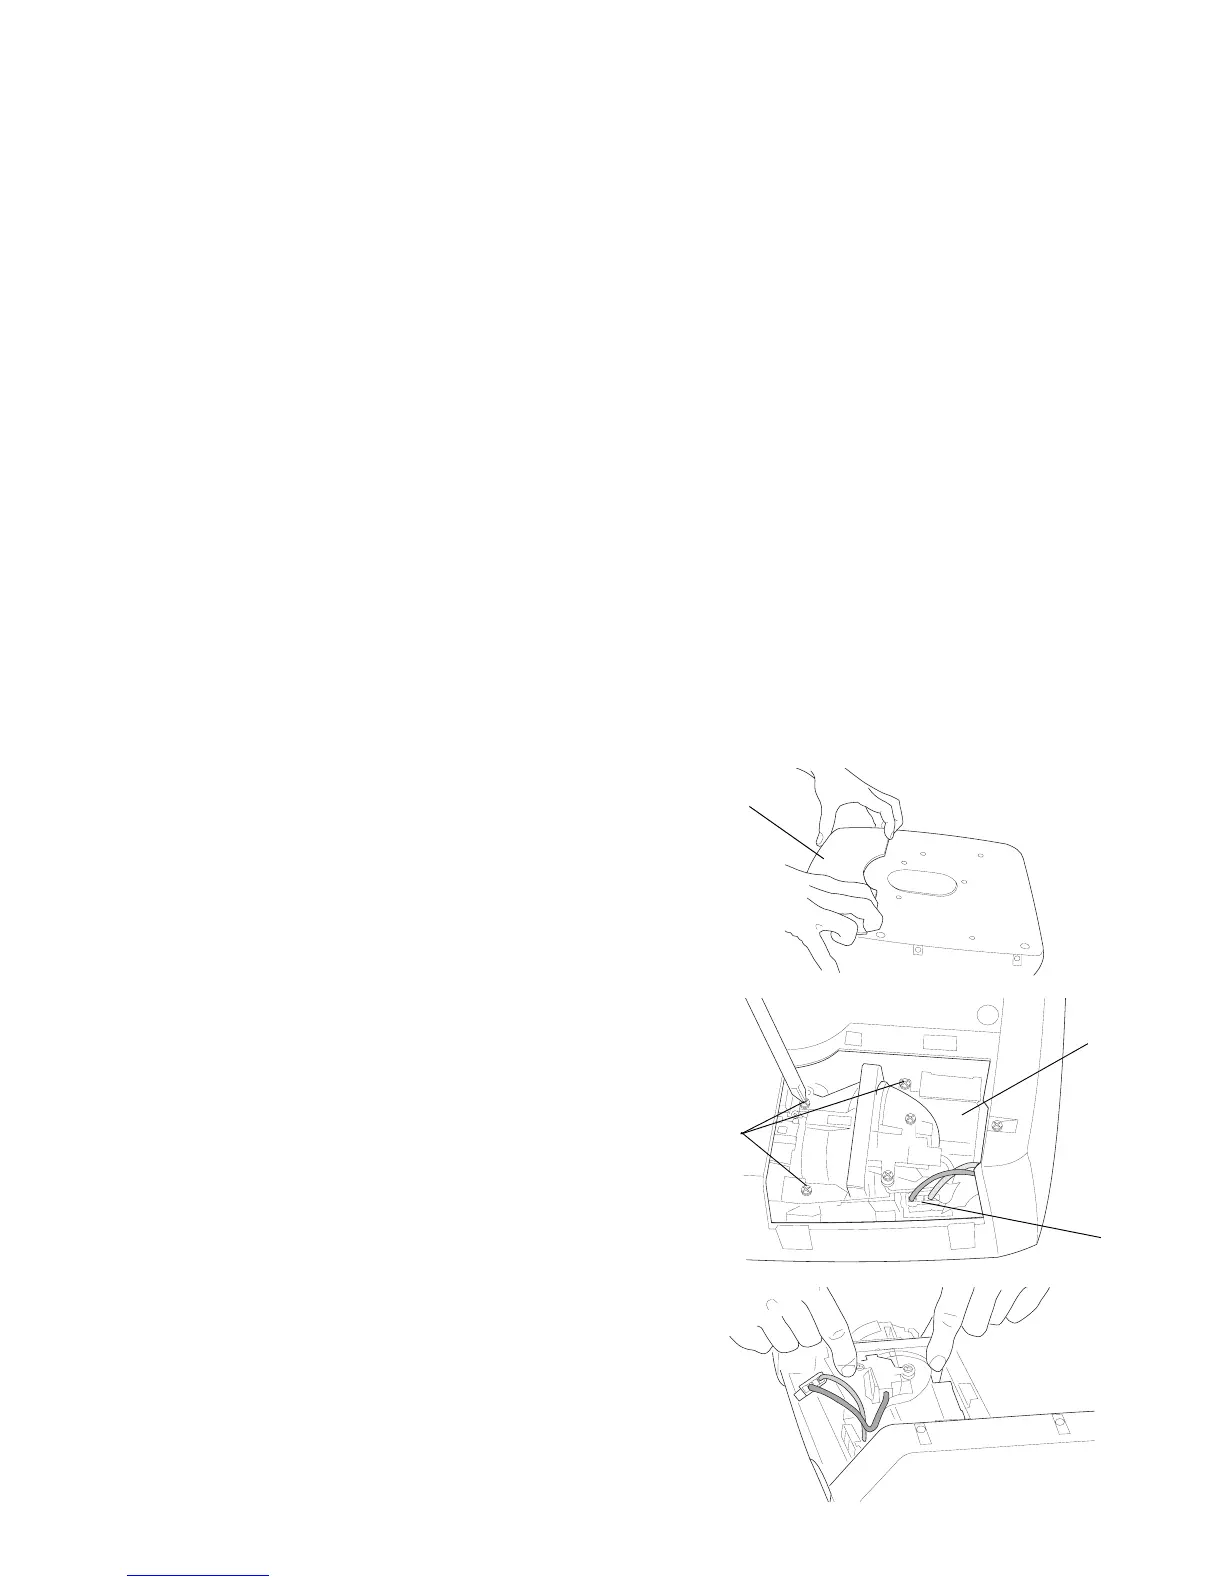
4 Push the 2 tabs on the lamp door toward the front of the projector and
lift the lamp door off.
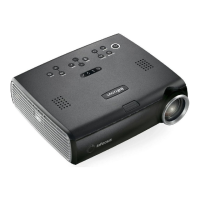
5 Loosen the three captive screws that attach the lamp housing to the pro-
jector.
6 Detach the lamp connector from the projector by depressing the locking
tab on the connector and lightly pulling it free.
WARNING:
To avoid burns, allow the projector to cool for at least 60 minutes
before you replace the lamp.
Be extremely careful when removing the lamp housing. In the
unlikely event that the bulb ruptures, small glass fragments may be
generated. The lamp housing is designed to contain these frag
-
ments, but use caution when removing the lamp housing. Before
replacing the lamp, clean the lamp compartment and dispose of
cleaning materials. Wash hands after lamp replacement. This prod
-
uct has a lamp which contains a very small amount of mercury. Dis-
pose of it as required by local, state or federal ordinances and
regulations. For more information see www.eiae.org.
7 Carefully remove the lamp housing. Dispose of the lamp in an environ-
mentally proper manner.
8 Install the new lamp housing and tighten the screws.
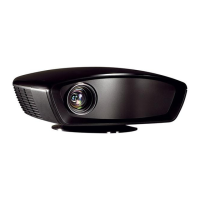
9 Re-attach the lamp connector to the projector. The locking tab should
engage when the connector is fully plugged in.
lamp door
lamp
housing
lamp
connector
captive screws