30
4
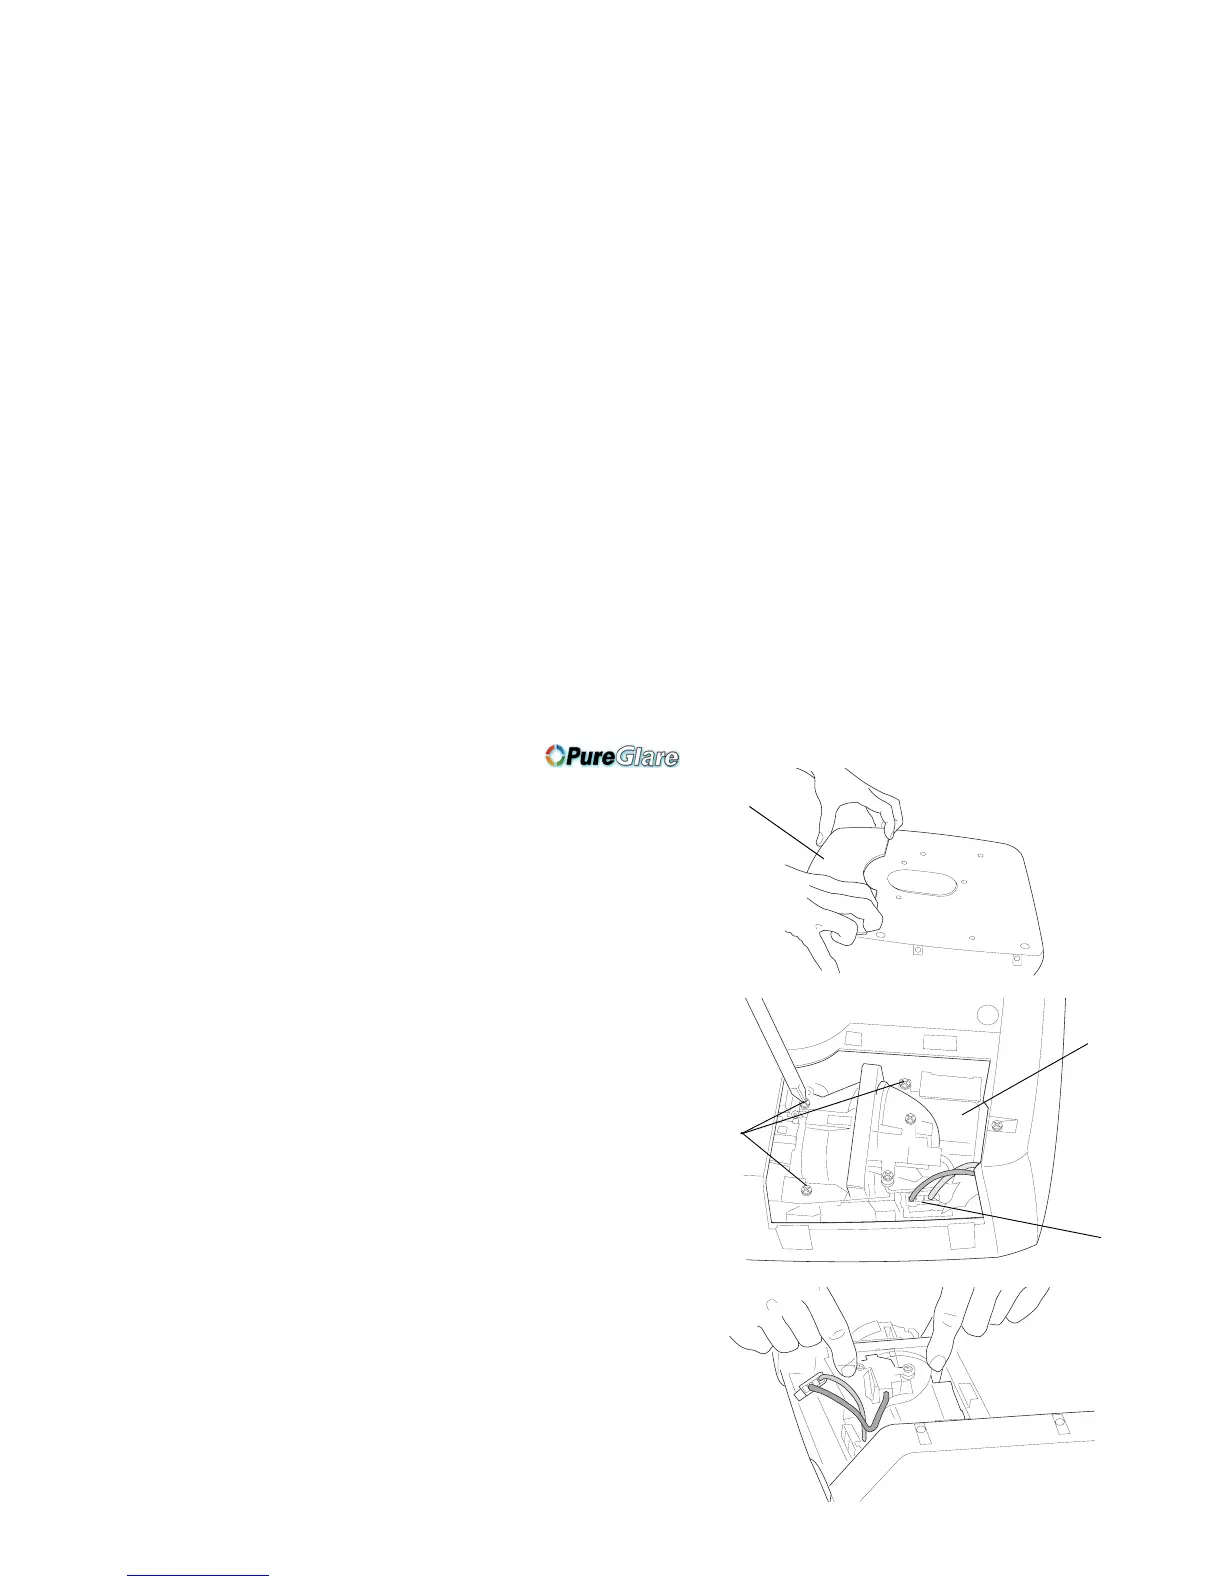
Push the 2 tabs on the lamp door toward the front of the projector and
lift the lamp door off.
5 Loosen the three captive screws that attach the lamp housing to the pro-
jector.
6 Detach the lamp connector from the projector by depressing the locking
tab on the connector and lightly pulling it free.
WARNING:
To avoid burns, allow the projector to cool for at least 60 minutes
before you replace the lamp.
Be extremely careful when removing the lamp housing. In the
unli
kel
y event that the bulb ruptures, small glass fragments may be
generated. The lamp housing is designed to contain these frag-
ments, but use caution when removing the lamp housing. Before
re
placing the lamp, clean the lamp compartment and dispose of
cleaning materials. Wash hands after lamp replacement.
Hg – Lamp contains mercury. Manage in accordance with
local disposal laws. See www.lamprecycle.org
.
7 Carefully remove the lamp housing. Dispose of the lamp in an environ-
mentally proper manner.
8 Install the new lamp housing and tighten the screws.
9 Re-attach the lamp connector to the projector. The locking tab should
engage when the connector is fully plugged in.
lamp door
lamp
housing
lamp
connector
captive screws
 Loading...