14 15
Setting the Meter Setting the Meter
Year
After pressing and releasing either Ƈ or Ɖ
buttons to set the year (from 2008 to 2099),
confirm with .
Date / Time
After pressing and releasing either Ƈ or Ɖ
buttons to set the date and time, confirm each with
.
Test unit
Press and release either Ƈ or Ɖ buttons to set
the test unit (mg/dL or mmol/L), confirm with .
Caution
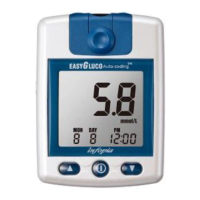
1. **VERY IMPORTANT: Correct test unit.
Your EASYGLUCO Auto-coding
TM
Meter is pre-set to mg/dL as test unit. A wrong
test unit will lead to wrong test result display! Please consult your healthcare
professional if you’re not sure which test unit to use. Stored test results are
displayed correctly after re-setting the test unit. See also conversion table on
page 38
2. Without setting the date properly, the average glucose level and the results in
memory will not show proper values. It is recommended to set the meter before
use and when new batteries are installed.
3. Yon can’t test your blood glucose while in the setting mode.
4. To turn the meter off during setup, press for at least 3 seconds
Alarm on/off
After pressing and releasing either Ƈ or Ɖ
buttons to turn the alarm on/off, confirm with .
Number of days for average
After pressing and releasing either Ƈ or Ɖ
buttons to set the number of days for average
calculation (3 different possible), confirm with .
Alarm time
After pressing and releasing either Ƈ or Ɖ
buttons to set the alarm hour and minute, confirm
with .
Alarm
After programming the number of desired alarms
(5 alarms possible), confirm with .