Installation, Operation and Maintenance Manual for Ingenia Outdoor Units CAH-OD-16-00
28
8.8 Installation of Exhaust and/or Outside Air Hood(s)
Prior to the installation of the hoods, make sure that the openings are properly sealed. Place
particular attention to the corners as if a gap can be seen at the corners, apply some caulking
to improve the seal. Using the finishing screws, attach the hoods to their designed location.
Once the hood(s) are in place, apply a bead of silaprene caulking all around the hood(s) as
indicated in figure 18.
9.0 Start-up
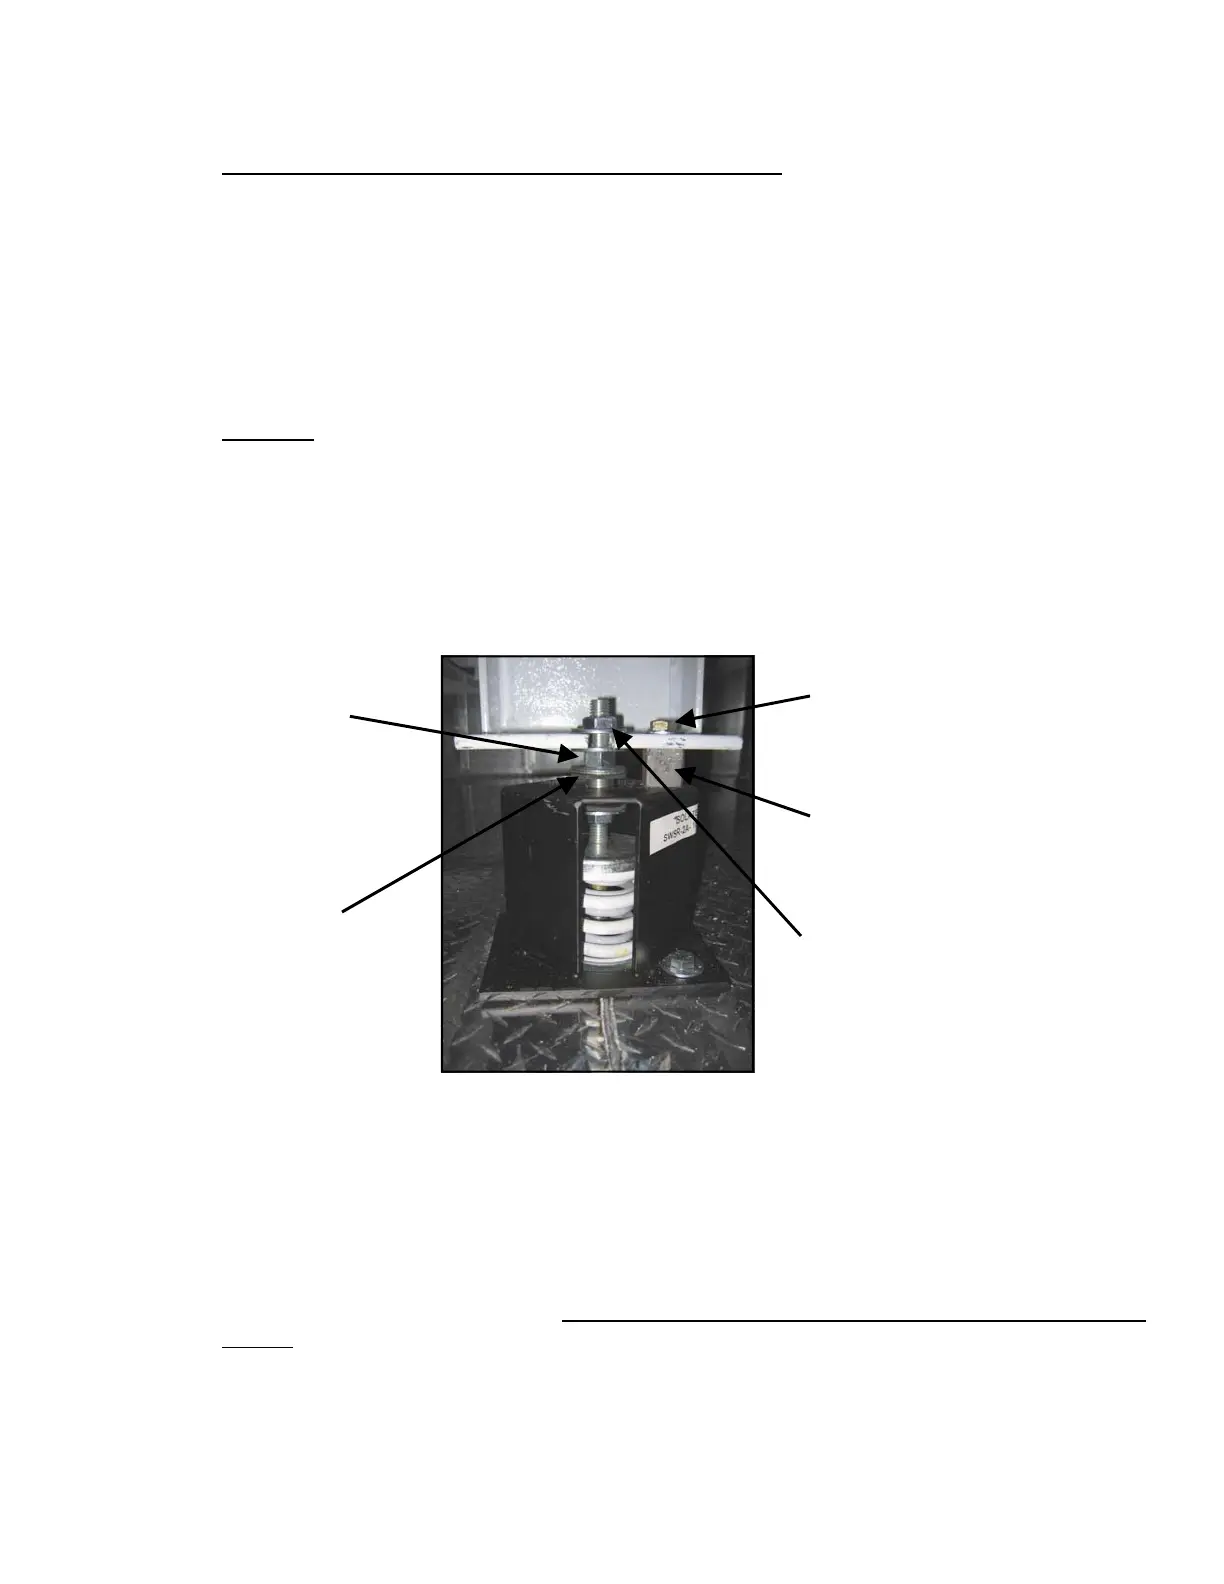
A. After equipment is installed at its final location, remove the shipping bolts on the isolator
housing as seen in the figure below. Turn adjusting nut counterclockwise until equipment load
is no longer resting on shipping blocks. Remove shipping blocks and discard.
Figure 19: Fan Isolator
B. If the isolators need adjustment, simply turn the adjustment nut counterclockwise to com-
press the spring or clockwise to decompress the spring. The adjustment process should be
done gradually on all isolators. The isolators are equalized when the top of the isolator housing
is approximately halfway between the top and bottom washer.
Whenever inertia bases are used, the concrete is supplied and installed by the installing con-
tractor. Therefore, it is important that the concrete be perfectly level and filled to the top of
the c-channel. If this is not done, the fan and motor assembly center of gravity will be shifted
and the isolators selected, will no longer be valid.
SHIPPING
BOLT
ADJUSTMENT
NUT (USE A
15/16” WRENCH)
BOTTOM
WASHER
TOP WASHER
SHIPPING
BLOCK
 Loading...