The X8I is equipped with comprehensive diagnostic
functions. Each input can be examined individually and
each output can be manually activated or manipulated
individually.
X8I Controller Diagnostics:
D1 Digital Input 1
D2 Digital Input 2 ON
D3 Digital Input 3
D4 Digital Input 4 OFF
D5 Digital Input 5 Pulsing
D6 Digital Input 6
D7 Digital Input 7
D8 Digital Input 8
-------------------------------------------------------------
R1 Relay Output 1
R2 Relay Output 2 OFF
R3 Relay Output 3
R4 Relay Output 4 ON
R5 Relay Output 5
R6 Relay Output 6
-------------------------------------------------------------
A1 Analog Input 1 bar <> mA
A2 Analog Input 2 v
A3 Analog Input 3 v
-------------------------------------------------------------
Ao Analog Output 0.0 to 20.0mA
Digital Inputs:
OFF (open circuit)
ON (closed circuit)
Pulsing
The pulse signal from an ‘ir-PCB’ is 0V to 24VDC at
50/60Hz. A typical DC voltage meter, or multimeter, will
detect this as 12VDC +-4V.
Relay Outputs:
Each relay output can be energized and de-energized
manually by selecting the item. Use Up(plus) and
Down(minus) to adjust and Enter.
Analog Inputs:
The Analog Inputs will alternate between the detected
value and the electrical measurement on the controller
input terminals. An independent measuring device can
be used to check the displayed electrical measurement.
A1: System Pressure, 4-20mA
A2: Digital: ir-PCB #4 – Alarm/Serv.
A3: Digital: Auxiliary Input (D1)
Analog Output:
The analog output can be manually adjusted. Use
Up(plus) and Down(Minus) to adjust and Enter. The
output will return to normal operational value upon
menu exit.
The analog output is utilized on the Terminal PCB to
switch the ir-PCB V outputs. Set the analog output to the
following to switch each ‘V’ output as required.
4.0mA All ‘V’ outputs OFF
7.0mA V1 = ON; V2, 3 and 4 = OFF
11.0mA V2 = ON; V1, 3 and 4 = OFF
15.0mA V3 = ON; V1, 2 and 4 = OFF
19.0mA V4 = ON; V1, 2 and 3 = OFF
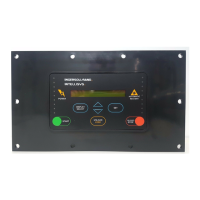
D02 Diagnostics – LED Panel

 Loading...