www.insigniaproducts.com
2
Contents
IMPORTANT SAFETY INFORMATION. . . . . . . . . . . . . . . . . . . . . . . . . . . . . . . . . . . . . . . . . . . . . . . . . . . . . . . . . . . . . . . . . . . . . . . . . . . . . . . .2
FOR YOUR SAFETY: . . . . . . . . . . . . . . . . . . . . . . . . . . . . . . . . . . . . . . . . . . . . . . . . . . . . . . . . . . . . . . . . . . . . . . . . . . . . . . . . . . . . . . . . . . . . . . . .2
Materials you may need . . . . . . . . . . . . . . . . . . . . . . . . . . . . . . . . . . . . . . . . . . . . . . . . . . . . . . . . . . . . . . . . . . . . . . . . . . . . . . . . . . . . . . . . 3
Tools you will need: . . . . . . . . . . . . . . . . . . . . . . . . . . . . . . . . . . . . . . . . . . . . . . . . . . . . . . . . . . . . . . . . . . . . . . . . . . . . . . . . . . . . . . . . . . . . 3
Installing your range . . . . . . . . . . . . . . . . . . . . . . . . . . . . . . . . . . . . . . . . . . . . . . . . . . . . . . . . . . . . . . . . . . . . . . . . . . . . . . . . . . . . . . . . . . . . . .3
Step 1: Removing packaging materials. . . . . . . . . . . . . . . . . . . . . . . . . . . . . . . . . . . . . . . . . . . . . . . . . . . . . . . . . . . . . . . . . . . . . . . . . . . . . 3
Step 2: Preparing the opening (for indoor use only) . . . . . . . . . . . . . . . . . . . . . . . . . . . . . . . . . . . . . . . . . . . . . . . . . . . . . . . . . . . . . . . .3
Minimum dimensions between cooktop, walls, and above the cooktop: . . . . . . . . . . . . . . . . . . . . . . . . . . . . . . . . . . . . . . . . . 4
Step 3: Electrical Requirements . . . . . . . . . . . . . . . . . . . . . . . . . . . . . . . . . . . . . . . . . . . . . . . . . . . . . . . . . . . . . . . . . . . . . . . . . . . . . . . . . . . .4
Step 4: Power Cord And Conduit Installations . . . . . . . . . . . . . . . . . . . . . . . . . . . . . . . . . . . . . . . . . . . . . . . . . . . . . . . . . . . . . . . . . . . . . .5
Step 5: 3-Wire Installation (Ground is through the neutral wire) . . . . . . . . . . . . . . . . . . . . . . . . . . . . . . . . . . . . . . . . . . . . . . . . . . . . .7
Step 6: 4-Wire Installations (Separate Ground Wire). . . . . . . . . . . . . . . . . . . . . . . . . . . . . . . . . . . . . . . . . . . . . . . . . . . . . . . . . . . . . . . . .8
Step 7: Installing the Anti-Tip Device . . . . . . . . . . . . . . . . . . . . . . . . . . . . . . . . . . . . . . . . . . . . . . . . . . . . . . . . . . . . . . . . . . . . . . . . . . . . . . .9
Step 8: Leveling the Range . . . . . . . . . . . . . . . . . . . . . . . . . . . . . . . . . . . . . . . . . . . . . . . . . . . . . . . . . . . . . . . . . . . . . . . . . . . . . . . . . . . . . . .10
Locating the Model and Serial Number . . . . . . . . . . . . . . . . . . . . . . . . . . . . . . . . . . . . . . . . . . . . . . . . . . . . . . . . . . . . . . . . . . . . . . . . . . .11
IMPORTANT SAFETY INFORMATION
Read these instructions completely and carefully.
• IMPORTANT—Save these instructions for local inspector’s use.
• IMPORTANT—Observe all governing codes and ordinances.
• Note to Installer – Be sure to leave these instructions with Consumer.
• Note to Consumer – Keep these instructions for future reference.
• Skill level – Installation of this appliance requires a qualified installer or electrician.
• Proper installation is the responsibility of the installer.
• Product failure due to improper installation is not covered under warranty.
FOR YOUR SAFETY:
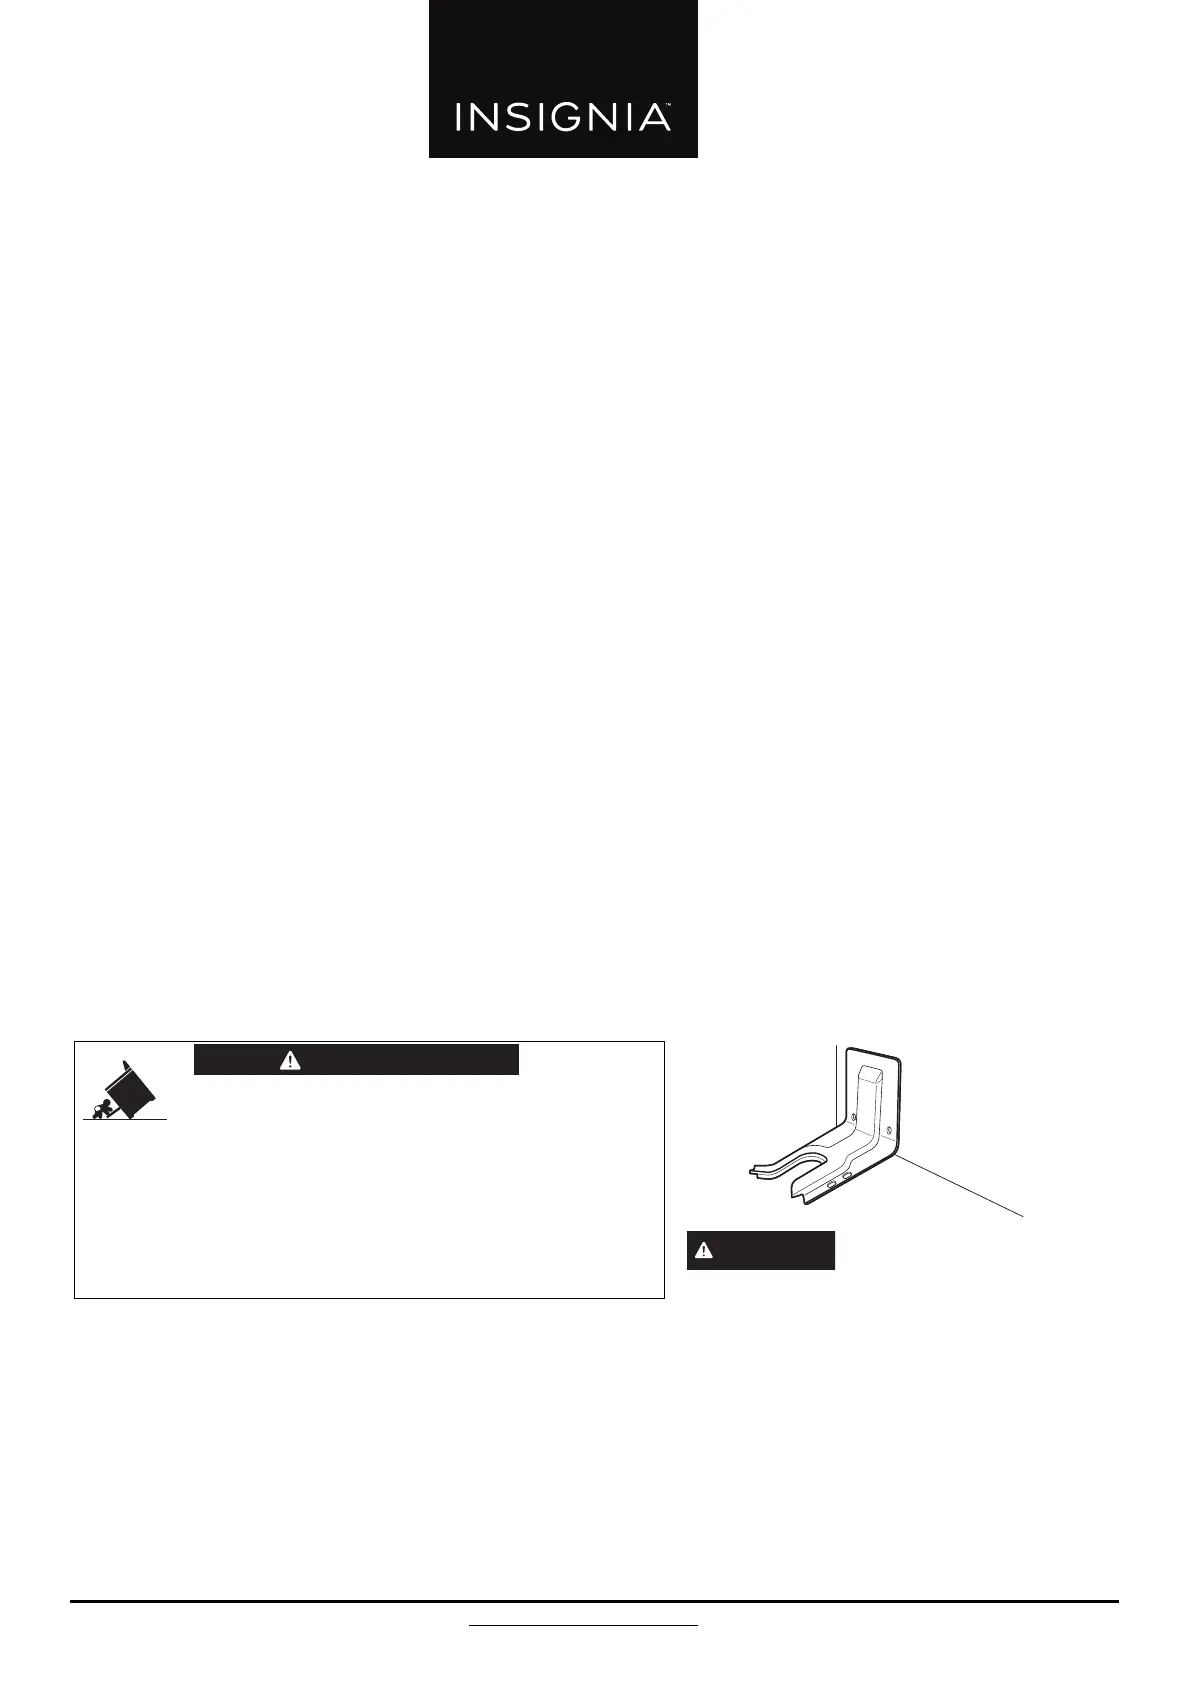
Anti-Tip Bracket
Kit Included
If you did not receive an anti-tip bracket with your
purchase, call 1-877-467-4289 (U.S. and Canada) to
receive one at no cost. For installation instructions
of the bracket, visit: www.insigniap;roducts.com
Before beginning the
installation, switch power off at service panel and
lock the service disconnecting means to prevent
power from being switched on accidentally.
When the service disconnecting means cannot be
locked, securely fasten a prominent warning
device, such as a tag, to the service panel.
Tip Over Hazard
• A child or adult can tip the range and be killed.
• Install the anti-tip bracket, provided with the unit, to the
wall or floor.
• Engage the range to the anti-tip bracket by sliding the
range back such that the foot is engaged.
• Re-engage the anti-tip bracket if the range is moved.
• Failure to do so can result in death or serious burns to
children or adults.
 Loading...