Inspire System Models 3024, 4063, 4323 English 25
200-079-101 Rev A
3024EN_ch.fm 5/6/14 10:31 pm
4.625 x 6 inches (117 mm x 152 mm)
Inspire Medical Confidential
Making the IPG Pocket
When selecting the location for the IPG pocket, consider patient lifestyle factors, such as the
use of firearms, carrying backpacks, and other work or recreation related activities. The
following instructions reflect the typical IPG pocket location.
1. Make a 5–6 cm (1.9–2.4 in) incision mid-line 2–3 cm (0.8–1.2 in) below the right clavicle,
taking precautions to ensure that the patient’s typical arm movements with activities of
daily living will not cause the IPG to ride up onto the clavicle.
2. Make a subcutaneous pocket of sufficient size to contain the IPG and any excess lead
wrap, which can typically be expected.
Tunneling the Lead
These instructions apply to both the stimulation lead and the respiratory sensing lead. Use the
tunneling tool to pass the lead connector from the point of lead implantation to the
subcutaneous pocket, avoiding sharp angle bends of the lead body. An intermediate incision
between the lead implant site and the IPG subcutaneous pocket is usually not necessary.
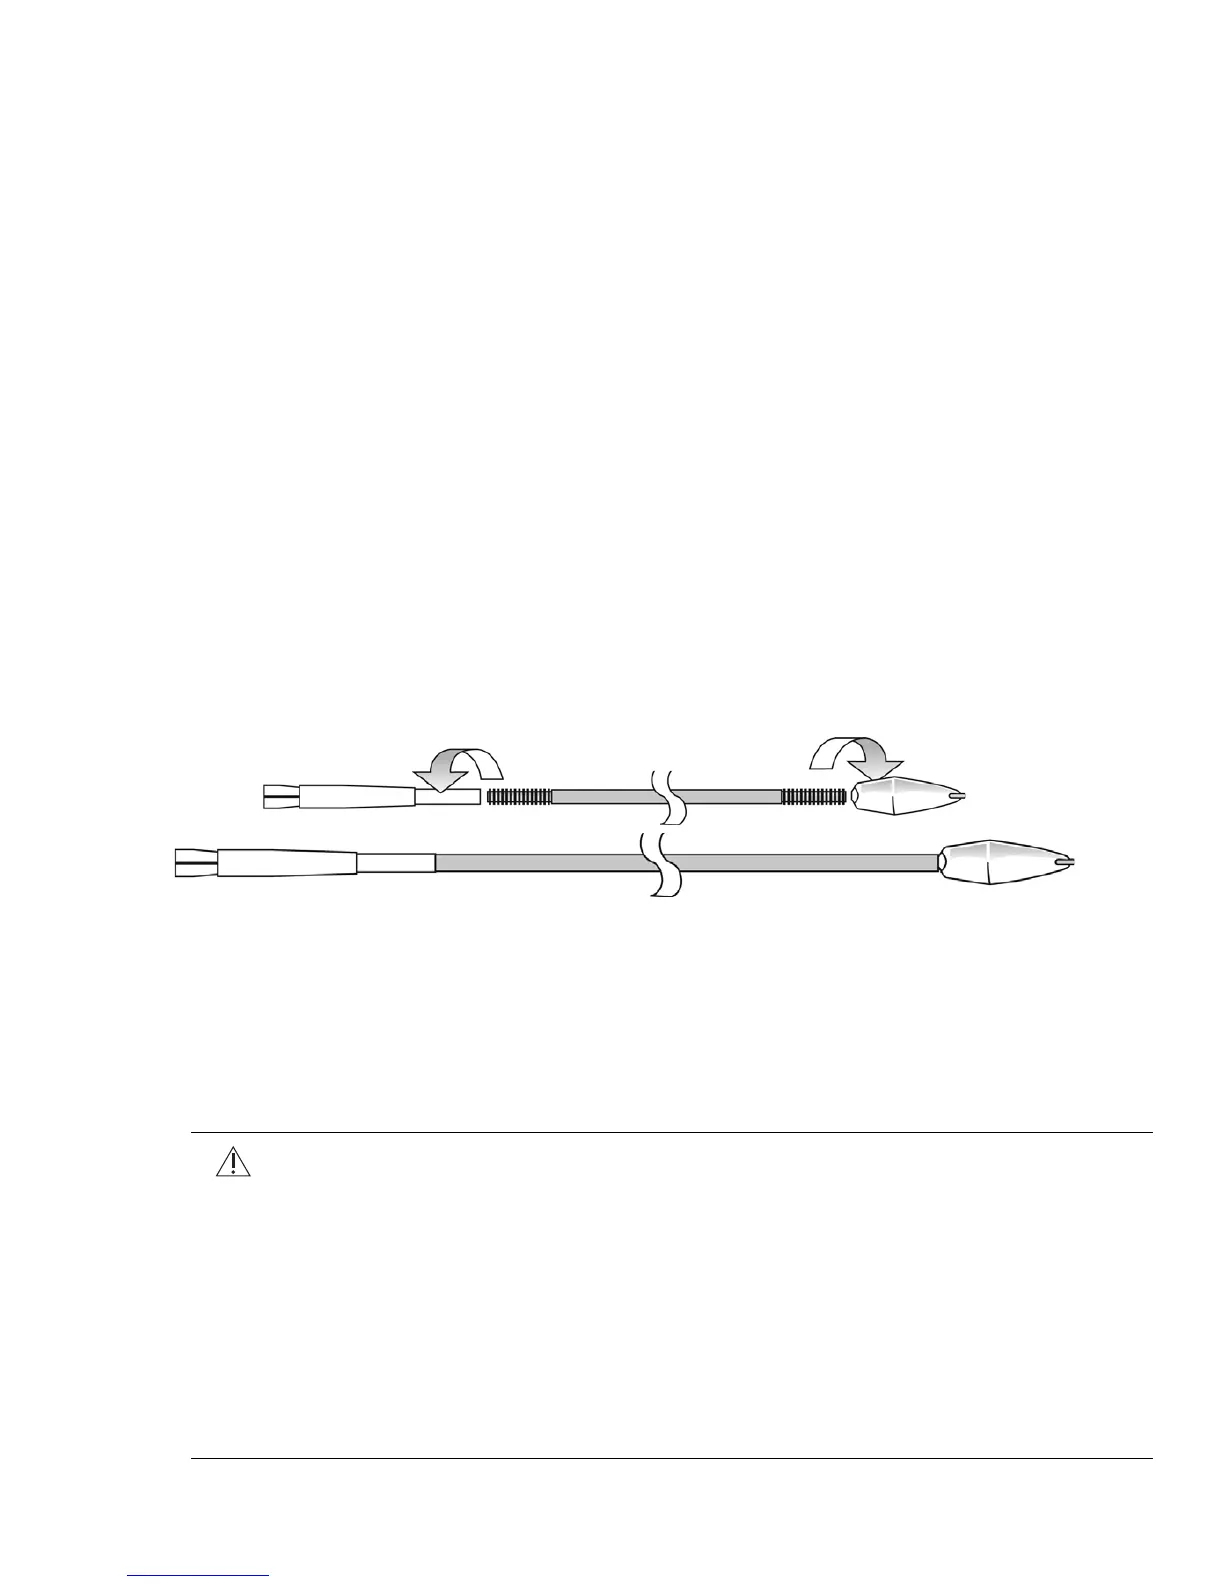
1. Locate the sterile tunneling tool (Figure 12) provided with the stimulation lead packaging.
• Prior to assembly, the rod may be bent into a bow shape to aide tunneling. Generally, it
is better to make multiple gentle bends than a single sharp bend.
• The tool is assembled by threading the tip and the collet assembly to the stainless steel
rod. Attach the tip first and the collet only after the tunnel is established.
Figure 12. Tunneling tool components
2. Simulate the final positioning by identifying where the lead connector will exit the eventual
tunnel.
3. Tunnel the tunneling tool from the lead incision to the IPG pocket before attaching the
collet. Advance the tunneling tool subcutaneously until the tip is exposed in the IPG
pocket.
Cautions:
• Follow the tunneling path established in step 2. Deep tunneling is not
desirable. Pass the lead superficially to avoid damage to deep structures.
• To avoid damage to the lead or body tissue, do not use excessive force or
surgical instruments when using the tunneling tool.
• For the stimulation lead, tunneling the lead under the clavicle bone is not
recommended. A lead tunneled under the clavicle bone creates an
increased risk of damage to veins and/or arteries.
• To avoid damage to the collet, do not attach it to the tunneling tool until the
tunnel is established from the lead implant site to the IPG pocket.
 Loading...