16
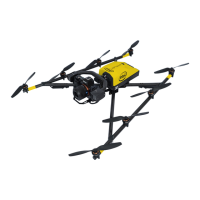
4 Are all the propellers rmly
mounted to the connected
motors?
Move each propeller gently while holding the connected motor. The
nut on top of the propellers is self-tightening. It only needs to be
finger tight (20 Ncm +-5 Ncm). Never tighten it with too much force,
as it might damage the motor. To tighten the nut, use the supplied
screw-wrench. Put the screw-wrench on the nut, hold the motor head
with the thumb and index finger of one hand, and use the index finger
of the other hand to turn the screw wrench. As soon as the motor
head starts turning as well, sufficient force has been applied.
5 Nudge every single propeller
so that it turns, and check if
any unusual sound can be
heard, or if a propeller spins
slower than the others and
stops spinning abruptly.
If there is a scratching sound or if a propeller spins slower than the others
without any unusual sound, this might come from an object in the motor.
Please use canned pressurized air to clean the motor. If there is a rattling
sound, this might come from a propeller that is not attached tightly
enough. In this case, carefully check the self-tightening nut on top of the
propeller. Tighten the nut as described in step 4.
6 Is the SD card of the Black
Box (ight logger) correctly
inserted in the back of the
UAV?
If the Status Display of the Intel® Cockpit Controller (CTR) displays the
message “No user SD” card, please take out the card, make a backup copy,
format it and re-insert it into the UAV.
7 Is the camera mount
correctly attached, and is the
thumbscrew installed in the
back of the UAV?
Make sure that the payload adapter is correctly attached onto the
payload, the camera mount is pushed all the way in, and the thumbscrew
is installed nger tight.
8 Are all the Intel® Powerpack
Batteries fully charged?
Voltage level can easily be checked using the LEDs on the front of the
batteries.
First Steps – Initial Setup
Preparing the Intel Falcon 8+ UAV
When using the Intel Falcon 8+ UAS for the rst time, some additional steps are required, which only need to be performed once.
It may be necessary to repeat them only in rare occasions. In detail, these steps are:
• Visit http://intel.com/FalconDownloads and install the latest rmware on the UAS. Consult the main manual for detailed
instructions on how to perform the rmware update. Regularly check the website for updates.
• Establish the initial connection between Intel Falcon 8+ UAV and Intel Cockpit Controller.
• Set the UAS date and time on the touchscreen tablet of the Intel Cockpit Controller.
• Perform a payload and compass calibration with every payload.
They are clearly indicated in the below descriptions as “First setup only”. All other listed steps are always required when
preparing the Intel Falcon 8+ UAS for ight missions.
1
Slide the batteries with the colored label facing upwards
(1) into the battery compartment. Slide them all the way in
until they are stopped and ush with the end of the slot.
Check that each battery is locked by its retaining clip (2).
The Intel Falcon 8+ UAV must always be own with
two batteries inserted.
Figure 28
2
2
1
 Loading...