17
Preparing the Intel Cockpit Controller
2
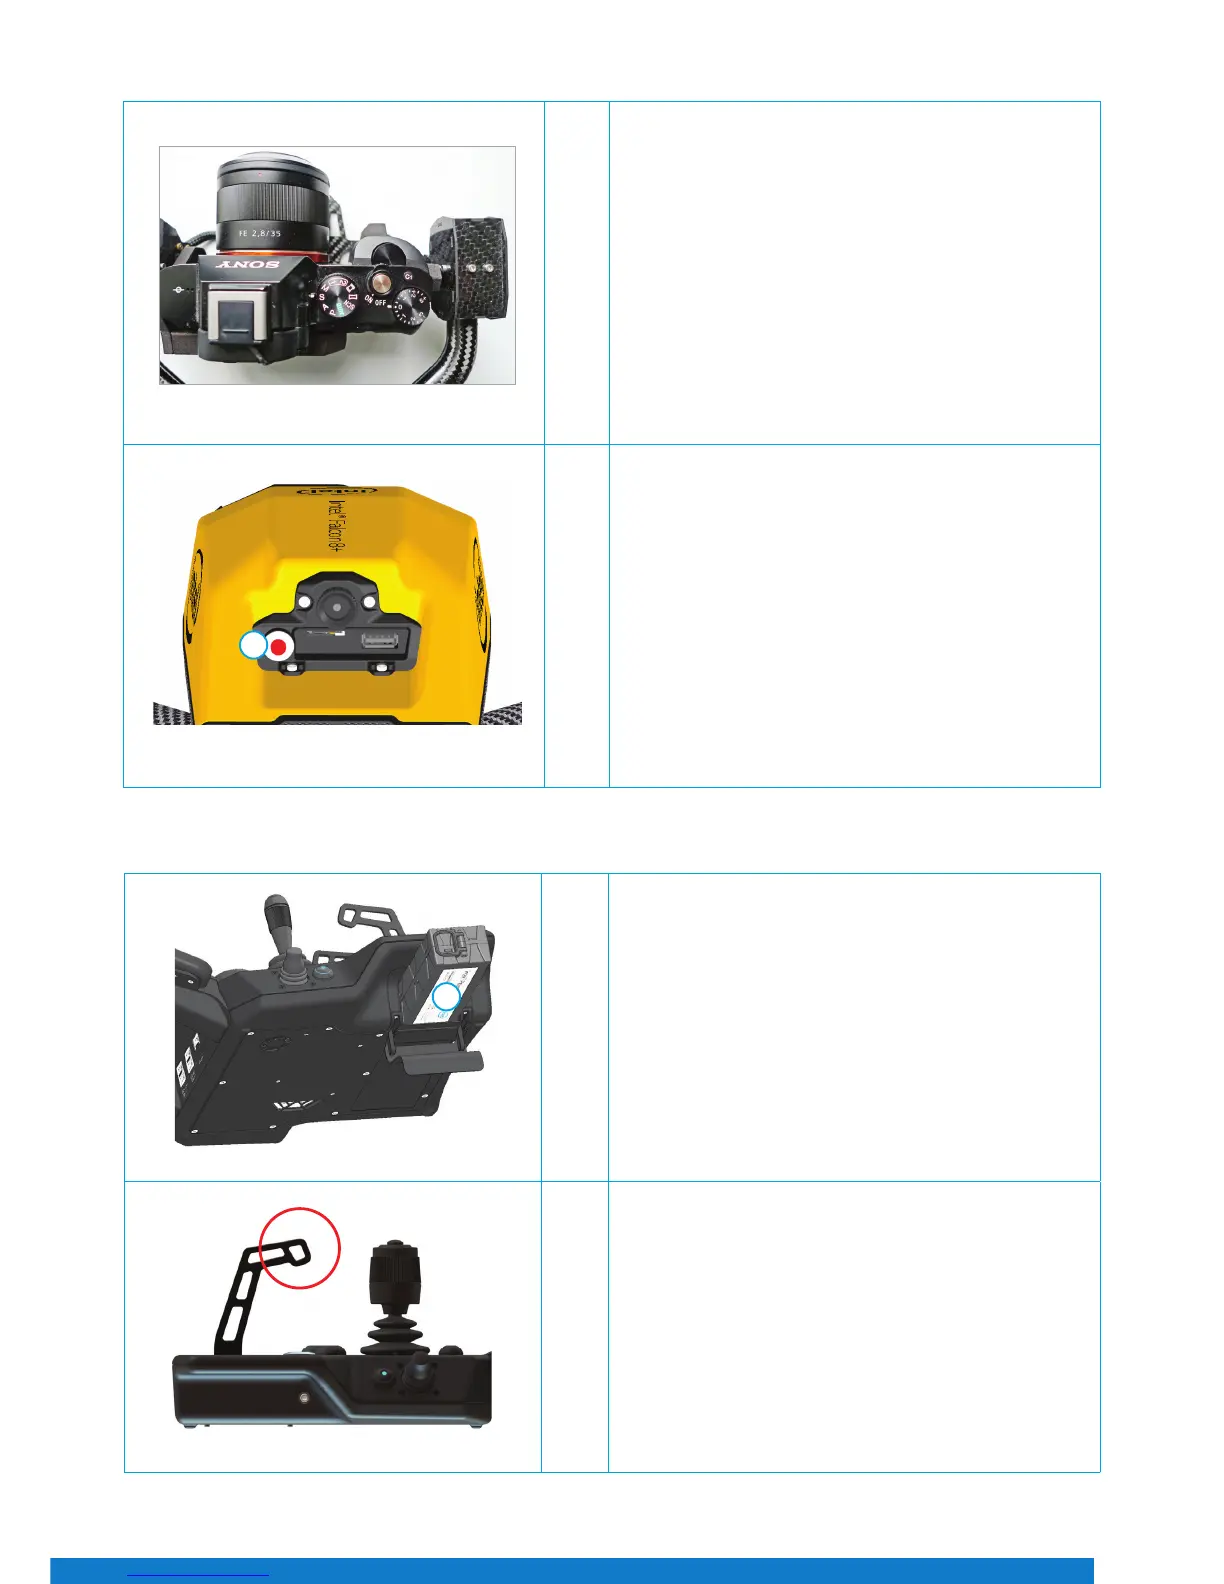
Switch ON the camera and remove the lens cap. The image
shows the Sony Alpha 7R as an example.
Please note that the ON/OFF switch on each payload is
dierent. For the Sony Alpha 7R, the ON/OFF switch is
located between Dial 1 and Dial 2 in Figure 29.
3
Press the power button (1) for approximately 2 seconds
until you hear a short beep. After approximately 3 seconds,
the LEDs on both sides of the System will be lit, and you will
hear the internal fan running.
The UAV is initialized when the gimbal starts automatically
reacting to the movements of the UAV. It requires
approximately 15 seconds to power ON, and is indicated by
a triple beep from the Intel® Falcon™ 8+ UAV.
Figure 29
Figure 30
1
1
Open the lid of the battery compartment, and slide the
battery with the colored label facing downwards into the
battery compartment. Slide it all the way in until it stops,
and is ush with the end of the slot.
The Intel Powerpack Battery provides power to the Intel
Cockpit Controller, as well as the touchscreen tablet.
2
Install the shoulder harness by connecting the carabiners
of the harness to the rst eyelet of the integrated holder
(circled in Figure 32) on each side of the cockpit.
Figure 31
Figure 32
1