Intergas Heating Ltd
19
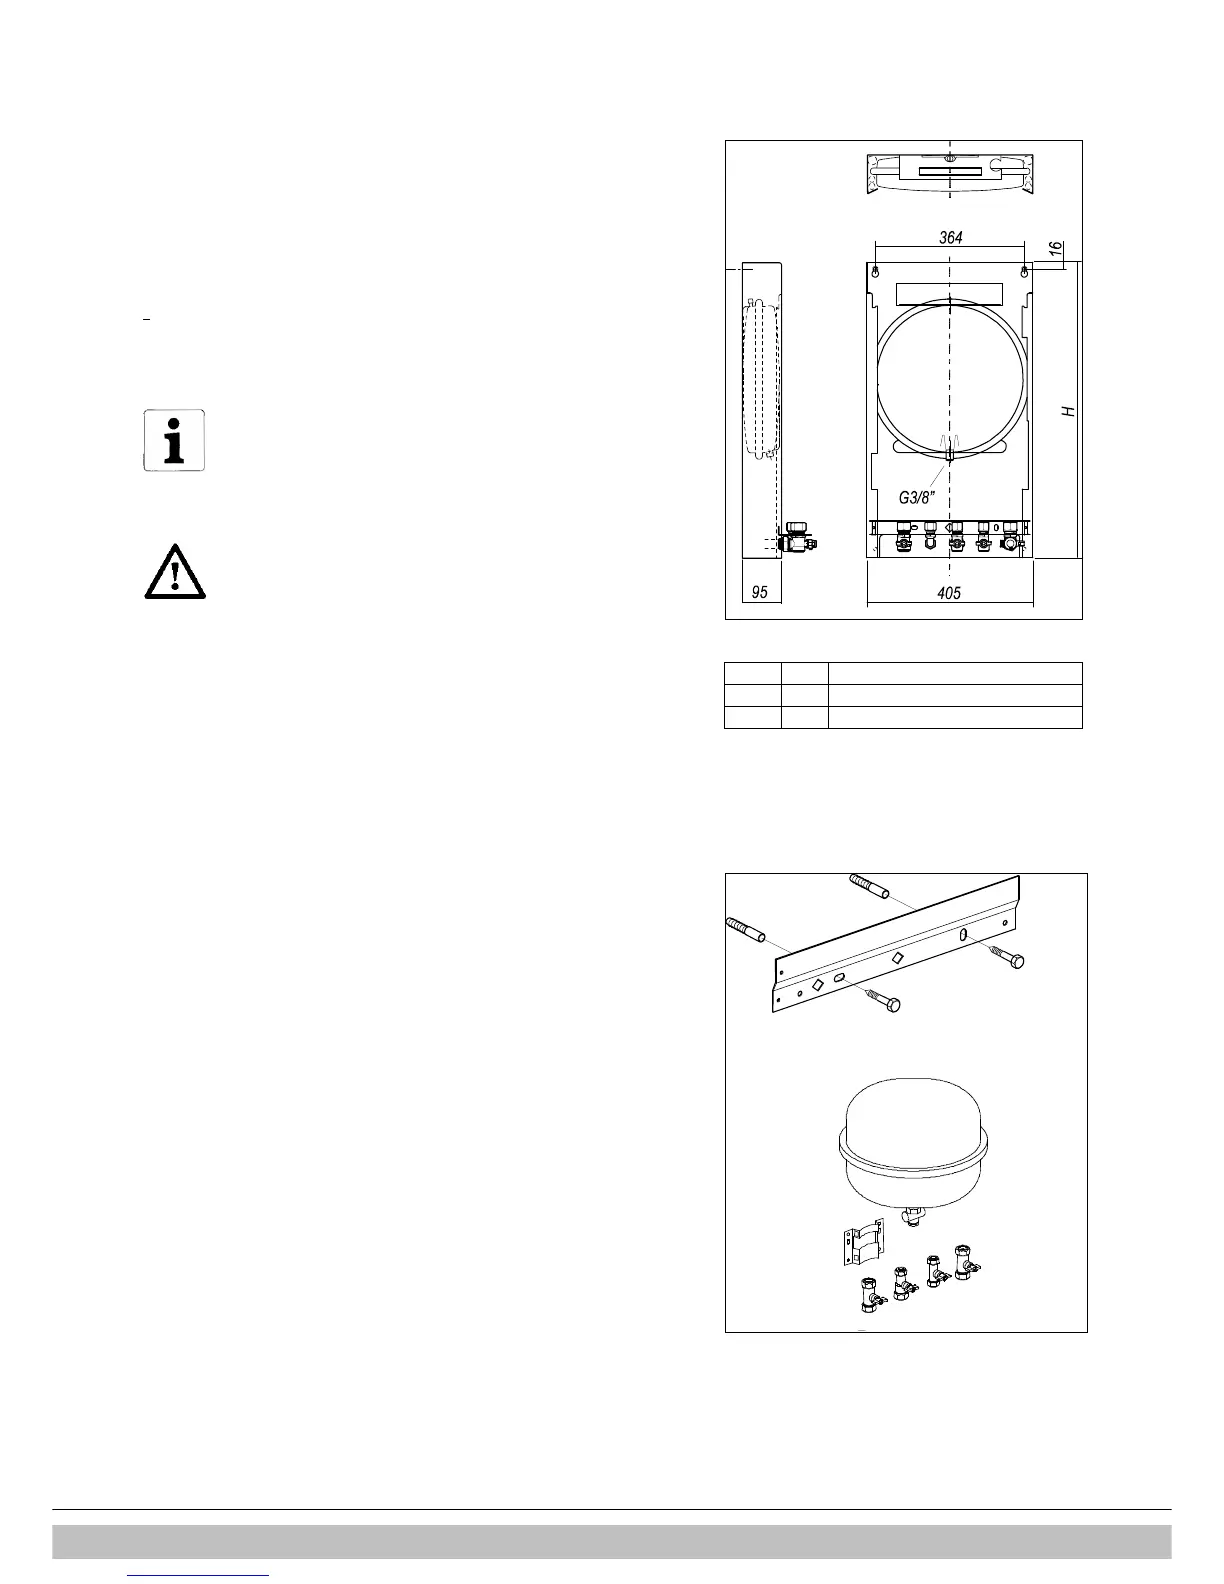
7.3 Assembly
The boiler can be mounted either on the fixing strip which is supplied in the box or to a wall
mounting jig with an expansion vessel.
The wall mounting jig includes an expansion vessel and shut off valves.
If the fixing strip is used an external ROBO kit must be fitted as well.
7.3.1 Using the wall mounting jig
•
Using the fastening materials supplied, secure the jig vertically to the wall.
Make sure the wall is suitable for placing the boiler.
•
Secure the bracket with the shut-off valves in the jig by inserting it with the flanged
side upwards through the openings (sleeves) in the jig.
N.B. The appliance is wider than the jig.
•
Install the CH heating system to the valves (DHW connections remain unused).
NOTE
All valves, with the exception of the return valve must be in a
vertical position for open. The return valve must be in
horizontal position for open.
CAUTION
Make sure that the boiler connections of the shut off valves
remain in the correct position (= straight upwards).Except
the return valve on the wall mounting jig which is horizontal
when open. Do not over tighten connections. Do not turn
tightened valves on pipes as this weakens joints within the
boiler.
7.3.2 Using the fixing strip + ROBO kit
•
Position the fixing strip to the wall and drill the holes.
•
Using appropriate fixing materials, secure the strip horizontally to the wall.
Make sure the wall is suitable for placing the boiler.
•
Hang the boiler on the fixing strip and connect the ROBO kit to the boiler and
installation.
H= 840 Compact HRE SB 30 & SB 40
H= 780 Compact HRE SB 24
H= 720 Compact HRE SB 18
+