EN - 4 UVD-IP-XP4DNR(-P) Camera
the air space must be specifically marked for that purpose or enclosed
in a conduit.
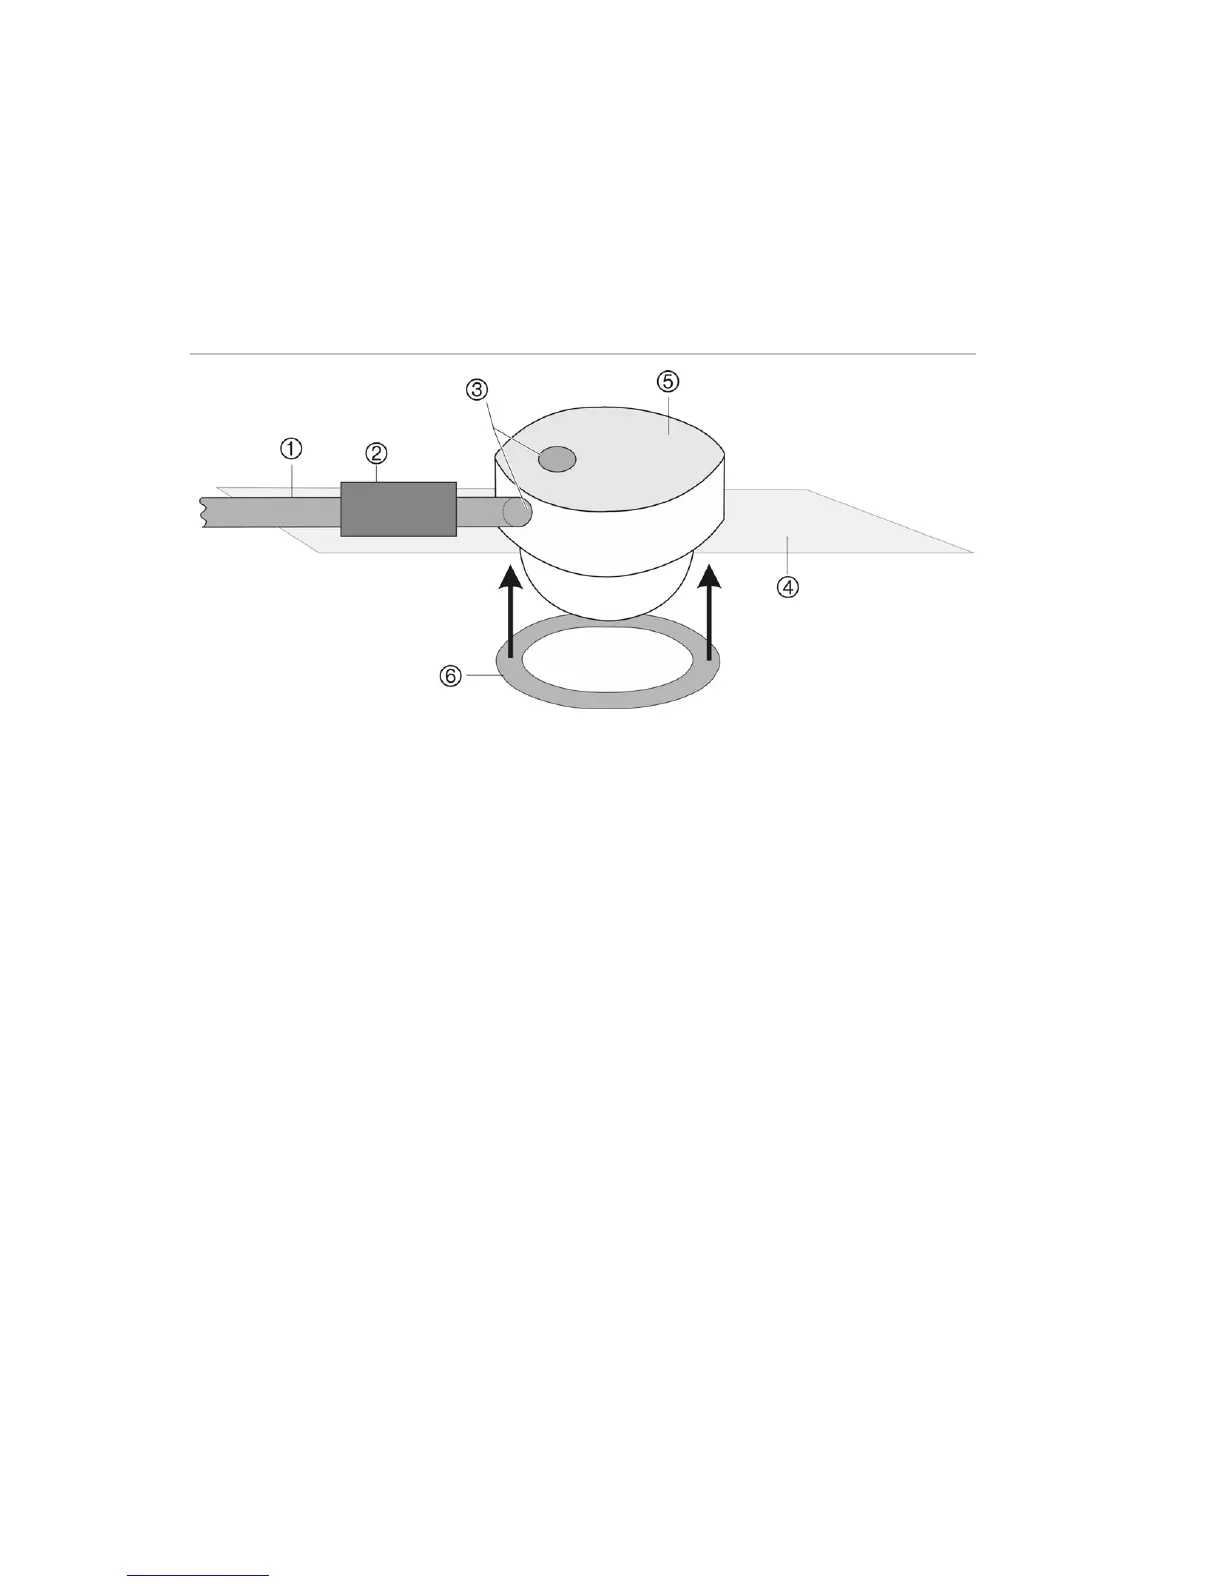
Re-route the leads from the camera so they exit from the threaded
knockout on the side of the camera (see Figure 2 below.) Move the
plug from the side threaded knockout and place it on the knockout on
the base of the camera.
Figure 2: Plenum-compliant cabling
1. Plenum-rated conduit
2. Box for connections
3. Threaded knockouts
4. Ceiling
5. Camera body
6. Trim ring
Installation
To install the camera you will need to prepare the mounting surface,
make cable connections, and mount the camera.
Viewing the camera via a digital (IP) connection
You can connect the IP camera to a network and view the images
through a browser. To view via a Network Video Recorder or similar
digital video system, please refer to the documentation associated with
that system.
Software requirements
The UVD-IP camera requires:
Microsoft Internet Explorer