1316
Power
Alert
Empty/Pause
Feed/Pause
EasyCoder
3440
2
Verifying Printer Communications With Your System
Once you have the printer connected to your system, you need to verify that the printer
communicates with your system. The easiest way to test communications is to set the printer to
Data Line Print mode and send down a character string from your system.
If you have just printed a hardware configuration test label, start with Step 4.
3440G.029
4
3
5
1
Power
Alert
Empty/Pause
Feed/Pause
3440G.026
EasyCoder
3440
3440G.020
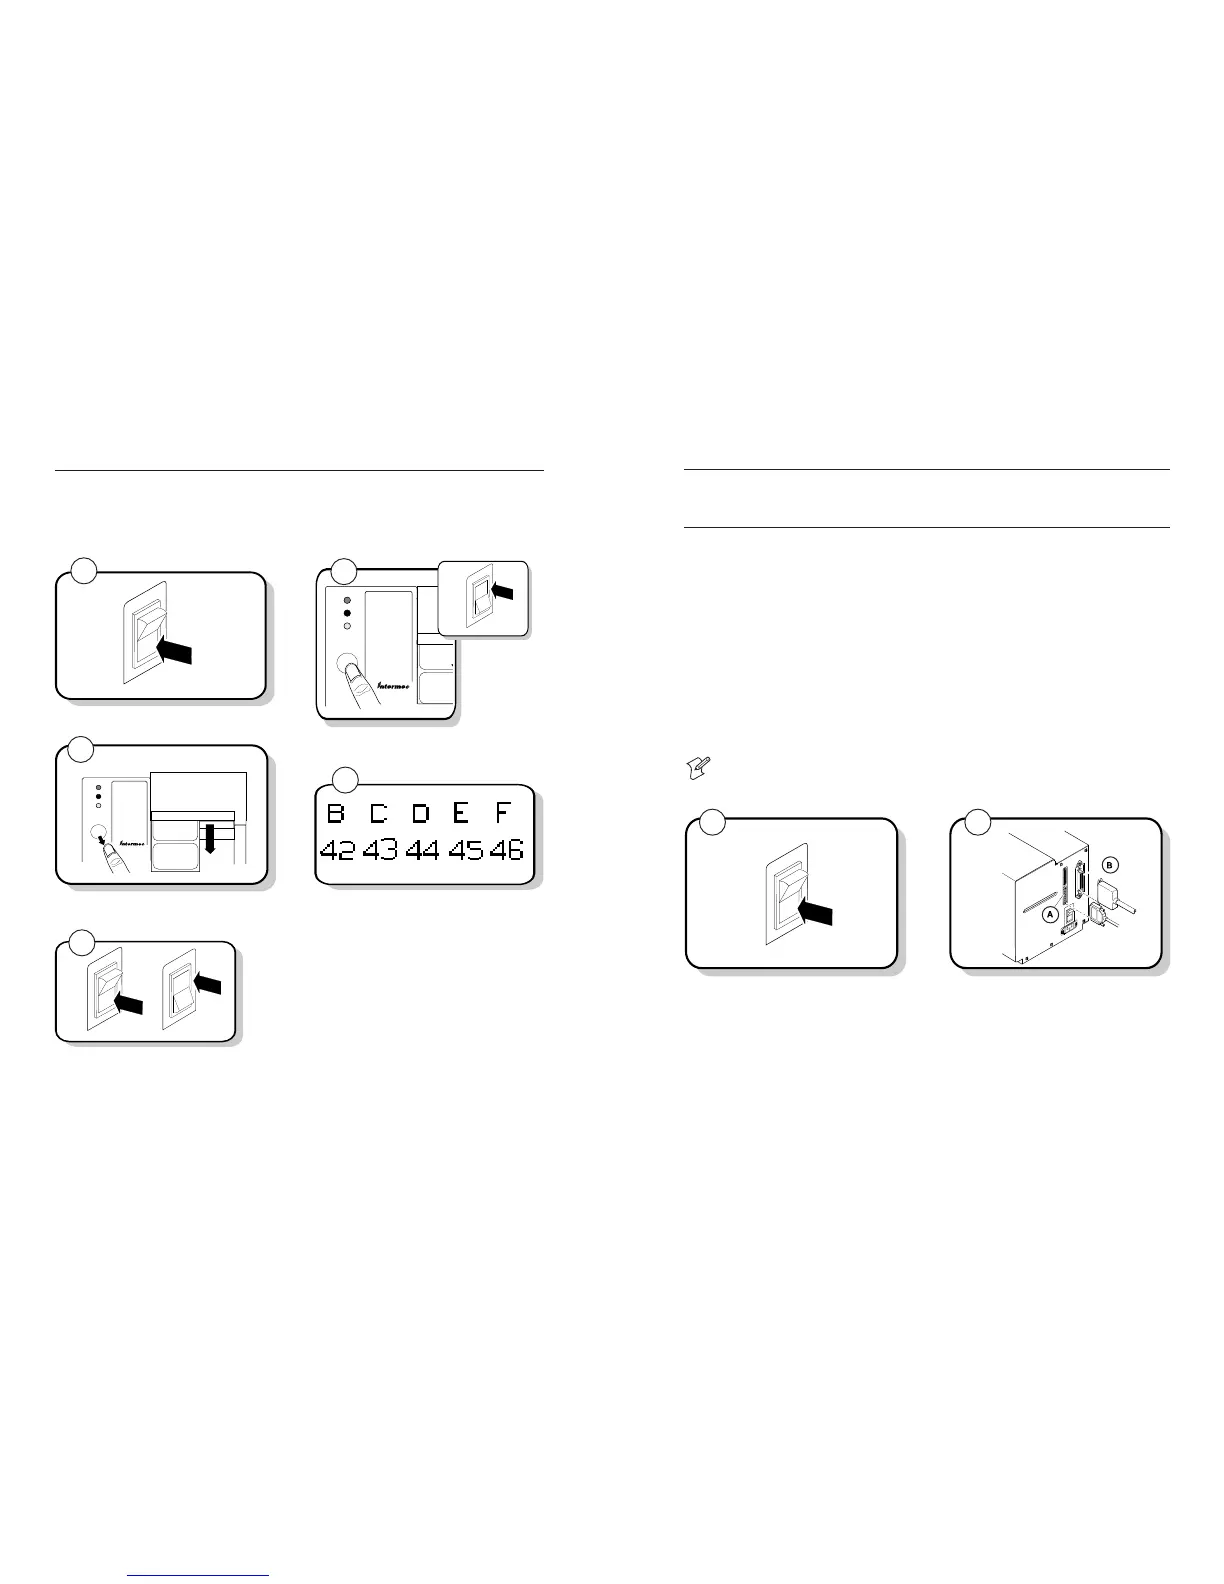
Turn the On/Off switch to the off (O) position.
Release the Feed/Pause button after the hardware
configuration test label prints.
Press and hold the Feed/Pause button. Turn the
On/Off switch to the on (|) position.
3440G.042
Send down some characters from your system.
At this point the printer does not attempt to interpret
any printer commands. It simply prints each character
with its hexadecimal equivalent underneath.
Turn the printer power off and then on again.
Connecting the Printer to Your System
You can connect your printer to a PC, a local area network, an AS/400 (or other midrange system),
or a mainframe. Use this section to connect the printer to your system.
Connecting the Printer to a PC
You can connect your printer to either a serial port or a parallel port (if you have the parallel option
installed) on your PC. You must provide the correct cables to connect the printer. Contact your
Intermec representative for ordering assistance if you do not have the appropriate cables.
Use the following table to determine the correct Intermec cable for your application. Cable
schematics for the PC serial cables appear on the following pages.
For Connecting To Use Intermec Cable
PC serial port
25F-25M, null modem, 9-wire 048668
9F-25M, null modem, 7-wire 048693
PC parallel port
Parallel port cable 051211
Note: If you are connecting the printer to a serial port on your PC, you may need to change
the serial port configuration of your PC to match the printer. See “Configuring the Serial
Port for Communications” later in this guide for the default printer configuration settings.
Plug the 25-pin connector into the serial (A) or parallel
(B) communications port on the rear of the printer.
Plug the other end of the cable into a serial (COM port)
or parallel port on your PC.
Turn the On/Off switch to the off (O) position.
1