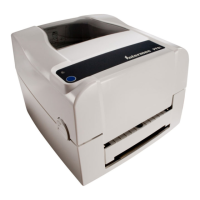
Chapter 2 — Connecting the Printer
44 PF8d and PF8t Desktop Printer User’s Guide
Connecting the Printer to Your Network
If your PF8 has an internal Ethernet card, you can connect your
printer to the network. The printer is set to automatically retrieve an
IP address from the network (DHCP) after it is turned on. You can use
the network connection with LabelShop or Intermec InterDriver. You
can also directly send commands to the printer through a terminal
emulation application, such as HyperTerminal. Terminal emulation
connections use the Raw TCP protocol through port 9100.
To connect your printer to the Ethernet network
1 Connect one end of the Ethernet cable (sold and ordered
separately) to the printer and the other end to the network.
2 On your PC, click Start > All Programs > Accessories >
Communications > HyperTerminal.
3 If this is the first time you are connecting to your printer, select a
name for your connection and click OK. The Connect To page
appears.
If you have a previous HyperTerminal connection to your printer
saved, click Cancel. Select File > Open and open your existing
connection. Continue with Step 8.
4 From the Connect using drop-down menu, select TCP/
IP(Winsock).
5 In the Host address field, enter your IP address. To find your IP
address, you can:
• send a command using a serial connection. For help, see
“Connecting the Printer Through the Serial Port” on
page 38.
• create a testprint. For help, see “Performing a Testprint” on
page 32.
6 In the Port number field, enter 9100.
7 Click OK.
Note: When you enable the Ethernet port, you disable the USB
port. Both ports cannot be enabled at the same time.