348
A
S AVE THESE INSTRUCTIONS
(348IO) SPA ENGLISH 7.5” X 10.3” PANTONE 295U 10/09/2019
English
Page 11
SET UP (continued)
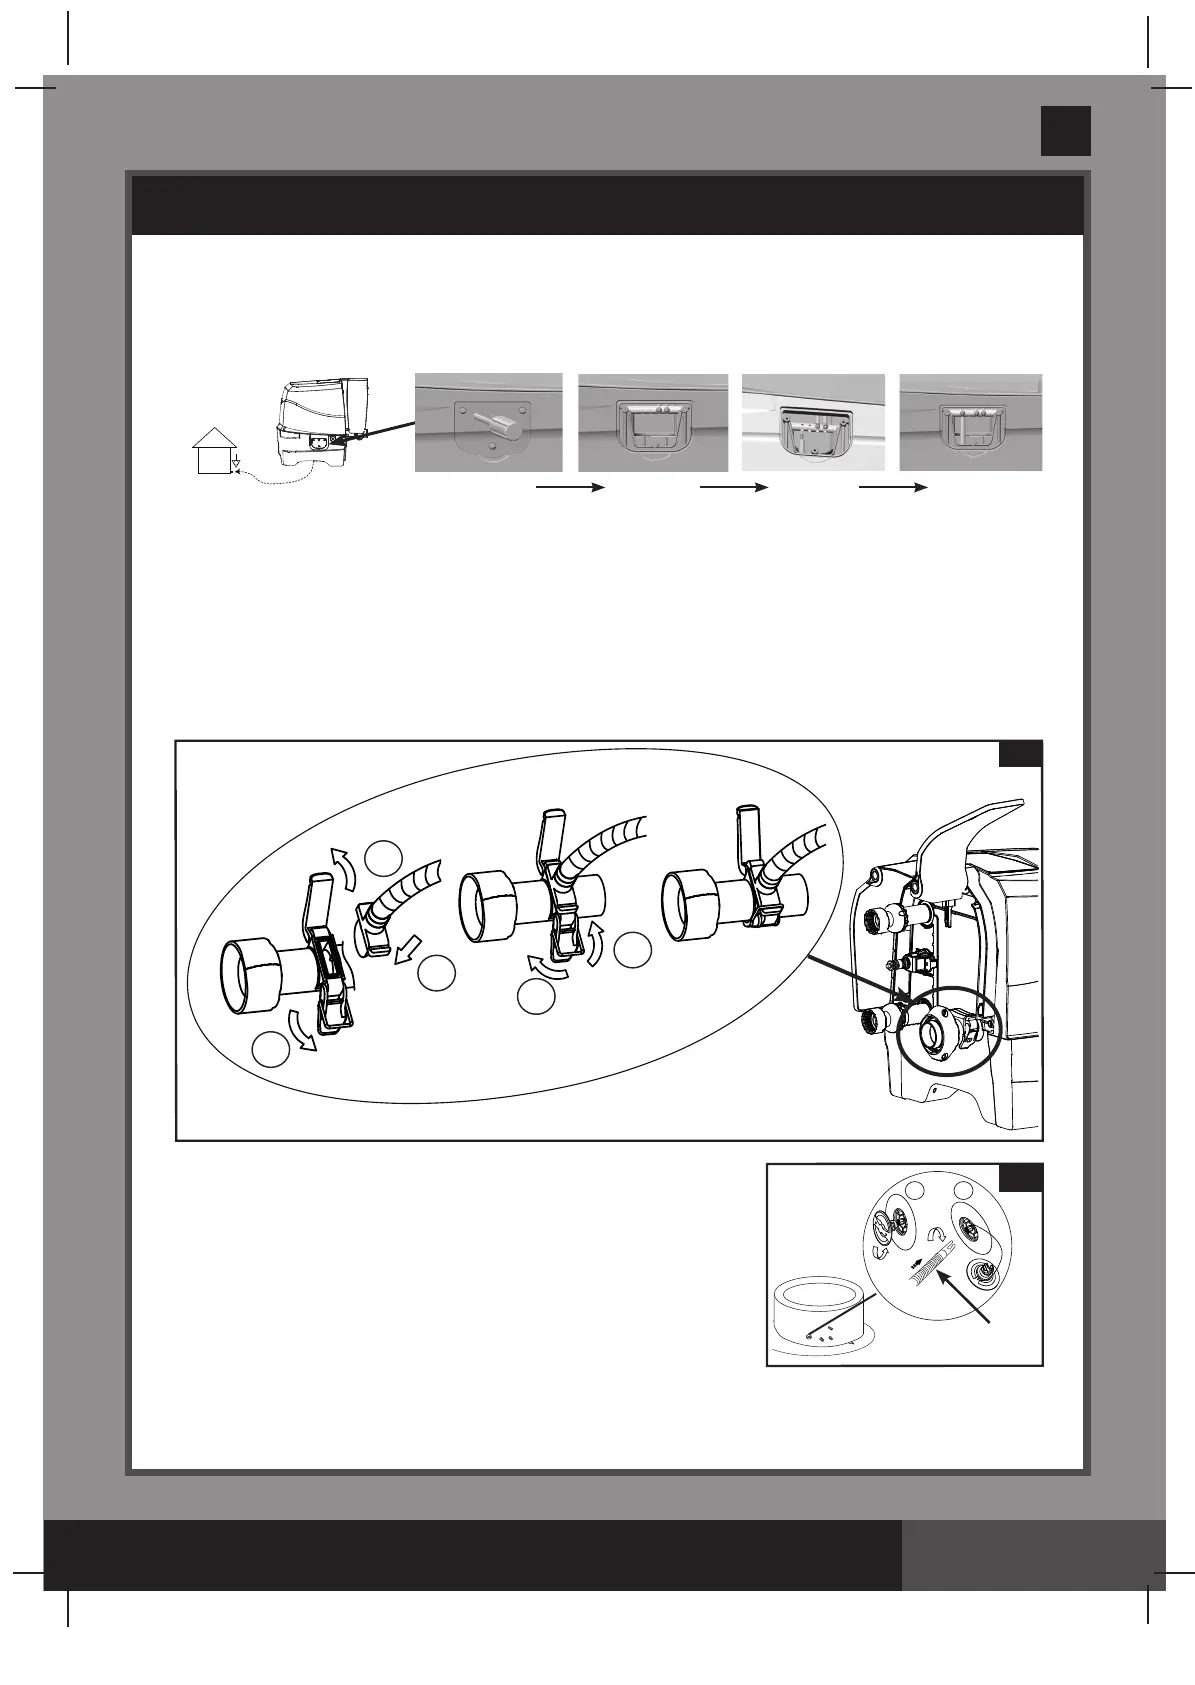
Ination
Inate the Spa Tub Wall
1.
Take out the ground cloth
(19)
and spread it over the cleared area. Then spread out the spa liner over
the ground cloth and point the drain valve towards a suitable draining area.
NOTE:
Spread the ground cloth with the bubbles facing down over the cleared area where you intend
to setup your spa.
2.
Flip up the control base side cover
(4)
torevealtheairblowerinationoutlet.Pulloutthelatchtoopen
the cover, insert the hose adaptor
(24)
with hose
and reattach the latch to the hose adaptor to secure it
in place
(see drawing 2)
.
3.
Unscrew the air valve cap on the spa tub to reveal the stem in
theuppositionforination.Inserttheotherendoftheination
hose
(7)
into the valve and turn to the right to lock it in position
(see drawing 3)
.
NOTE:
If necessary, adjust the spa tub external lining
(31)
relative
to the spa tub
(16)
in order to align the openings with the air valve
andtheconnectionttings.
2
1
2
3
4
5
Optional equipotential bonding system
Dependingonlocalbuildingcodesandregulations,haveaqualiedelectriciantoconnectthespa
equipotential terminal with a conductor (wire) having a nominal cross-sectional area of 2.5 mm
2
to 6mm
2
to
the household equipotential terminal. (Wire not included)
3
7
1 2