EndoWrist SP Camera
da Vinci SP Instruments and Accessories
10
DRAFT/PRE-RELEASE/CONFIDENTIAL
12/5/19
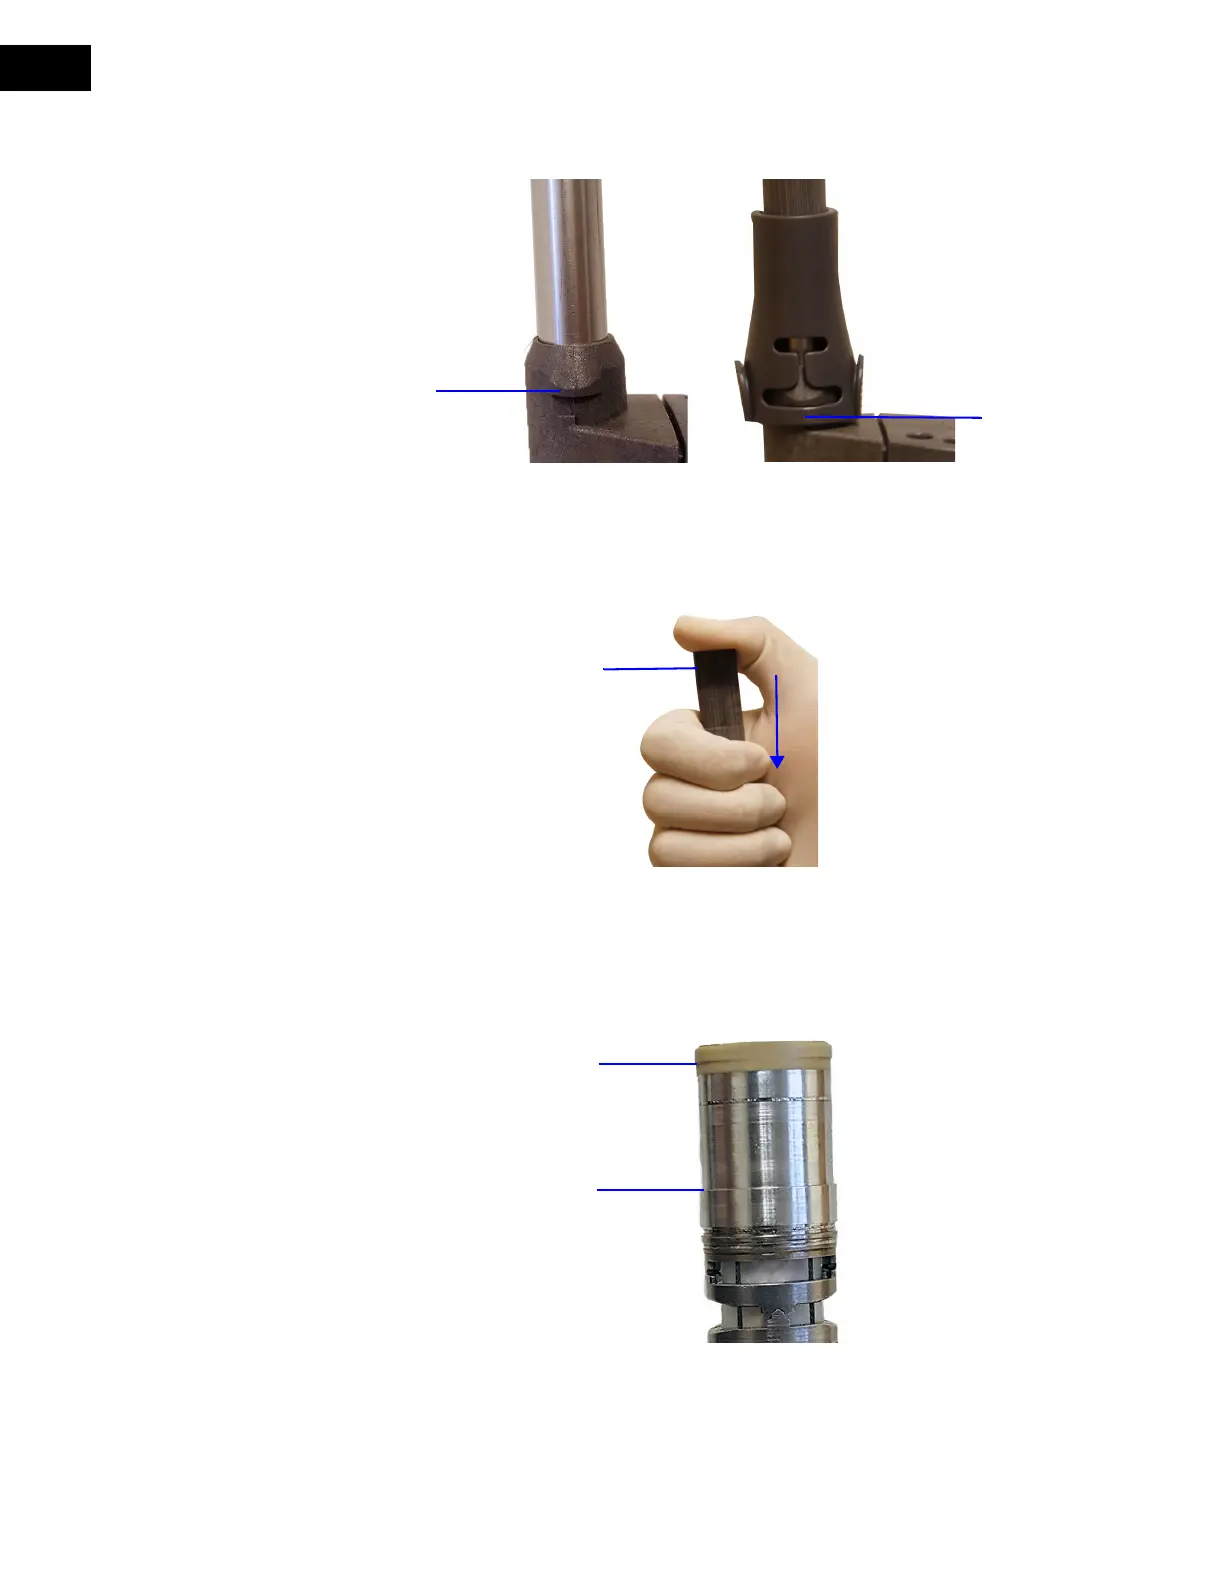
3. Press down the connector on the sheath until it is over the flanges on the base of the
camera shaft, and there is a tactile and audible click (
Figure 2.4).
Figure 2.4 Connector over the flanges on the base of instrument shaft
4. With one hand, wrap your fingers around the joints to stabilize the camera tip and hold
your thumb over the black band on the distal end of the sheath (as shown in
Figure 2.5).
Slide the black band down until your thumb contacts the camera lens and the band is
past the distal ridge.
Figure 2.5 Hold thumb over black band and push black band down onto distal tip
5. Confirm that the sheath is correctly installed by ensuring that the black band of the
sheath rests between the two ridges (as shown in
Figure 2.6 and Figure 2.7 C). If the
sheath is incorrectly installed, adjust the position of the black band or remove and
reinstall the sheath.
Figure 2.6 Ridges on the camera tip
Connector
over flanges
Flange
(one on each side)