Invacare®Matrx®accessory
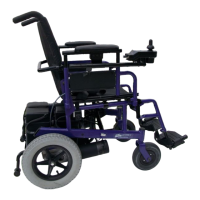
3.Adjusttheheight,widthandangleoftheextensionbracketAon
themountingplateB.
4.WorkingononesideofthebackshellC,alignthemounting
holesinthemountingplateBwiththepinholelocationsonthe
elitebackshell(1).
5.Install/securethemountingplateusingthemountingpinsEand
flangenutsFprovidedwiththebackshell(2).
RefertoyourMatrx®Eliteusermanualforinstructionson
settingthepropermountingpindepth.
IMPORTANT!
–Oncethepindepthhasbeenproperlyadjusted,ensure
theflangenutsarefullytightenedagainstthemounting
plate.
6.Repeatsteps3and4fortheoppositesideofthebackshell.
7.InstallthesupportclipsD(includedseparatelywithyoursupport
harness)ontotheextensionbracketAusingthe12mmbutton
headscrewsGprovided.
8.Makeanyfinaladjustmentstotheextensionbracketposition
(height/width/angle)andfullytightenhardware.
9.Verifythatallremainingmounting/installationhardwareissecured.
WiththeSupportHarnessMountingBracketAssemblyfully
installed,pleaserefertoyourSupportHarnessUserManual
(providedseparately)forimportantsafetyinformationand
instructionsregardingtheproperset-upandinstallationof
yoursupportharness.
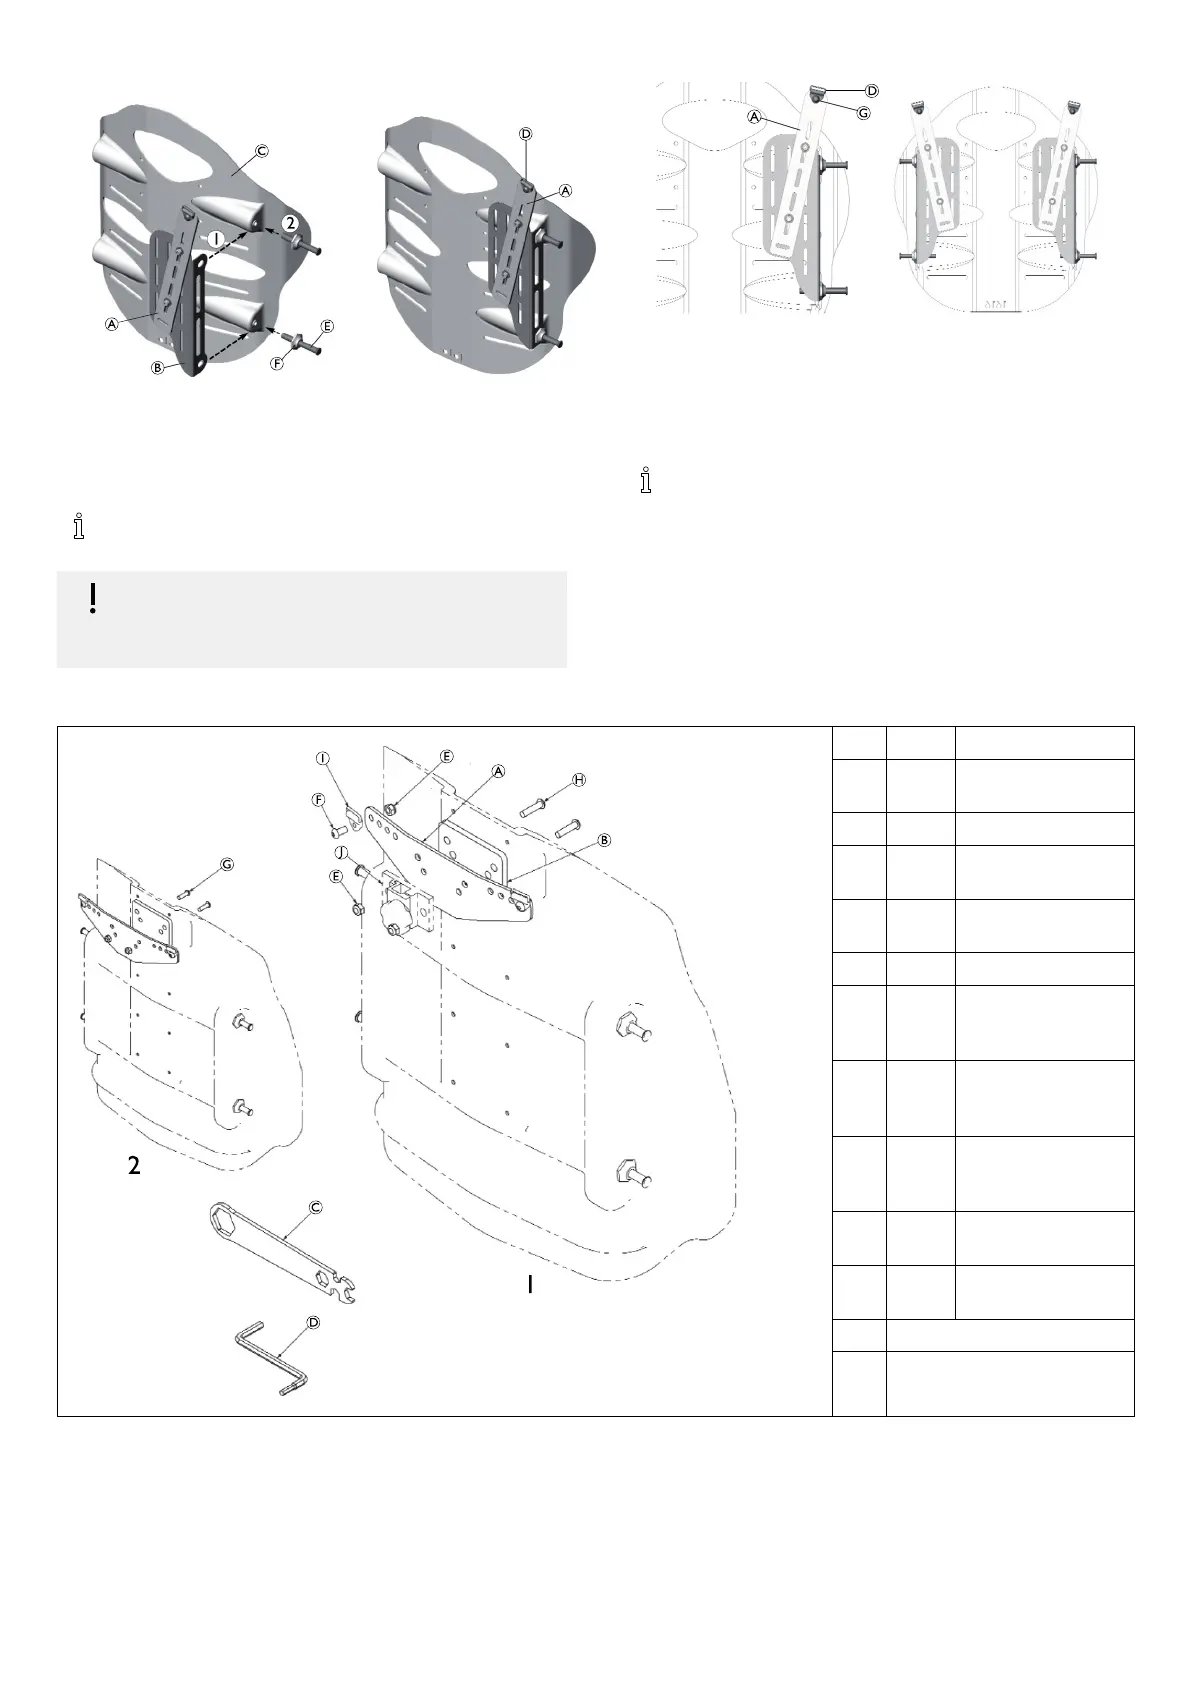
3.2InstallationOverview(Matrx®PBBacks)
Pos.
Qty.
Description
A
1SupportHarness
MountingBracket
B
1Shim
C
1
Multiwrench,
universal
D
1
Multi-metricHexkey,
4mm/5mm
E
4
M6Nylocnut,BZ
F
2M61.0x12mm
Buttonsocketcap,
alloysteel,BZ
G
2M61.0x20mm
Buttonsocketcap,
alloysteel,BZ
H
2M61.0x25mm
Buttonsocketcap,
alloysteel,BZ
I
–
Supportharnessclips
(notincluded)
J
–
Headrestclamps(not
included)
1Withheadrestclamp
2Withoutheadrestclamp
4
1589332-A