14 60129676-A
Invacare
®
Softform Active
®
2 Rx
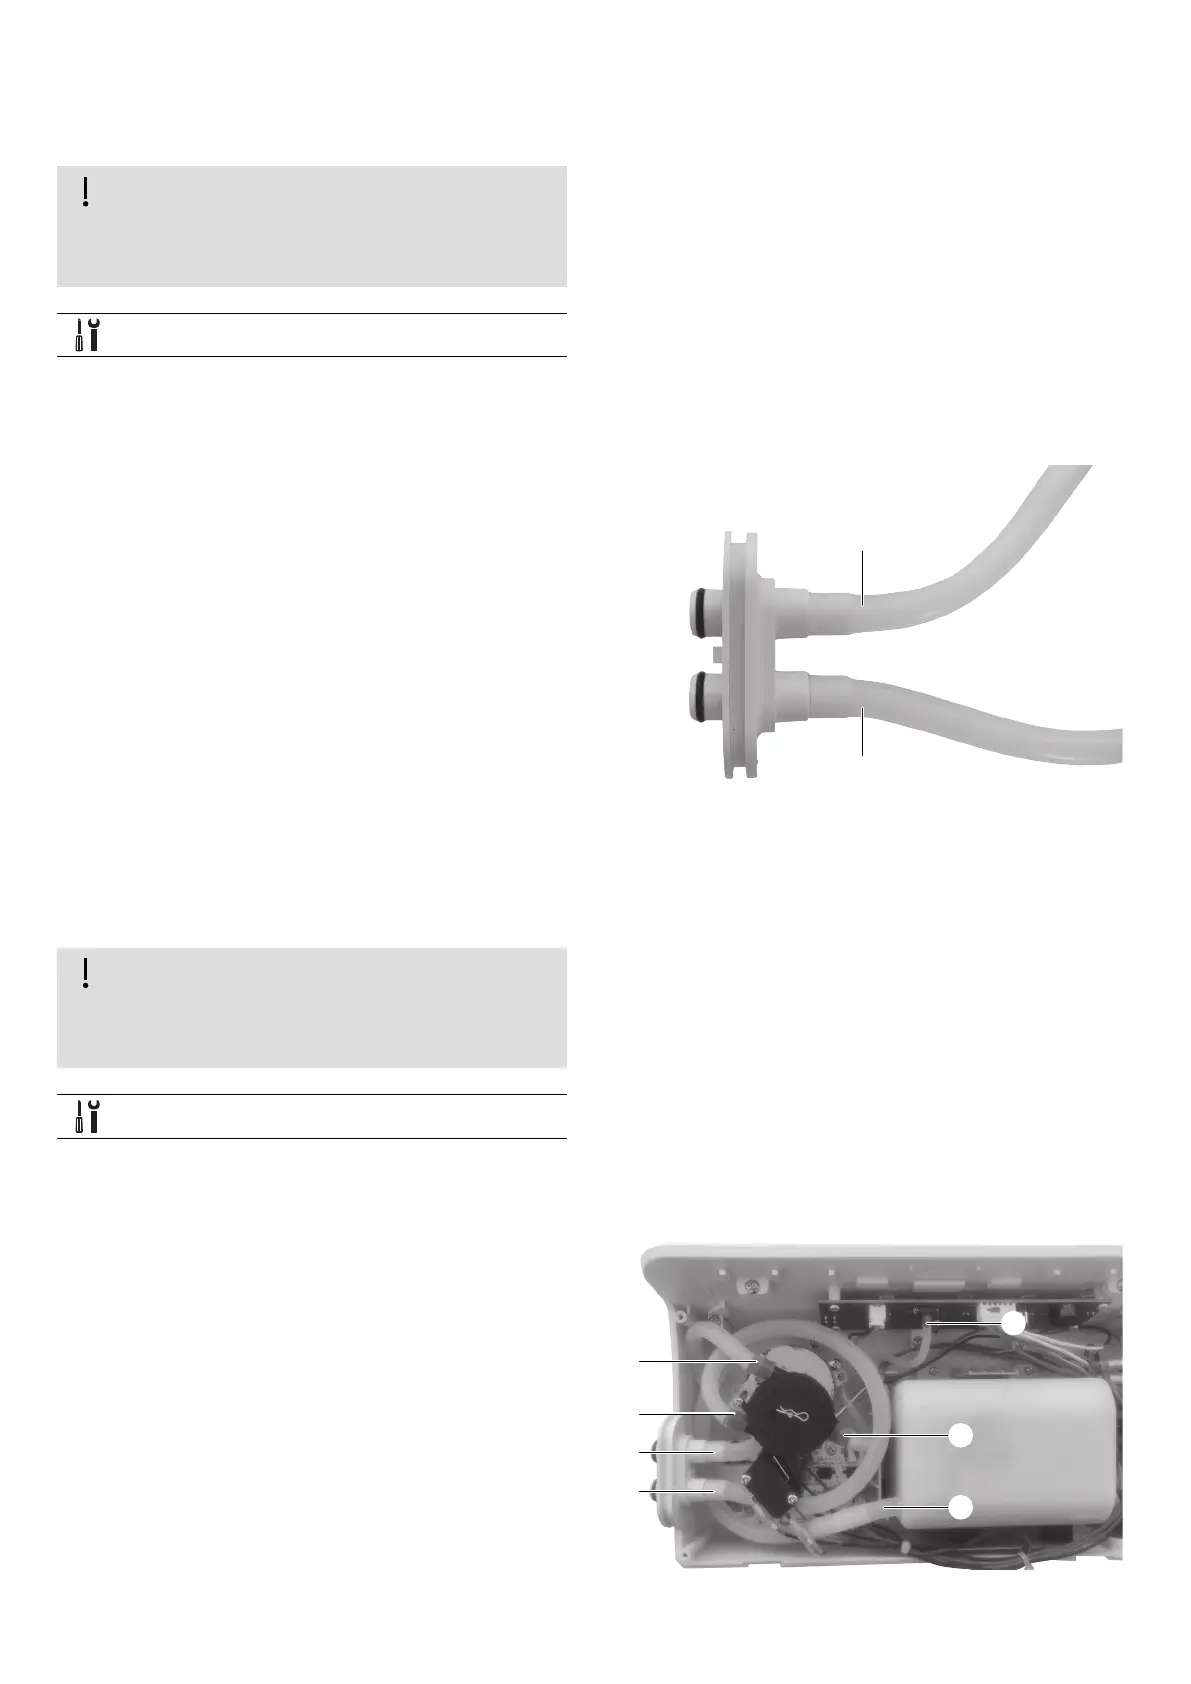
4.6 Replacing the CPR Connector
R
efers to spare parts kit SP1633238
Risk of damaging the PCB by electro-
static discharge
Handle PCB's only in Electrostatic Protected
Areas
PH1 Phillips key
1.
Switch o the control unit and disconnect from
mains supply.
2. Remove the bottom housing (see 4.1).
3.
Unplug both silicon tubes A from the connector.
4. Discard the defective connector.
5.
Reinstall the silicon tubes to the new connector
and slide it into the slit. Ensure no tube is kinked
or clamped.
6. Reinstall the bottom housing.
4.7 Replacing the Tubbing Set
R
efers to spare parts kit SP1633112
Risk of damaging the PCB by electro-
static discharge
Handle PCB's only in Electrostatic Protected
Areas
PH1 Phillips key
1.
Switch o the control unit and disconnect from
mains supply.
2. Remove the bottom housing (see 4.1).
3. Unplug tubes A to G. Discard them.
4.
Install the 320 mm long tube on one side of the
T-valve and the 40 mm long tube on the opposite
side. Connect the third (smaller diameter) tube
both to the T-valve and to the UIPCB.
5.
Install remaining tubes to their original positions
(see 4.5, steps 14 - 17).
6. Reinstall the bottom housing.
A
A
Fig. 4-24
A
B
C
D
E
F
G
Fig. 4-25
 Loading...