EN
13
|Installation
2 Screws
Security Bracket
Foam seal B
(Adhesive type-shorter)
Foam seal A
(Adhesive type)
Window slider A
Window slider B
(if required)
Foam seal C
(Non-adhesive type)
Foam seal C
(Non-adhesive type)
2 Screws
Security
Bracket
Expansion anchor
position
Adaptor cap
Wall Exhaust
Adaptor B
or
or
or
or
or
Foam seal B
(Adhesive type-shorter)
Foam seal A
(Adhesive type)
Window slider A
Window slider B
(if required)
max 120cm or 47 inch
min 30cm or 12 inch
Note: Once the Exhaust Hose assembly and
Adjustable Window Slider are prepared, choose
from one of the following installation methods.
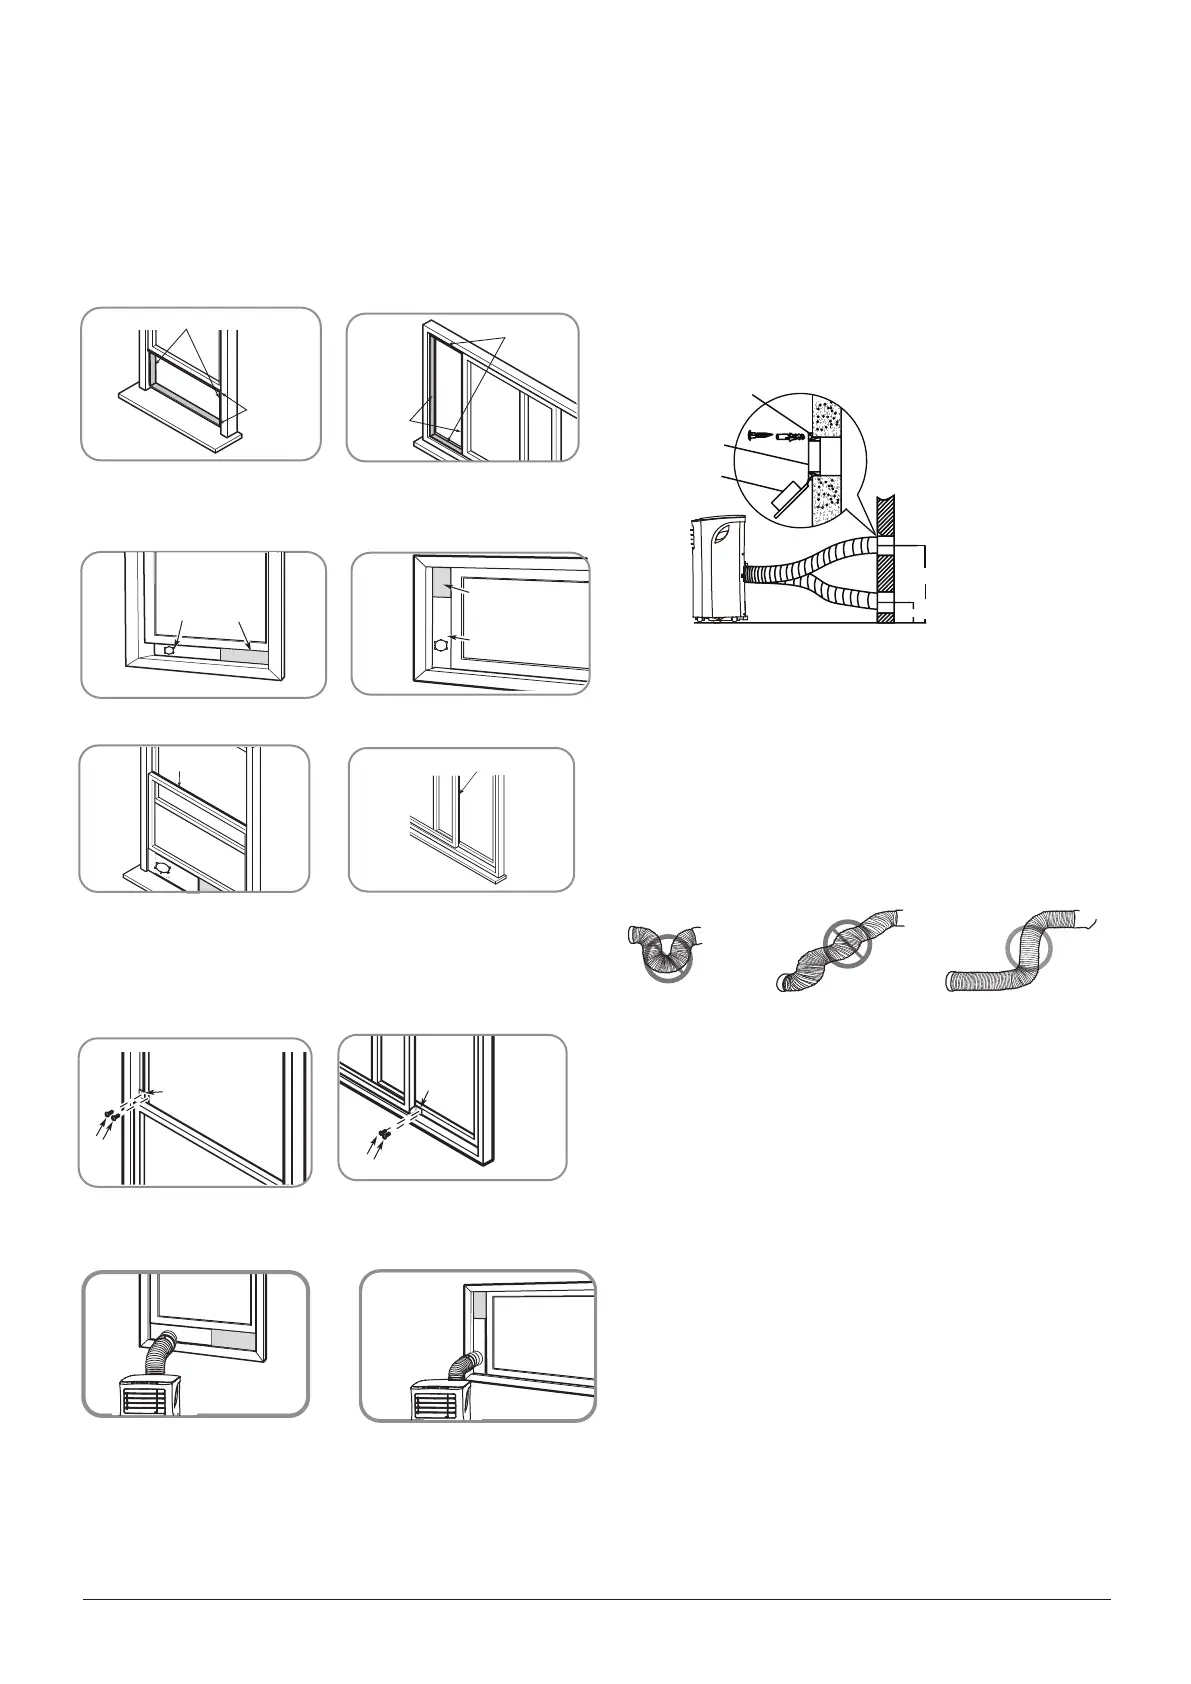
Type 1: Hung Window or Sliding Window
Installation(optional)
1. Cut the foam seal (adhesive type) to the
proper length and attach it to the window
frame.
2. Attach the window slider kit to the window
opening.
4. If desired, install the security bracket with 2
screws as shown.
5. Insert the window slider adaptor into the
hole of the window slider
3. Cut the non-adhesive foam seal C strip to
match the width of the window. Insert the seal
between the glass and the window frame to
prevent air and insects from getting into the
room
Type 2: Wall Installation (optional)
1.Cut a 125mm (4.9inch) hole into the wall
for the Wall Exhaust Adaptor B. 2.Secure the
Wall Exhaust Adaptor B to the wall using the
four Anchors and Screws provided in the kit.
3.Connect the Exhaust Hose Assembly (with
Wall Exhaust Adaptor A) to the Wall Exhaust
Adaptor B
Note: To ensure proper function, DO NOT
overextend or bend the hose. Make sure that
there is no obstacle around the air outlet of the
exhaust hose (in the range of 500mm) in order
to the exhaust system works properly. All the
illustrations in this manual are for explanation
purpose only.
Your air conditioner may be slightly dierent.
The actual shape shall prevail.
Note: Cover the hole
using the adaptor cap
when not in use.
 Loading...