55
Left
Center
Right
Hooks
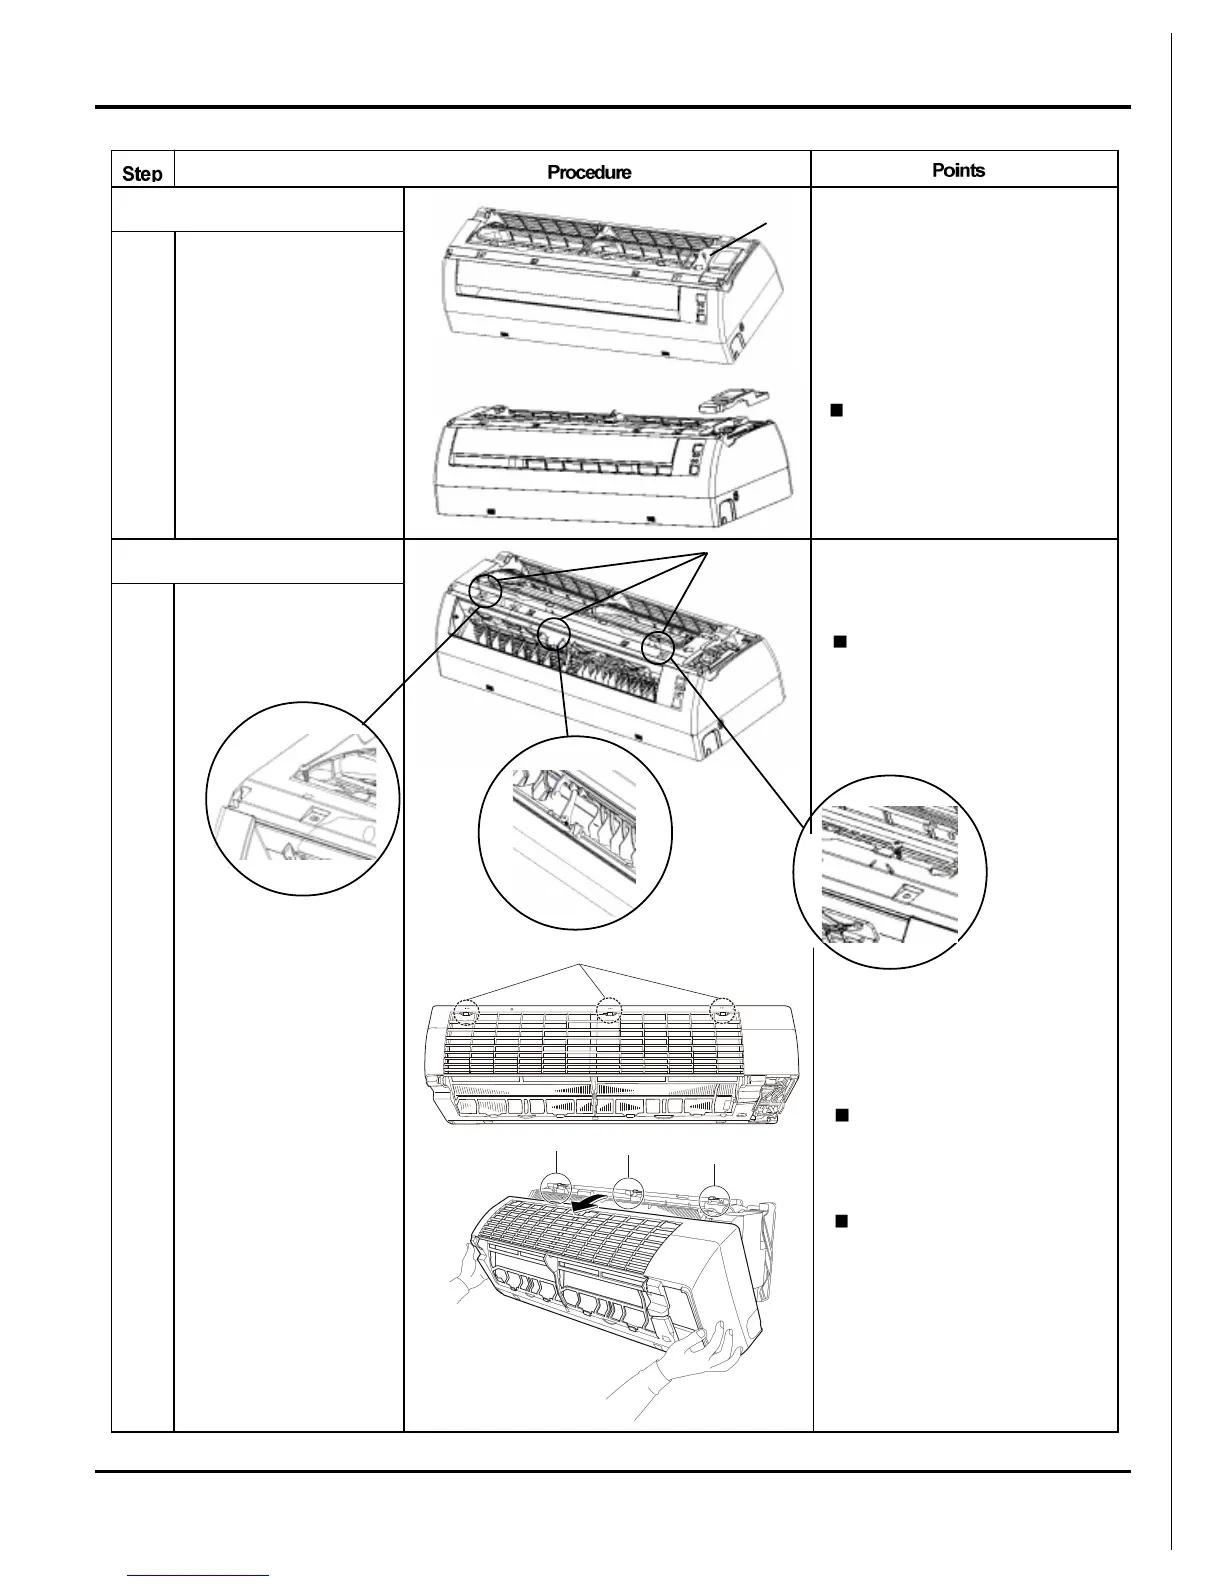
4. Opening and closing of service cover
Remove a service
cover mounting screw.
Open service cover
upward.
1
A switch for field setting is
not provided in particular.
5. Removal of front grille assembly
Screw stoppers inside the
flap which were equipped in
the existing models are not
provided.
At the upper part there are 2
hooks in the left and the
right.
Remove the 3 screws,
in the right and the left,
which fix the main body
with the front grille.
1
Disengage the hooks by
pressing knobs with a
screwdriver.
screws
screws
Disengage the 3 hooks
on the upper part.
In case that the hooks
are not pressed from
above, remove the front
panel and then remove
the grille while pushing
the hook through a
clearance between the
front grille and the heat
exchanger.
2
The front grille can be
removed in a manner to
pull out the upper part
forward and lift up the
lower part.
3
Removal Procedure
 Loading...