6.9 Inverter Manipulation
Check the inverter:
Step1. Check the status of indicators and LCD screen.the indicator
screen should display the main interface.
Note!
If the left indicator is not blue please check below the
three points:
-All the connections are correct.
-All the external breakers are switched on.
-The DC switch on the inverter is in the "ON" position.
Step2. If it is the first time to start up, please follow it. For
specific setting, refer to section 8 (Setting).
Step3. Set WiFi according to wifi user
manual. Step4. Operate "Self Test".
(applies to Italy only)
Self-test in accordance with CEI 0-21(applies to Italy only)
The self-test is only required for inverters, which are commissioned in
Italy. The Italian standard requires that all inverters feeding into the
utility grid are equipped with a self-test function in accordance with
CEI 0-21. During the self-test, the inverter will consecutively check
the protection reaction times and values for overvoltage, under voltage,
overfrequency and underfrequency.
+
-
Battery
DPDT
E -BAR
INVT meter
Main switch
RCD
PV1+
PV1 -
PV2+
PV2 -
RCD
PE
EPS
Load
Inverter
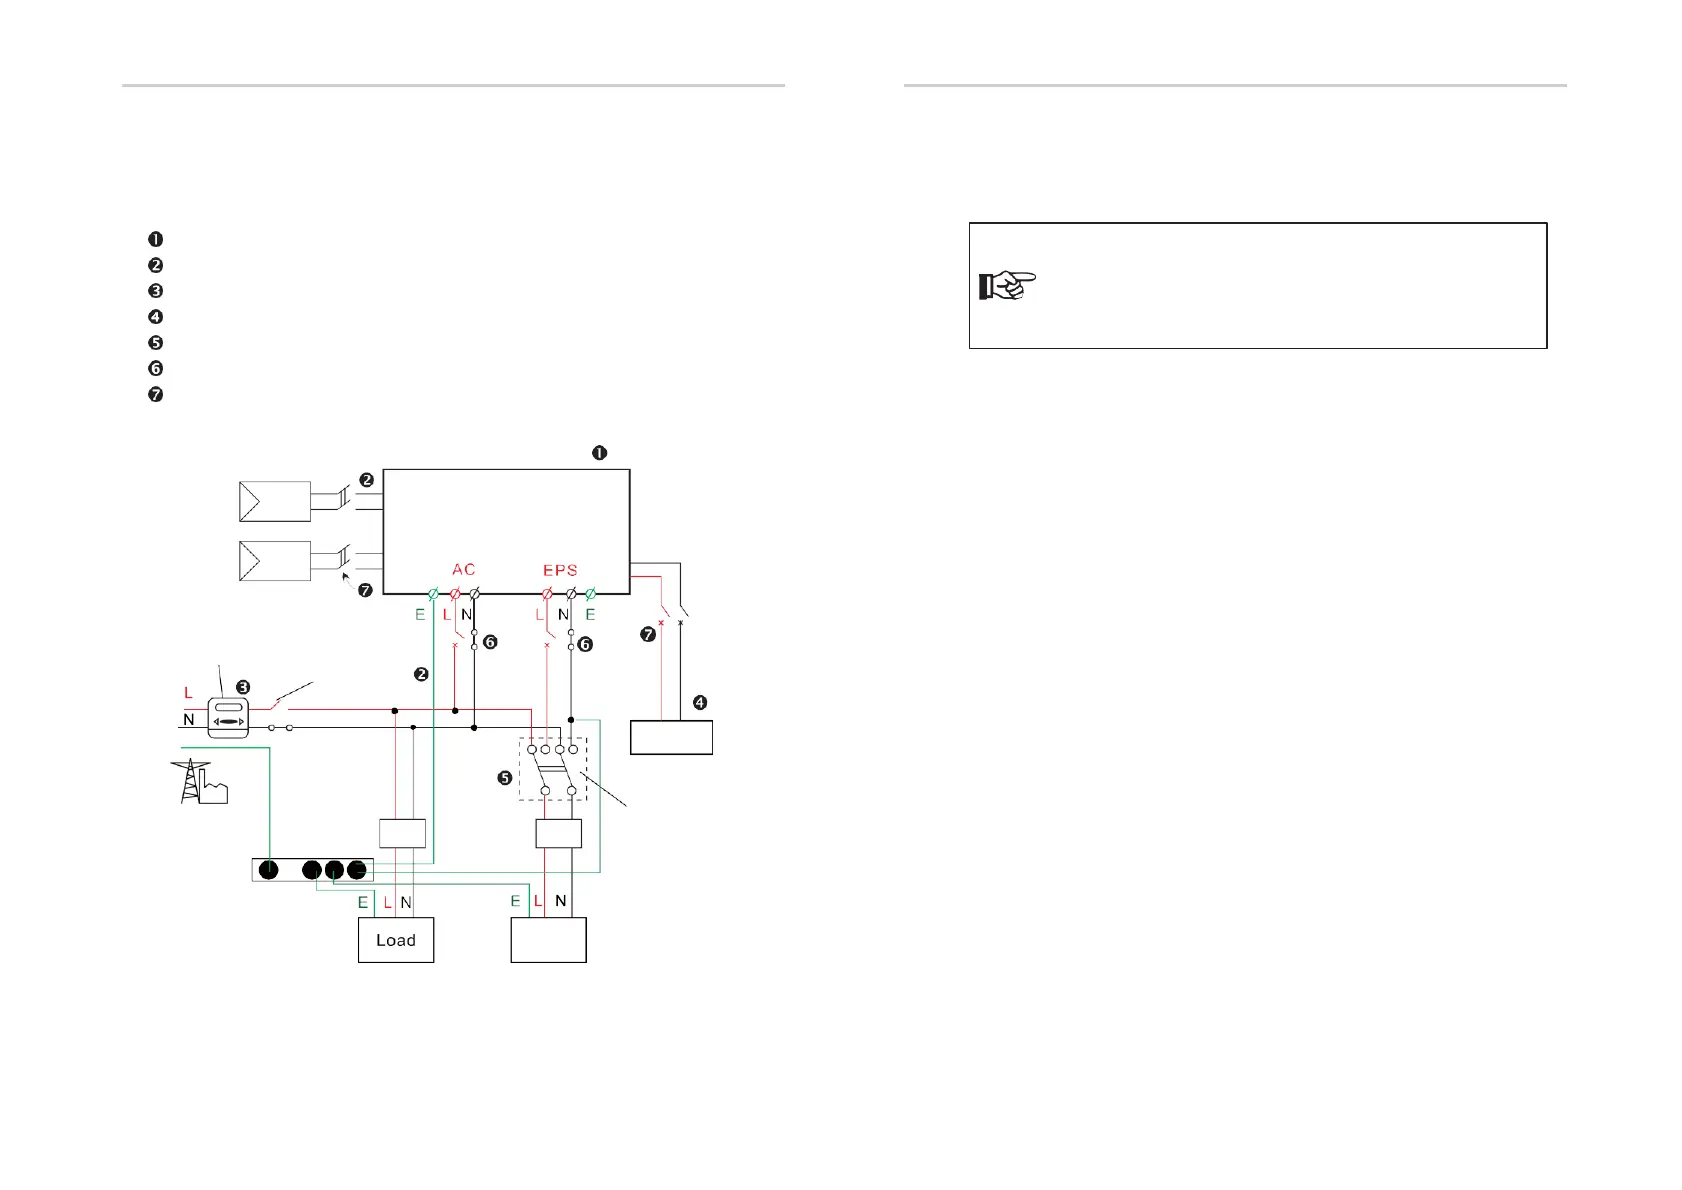
Start inverter after checking all below steps:
Ensure the inverter fixed well on the wall.
Make sure all the DC wirings and AC wirings are completed.
Make sure the meter is connected
well. Make sure the battery is
connected well.
Make sure the external EPS contactor is connected well. (if
needed) Turn on the AC switch and EPS switch
Turn on the PV/DC switch and battery switch.
Electrical Connection
38 39
Electrical Connection
 Loading...