EasyManua.ls Logo

Ioline 300 System User Manual

Default Icon
4 pages
To Next Page IconTo Next Page
Page #1 background imageLoading...
Page #1 background image
E
D
B
A
C
J
K
A. Tray (removable)
B. Table (non-removable)
C. Adhesive Sheet, Mounted
D. Keypad
E. Carriage
F. Serial Port
G. Power Connector
H. Power Switch
J. Most Cuts Start Here (Origin)
K. Thumb Nuts (2)
L. Leg (2)
300 System
Quick Start Guide
CORPORACORPORA
CORPORACORPORA
CORPORA
TIONTION
TIONTION
TION
This quick start guide has instructions for
setting up and using the Ioline 300 Sys-
tem. Please consult the 300 System User
Guide and the 301 Software User Guide
for more information about getting the
most out of your Ioline product.
IOLINE CORPORATION
14140 N.E. 200th Street, Woodinville, WA 98072, USA
Voice: 1.425.398.8282 • Fax: 1.425.398.8383
info@ioline.com • www.ioline.com
Part Number: PRINT:107077r5 • FILE:107070r3
F
G
H
Contents
Unpack the Cutter
Cutter Connections
Computer Connections
Install Ioline Software
Install an Adhesive Sheet
Apply Cloth and Install the Tray
Choose a Blade
L
Question and Answer IconNeed help?

Do you have a question about the Ioline 300 System and is the answer not in the manual?

Ioline 300 System Specifications

General IconGeneral
Max Cutting Width30 inches
InterfacesUSB, Serial
Cutting Width30 inches
InterfaceUSB, Serial
Cutting Speed30 inches per second
Resolution0.0005 in (0.0127 mm)
Power Requirements100-240 VAC, 50-60 Hz
Max Media Width30 inches

Summary

Unpack and Connect Cutter

Unpack the Cutter

Steps for removing the cutter and accessories from the box and preparing it for use.

Cutter Connections

Instructions for connecting the power cord and serial cable to the cutter.

Computer Connections

Steps for connecting the cutter to the computer via serial and parallel ports.

Software and Material Setup

Install Ioline Software

Guide for installing the Ioline Control Center and associated software from CD-ROM.

Install an Adhesive Sheet

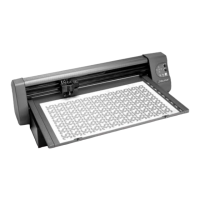
Instructions for applying adhesive sheets and backing materials to the cutter's tray.

Prepare for Cutting

Apply Cloth & Install the Tray

Steps for applying material to the tray and securing it onto the cutter.

Choose a Blade

Information and guidance on selecting and installing the correct blade for cutting tasks.

Related product manuals