4. Getting Started
In order to experience the full GOTO capability of GOTONOVA
®
technology it is very important
to set up the mount correctly before observation.
4.1. Setting the Mount and Performing Polar Alignment
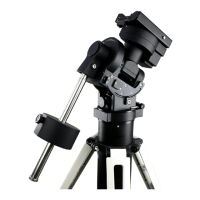
Assemble your CEM70 mount. Make sure the mount is leveled. Mount an OTA and accessories,
and carefully balance the mount on both R.A. and DEC axes. Turn the mount power switch on. When
the GPS receiver is connected to satellites, the hand controller LCD will display GPS OK and the mount
will have the correct time and site information (this can also be entered manually as previously
described). Polar align the mount.
Always check if the mount is at the Zero Position when the mount is powered on, i.e. with the
counterweight shaft pointing to ground, OTA at the highest position with its axis parallel to the polar axis
and the telescope pointing to the Celestial Pole. Press MENU => “Zero Position” => “Goto Zero
Position” to check it. If the mount is not at the Zero Position, press MENU => “Zero Position” => “Set
Zero Position.” Release the Gear Switch to manually return the mount to Zero Position, or use the
hand controller to slew the mount to Zero Position. Press ENTER to confirm the zero position.
4.2. Manual Operation of the Mount
The mount can now be used to observe astronomical objects using the HC. Use the arrow keys
(►, ◄, ▼, and ▲) to point the telescope to the desired part of the sky. Use the number keys to
change the slewing speed. Press the STOP/0 button to start tracking.
4.3. One Star Alignment
After the mount set up, perform a “One Star Align” to correct the Zero Position discrepancy, or
linear error.
Press MENU => “Alignment” => “One Star Align” to perform “One Star Align.” The hand
controller will display an alignment star. Select a different star using the ▲ or ▼ keys. Then press
ENTER. After the mount slews to the target, use the arrow keys to center it in your eyepiece. Then
press ENTER. (More details on the alignment function are given in section 5.3)
4.4. GOTO the Moon and Other Objects
After performing these set-ups the mount is ready to GOTO and track objects. One of the most
common objects is the Moon.
To slew to the Moon press MENU=>“Select and Slew”=>“Solar System”=>Moon=>ENTER.
The telescope will automatically slew to the Moon and lock on it. It will automatically begin to track once
it locks on. If the Moon is not centered in your eyepiece, use the arrow keys to center the Moon. You
may use “Sync to Target” to improve the tracking.
You may also select other bright celestial objects to start with, such as Jupiter or Saturn.
4.5. Star Identification Function
The 8407+ hand controller has a star identification function. After setting the correct local time
and location and completing polar alignment, slew the telescope to a bright star manually or using the

 Loading...