Do you have a question about the iOptron iPolar and is the answer not in the manual?
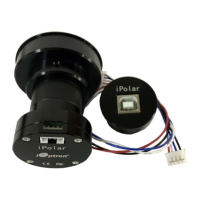
Connect the iPolar to a computer USB port and allow automatic driver installation for first-time use.
Download the iPolar software from iOptron.com and ensure your system meets the Windows and .NET Framework requirements.
Set mount to zero position, adjust altitude to latitude, and point RA axis towards true north/south within ±6°.
Launch the iPolar software, select language, and click 'Connect' to establish communication with the camera.
Access the settings window via the 'Settings' button to configure initial parameters for the iPolar operation.
Manually input latitude, longitude, pressure, and temperature for accurate polar alignment.
Review and confirm the entered location and atmospheric parameters to save the settings.
Utilize ASCOM connection to automatically read location data from the iOptron mount.
Capture a dark frame image to identify bad pixels and camera dark current for optimal performance.
Configure camera center coordinates (X, Y) if the iPolar cannot be rotated with the mount RA axis.
Verify iPolar settings, GPS location, dark frame status, and confirm stars are visible in the RAW image.
Initiate plate solving by unchecking RAW image; adjust exposure time based on star detection count.
After plate solve, confirm camera center and virtual pole position, then adjust mount if needed.
Use mount adjustment screws to move the virtual pole towards the camera center for precise alignment.
Polar alignment is complete when the virtual pole circle overlaps the camera center cross and turns green.
Access the Draw Mask function to exclude unwanted areas in the image for plate solving.
Draw rectangular masks on the image to exclude obstructions, then confirm or clear the masks.
| Sensor Type | CMOS |
|---|---|
| Resolution | 1280 x 960 |
| Interface | USB 2.0 |
| Type | Electronic Polar Scope |
| Accuracy | 30 arcseconds |
| Software | iPolar Software |
| Operating Temperature | -20°C to 50°C |
| Humidity | 10% to 90% non-condensing |
| Power Requirements | 5V DC via USB |
| Storage Temperature | -20°C to 60°C |