2
Topic
Climate Logic System Quick-Start Guide
The Quick-Start guide provides the essential steps required to properly install and setup the
Climate Logic system in the most direct route possible. As needed, refer to the detailed information
on the page number listed with each step.
Step 1 – Connect and secure the Receiver Module next
to the controller. See page 6.
Step 2 – Adjust controller program A for the hottest/
driest conditions expected, without causing
over-watering and runo. Retain all watering
time/day restrictions in the program schedule
as required See page 6.
Step 3 – Synchronize the Receiver Module and controller
to the current time and date. See page 7.
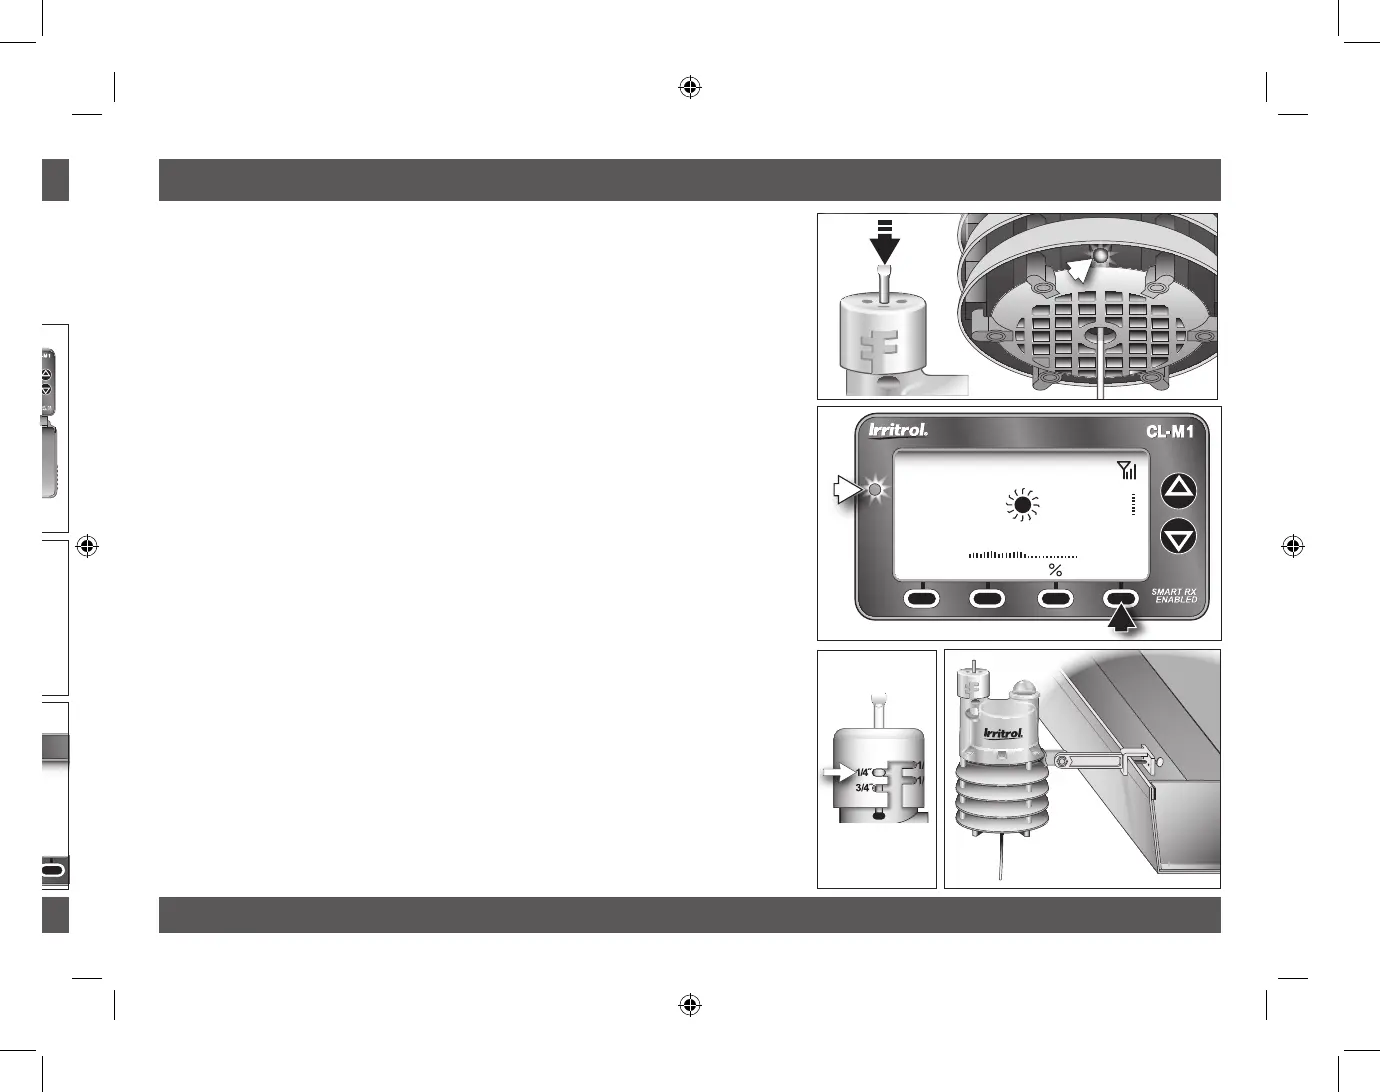
Step 4 – Insert the Receiver Module Setup Card as
shown. See page 8.
Step 5 – Establish your location by entering the ve-digit
ZIP code, or Lat/Lon coordinates as preferred.
See page 8.
2
Quick Start Setup Guide
Quick Start Setup Guide
3
Quick-Start Guide
Step 6 – Press and hold the sensor Test Pin for 10–15
seconds to activate the Weather Sensor!
A red LED (viewable through the lower vent
ring) will illuminate twice after 10 seconds to
conrm activation (if not already active).
See page 9.
Step 7 – Press the sensor Test Pin again to conrm
signal reception at the Receiver Module. The
receiver’s red LED will turn on momentarily
when the signal is received. Press the BYPASS
key to cancel the Dry-out mode delay period
and resume normal operation. See page 9.
Note: If the LED does not turn on, refer to the
Weather Sensor setup procedure on page 19.
Step 8 – Check the Rain Sensor threshold setting and
adjust as needed. See page 10.
Step 9 – Secure the Weather Sensor to a rain gutter
or other suitable structure that provides
unrestricted exposure. Adjust the sensor
alignment to vertical. See page 11.
EARTH
GROUND
MV/
Pump
Sensor
+
-
7 8 9 10 11 12
1 2 3 4 5 6
24 VAC
VC
MENU
_ _ _
F 100%
CLIMATE LOGIC
9:15a
11/16
Location
LAT
LONG
North America
-000.0000
00.0000
SAVE CANCEL ZIP NEXT
CLIMATE LOGIC
52F 40%
Dry Out Remain 12h
MENU
10:15a
BYPASS
11/16
 Loading...