1 1/2”
MIN
8”
MIN
1 1/2”
MIN
8”
MIN
Hearth Extension
20” min
12”
min
12”
min
Insulation Behind sheathing
with 1 1/2” Clearance
When Supported
3” min When
Unsupported
1 1/2”
min
1 1/2”
NOT PERMITTED
1 1/2”
MIN
Do Not Place Sheathing
WIthin the 1 1/2” Required
Clearance to Combustibles
COMBUSTIBLE
FRAMING
1 1/2”
MIN
1 1/2”
MIN
1 1/2”
MIN
FACE OF
COMBUTIBLE
FRAMING
1 1/2”
MIN
1 1/2”
MIN
FACE OF
COMBUTIBLE
FRAMING
8”
MIN
8”
MIN
23
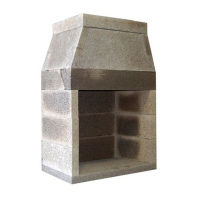
Required Clearance to Combustible Framing
Fireplaces are tested and listed for one and one-half
inch (1-1/2”) clearance to combustible framing material at the
rebox sides and back.
Installation and use practices that are beyond the
control of the manufacturer* can result in situations where
clearance requirements (as determined through testing and
as stated by the manufacturer) are not maintained due to
construction subsequent to the installation of the Isokern
unit. It is the general contractor’s responsibility to assure that
listed clearances to combustible framing and to insulation
are maintained throughout the construction of the project
subsequent to the installation of the Isokern unit.
To avoid causing a re resulting in damage to property,
personal injury or loss of life, do not pack or ll the required air
spaces with insulation or other material. No material is allowed
in these areas. (Figures 31 & 32)
*The manufacturer is not responsible for installation and use
practices that are beyond the scope of the product as dened in
the product listing and in the installation manual.
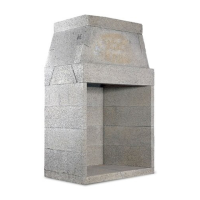
The rebox backwall, side walls and the smoke dome
back require 1 1/2” clearance to combustibles. (Figure 33)
Keep all insulation, vapor barriers, “house wrap”
paper and other insulating type membranes and products,
including berglass, cellulose and other insulation,
(anything that carries an “R” rating) a minimum of three
inches (3”) away from all rebox and chimney surfaces. See
exception. (Figure 34)
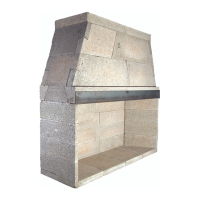
Exception:
If insulation is used in walls surrounding the replace,
insulation may be installed behind sheathing of gypsom board,
plywood, particle board or other material on the side facing
the Isokern. The facing material cannot be within 1 1/2” to the
replace sidewalls.
When Fireplace installations are surrounded by walls
that are to be insulated, the walls must have enough clearance
to the Isokern unit in order to maintain the three inch (3”)
minimum clearance to insulation for unsupported insulation.
(Figure 34)
Never spray the Fireplaces with any type of sealer,
insulation or other material.
FIGURE 31
FIGURE 34
FIGURE 32
FIGURE 33
 Loading...