ECI
MORTAR
SHIM IF REQUIRED TO
ACHIEVE CORRECT
HEIGHT
15
Assembly Instructions
General Isokern Assembly Instructions:
Earthcore Mortar (a thin-set type masonry adhesive)
is used to glue all Isokern components together during eld
assembly of the unit. The mortar is supplied dry, in 50 pound
pails.
Earthcore mortar is mixed with clean water to a
smooth, workable texture (without lumps or dry pockets)
of a “toothpaste” consistency. This mixture is suitable for
application onto Isokern components by using a masonry grout
bag supplied with the unit.
Attention should be paid that the mortar mixture is not
too thin or runny, as this will not allow the mortar to reach its
maximum bonding strength.
Earthcore mortar is squeezed from a grout bag onto
the contact surfaces of the Isokern components as they are tted
together.
It is important that a 1/2” bead of mortar on all the
components’ contact surfaces is applied at about 1/2” in from
all edges of the contact surface of the component. (Figure 8)
When setting the next component onto the mortared
contact surface of the rst component, some mortar should
squeeze out along the face of the entire joint as a sign of
complete and proper sealing of the joint.
On broader contact surfaces it is advisable to apply
several additional 1/2” beads of the Earthcore Mortar to the area
to assure proper sealing of the joint.
Properly mortared rebox and smoke dome assembly
requires approximately 30 pounds (dry measure) of Earthcore
mortar.
Broken Components:
Components broken into 2 or 3 pieces can be repaired
by using Earthcore mortar along the break line as the component
is set into place. Components broken into multiple small pieces
should be discarded and replaced.
Leveling and Aligning Components:
Be sure to assemble all Isokern components level and
ush with adjoining components.
Earthcore mortar is not intended to create a mortar
joint of any thickness for leveling purposes. Therefore, leveling
and alignment adjustments are made by the use of small plastic
shims supplied with the unit. (Figure 9)
The shims can be inserted under a component to level
and align it with adjacent Isokern components. Be sure to re-
grout any and all gaps resulting from shim insertion to maintain
components to full bearing.
Notes:
1. Do not mix Earthcore mortar with spirits or anti-freeze
agents.
2. The maximum recommended mortar joint thickness at
Isokern components is 1/4”.
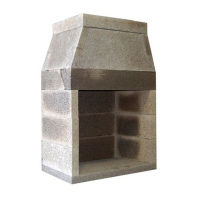
FIGURE 7
FIGURE 8
FIGURE 9
 Loading...